Showing posts with label coleman. Show all posts

Thursday, March 26, 2020

ChowdaQ XII

Have I talked about ChowdaQ here? I don't see that I have, at least not in the last few years.

I started driving a diesel Mercedes full time back in the winter of 2003, that was my '83 240D "Hammie" that I bought in New Jersey and drove home. Thats a story in itself. Anyway to keep that car on the road I joined the email discussion list on MBZ.org. Back then our main parts supplier was Rusty and at some point Rusty held a customer appreciation BBQ that got nicknamed the RustyQ. Its worth noting that we often referred to Rusty as "Q" in homage to the character in the 007 films as Rusty was the man with the stuff. There were then a bunch of other BBQs, IowaQ, the OkieQ and probably some more I don't recall.

All that was far away from me in New England so I decided we should hold a Q. After much discussion it got nicknamed ChowdaQ. The first ChowdaQ was set for the fall of 2005 or so, I don't recall exactly. The plan was to get together in a park near my apartment and have burgers and whatnot. As is typical for me I really hadn't prepared and the day dawned rainy and gross so I shot of a quick note to cancel and we headed out for breakfast. I didn't spare it another thought but 2 guys did, separately and without seeing each other, show up. Fred, who ended up being a great friend, drove out from near Boston and another guy who never forgave me, came from Connecticut.

Anyway the idea of ChowdaQ then languished for a few years until I met Dwight. I'd taken a welding class in RI and he came out and took my friend and I to lunch. I think it was then that we rehashed the idea of ChowdaQ and without Dwight it certainly wouldn't happen. The first "modern" ChowdaQ was in 2008 and I've always referred to it as ChowdaQ I. The original abortive attempt gets the title of ChowdaQ 0, "the ChowdaQ that wasn't".

The MBZ email list is long gone, with Okiebenz taking over but the ChowdaQ lives on, "The last of the MBZ Qs."
September 2019 was our twelfth annual ChowdaQ. These days we've got a pattern pretty well established and a pretty good attendee list with some really cool cars. The site is Goddard State park in Warwick, RI. Robert Goddard was the father of modern rocketry, the park is the old family estate. Its a great place for a picnic.


I haven't had a Mercedes since we got Angie's Golf. This year my Jetta came incognito. Somehow I ended up with a whole bunch of MB hubcaps...


I think a lot of people come just for the food. Karen makes the Chowda. This is RI chowda, made with clear broth. I always take a picture so Wilton on the email

I cook in the dutch ovens with my old Coleman 413E, this year I did pork tenderloin, I watch the sales at the grocery store all summer for this. I aim for the meat to cook a minimum of 3 hours to ensure its nice and tender.


The last couple years we've done quahogs. If all you've ever had before at steamer clams these are so much better its crazy. These are "little neck" clams so they don't have the big neck like steamer clams do. They're buttery all by themselves and delightful when dipped in butter. 2019 was windy so Roy used his VW camp mobile as a wind break and we taught him how to cook quahogs.
Mary brings a ton of fruit and Fred brings salad so theres always something for everybody.


Kari is a potter and makes prizes that we give out.


At the end we pass around a hubcap for donations which, in the last couple years has paid for everything.

Anyway, if the good lord is willing and the creek don't rise you'll see us back in September for ChowdaQ XIII.

Friday, September 9, 2016

More lanterns making electricity

Experiment 3 started with me cutting out a plate the same size as the top of a 228E vent. I attached the peltier and heat sink to it and fired the lantern up.

Early results were very good, 1.7v soon after light up. I think the thin steel plate heated up faster, I also got a better coating of heat sink compound on the peltier and on the heat sink.


Unfortunately as the rig got thoroughly heated up voltage dropped to .5, my little heat sink can't shed heat fast enough to keep up with the lantern.


I tried stacking a heat sink on top of the existing heat sink which seemed like it was working at first but in the end just added thermal mass, once the add on heat sink was heat soaked it dropped back to the same .5v I was seeing with just one heat sink.

So I've managed to get the hot side plenty hot, I've got a USB booster that will take anything over .9v and boost it to charge a USB device, the 1.7v I had when I first lit the lantern is plenty, I'll probably need more current but I can get that with a couple peltiers in parallel. What I need now is to keep the cold side temp such that the voltage stays up.

More experiments to come!

Thursday, September 8, 2016

New project

Back in the saddle again...

As if I needed any more projects I've started work on something new. I saw some videos on YouTube of people using peltier devices to charge cell phones. This got me thinking that a Coleman lantern makes a ton of extra heat so why not put that heat to good use.


This is a peltier device, if you put electricity across the two wires it'll make a cold side and a hot side, so it transfers heat from one side to the other. If you work it the other way around, that is apply heat to one side and cool the other it will produce electricity.

Which leads us to:

A Coleman 228E with a peltier strapped to the vent. The outer vent edge shown gets to about 150F. In testing the outside of the heatsink was getting to around 100F. With that temperature difference (delta) the peltier was making around 1/4 volt. Thats proof of concept but not really enough power to do anything...


Experiment two got us more heat, the top of the vent is more like 250F, the ends of the heatsink were now reading more like 120F and you can see in the picture we got around .85v. This is a semi-useful result, I could run several peltiers in series to get a useful voltage but its still disappointingly low. I sprinkled some water on the heatsink and got 1.9v which is a very good result.

This tells me the issue is insufficient temperature delta, the hot side is plenty hot but the cold side isn't cold enough. The heatsink I was using is really small, I've got another much larger one from an old computer case to try next but before I go there I need to make a better system for mounting the peltier and heatsink. Lantern vents are rounded at the top, I really need a flat surface 40mm wide to mount on. I'll work on that next...

Monday, April 4, 2016

More torch fun.

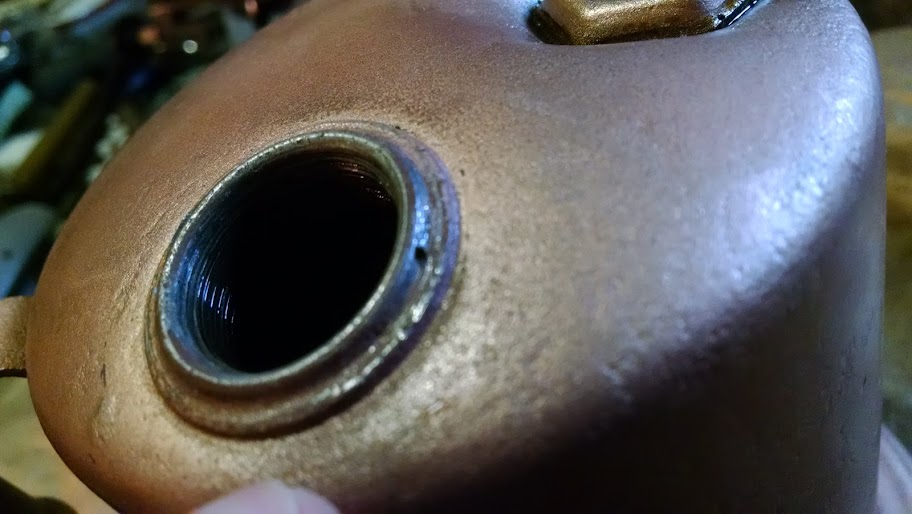
Last I told you about the torch I had it working but I was concerned about the seal at the pump. It turns out the seal was not actually the issue, there was a tiny hole in the bung that the pump screws into.

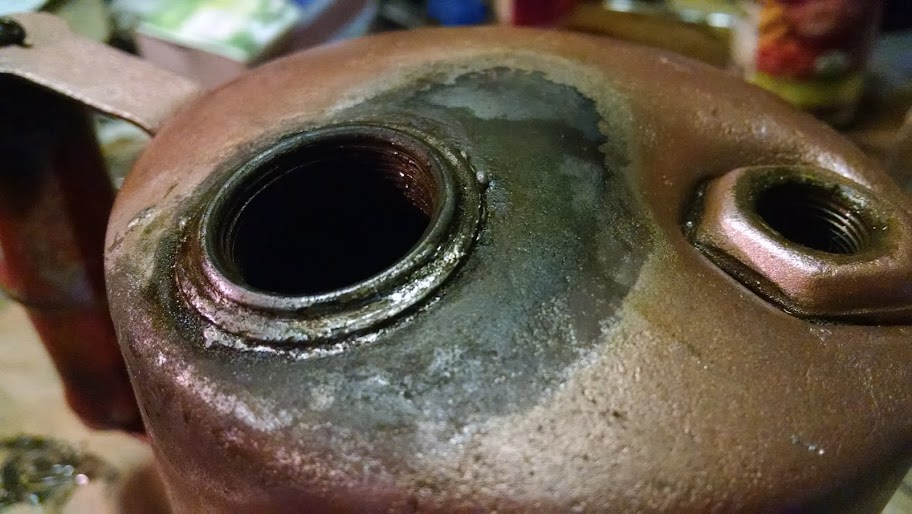
A great deal of time later and I managed to solder the hole closed


I think the hole is supposed to be there, I think its an explosion preventer, the torch gets hot and the lead in the hole melts allowing pressure to release without the torch exploding. There'd be quite a fireball but it wouldn't explode... I think this because I found at least 3 more little holes around that rim, it seems unlikely that many rust holes developed. Now with that fixed I still had a leak but I already knew about this one.


It was easy to fix too, a dab of lock-tite sealed it up tight. I pumped it up Tuesday and left home on a work trip, Friday when I got home it still held pressure.

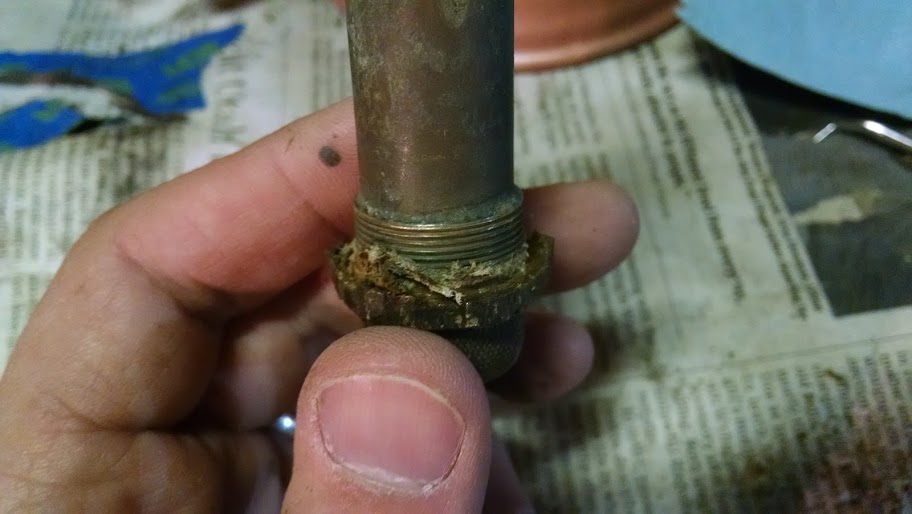
The other odd thing I encountered was a tendency for the packing nut to back off. Thats the nut around the valve shaft. Its got a graphite seal inside and when I first got the torch it was stuck. I heated it with a torch and got it loose but it would tend to unthread when I opened the valve. Another very small drop of locktite fixed that too.

Now if only the weather would cooperate I'd give it a test firing...

Wednesday, March 23, 2016

It works!

Sorry this blog has been slow in coming, life and all...

Anyway, I finally found time to get the Turner Torch back together. The new paint came out pretty good if not outstanding, as the torch gets banged around it'll look more original. I assembled it and found a little leak around the torch head where it goes into the fount. A drop of blue Locktite cured that. I couldn't get the pump shaft to seal so I dug out the old to replace with an o-ring, in doing so I realized the old seal was leather.


If I'd realized that earlier I would have just treated it with neats-foot oil but since I already had it half dug out I figured I'd just finish the job. The o-ring seals okay but could be better. I think if I sand it down so its got a square edge against the found it'll seal better.

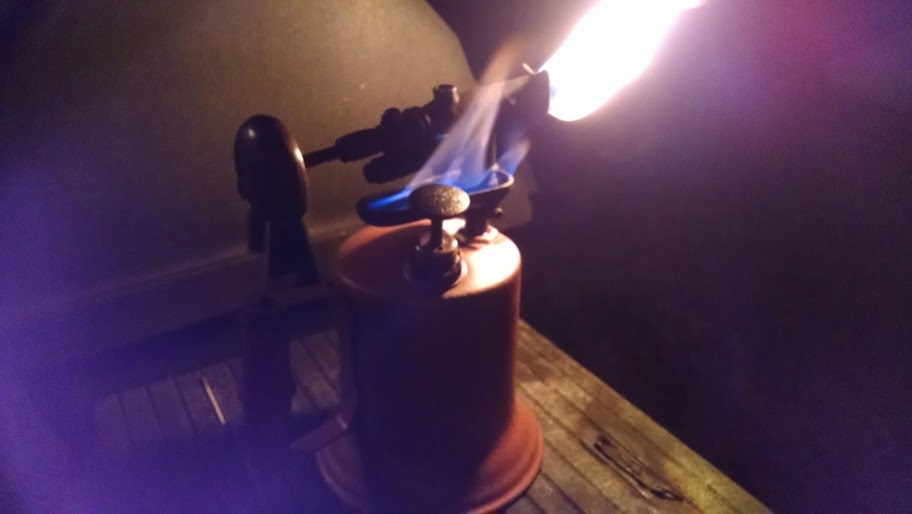
Finally a dose of alcohol into the tray, wait while it heats and crack the valve. Actually for the first attempt I double dosed the tray to make sure everything was plenty hot. This picture is from my second light up and you can see its not really hot enough yet.


After a couple minutes it settled down and burned nicely but suffered from the twin issues of needing to be pumped up often and having a poorly working pump. The pump is improving with use, it gets a lot of exercise trying to keep the torch going. I'll need to work on the cap seal more before going much further...

Friday, September 4, 2015

A trip to the Senior Center

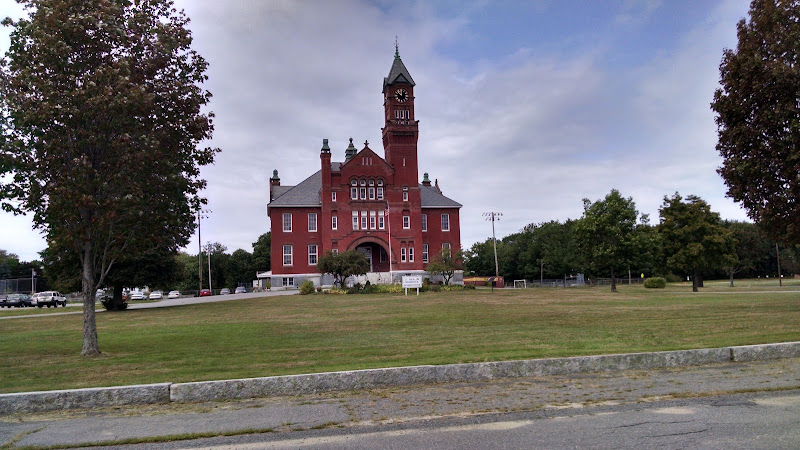
For the last 9 years the bells of the senior center here in Winchendon have been an hourly reminder of what a cool old town we live in. Today in preparation for the 2017 Coleman Collectors convention Angie and I visited the place.


Quite the place huh? Built in 1895 as a school its a big building, the footprint is close to 6,000 square feet with rooms on 3 stories its got lots of space and the big windows mean lots of natural light.

They've got a lovely big old auditorium:


Its about 3,500 square feet which is larger than the place we had for our convention this year. Notice that there are no electric lights on in the picture, thats all natural light.

The highlight of our trip was the climb into the bell tower:


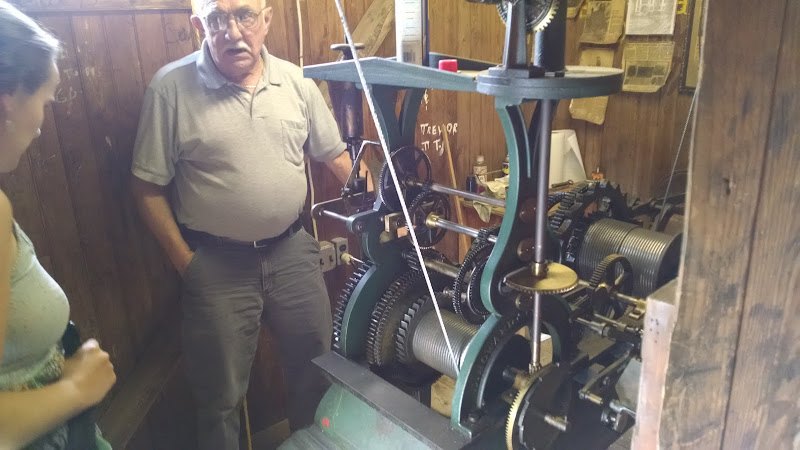
This is the actual operating mechanism of the clock in the tower. Art maintains it, he says its an eight day mechanism but in practice he gets more like seven and a half days per winding. He says that the clock hands drift a bit here and there but the bells are generally within about thirty seconds a week. Considering the clock is the same age as the building I'd say thats pretty impressive.

As I write this I can hear the bells chiming, by the clock on my computer its exactly 5pm, good job Art!

Art says we should go back in the fall and he'll take us all the way up in the tower, with the leaves off the trees he says theres an excellent view of Mount Monadnock. I'll borrow a good camera for that and get some nice pics.

Anyway right now it looks like this is our convention location. Crossing my fingers, picking a convention location was harder than I expected and I'm glad to have that part settled.

Tuesday, August 4, 2015

621a o-ring fix

One of the big thing lantern people look for is the elusive "birthday lantern" which is one which was made in the same year as you were. I've got 4 of them now, a 200A, 335, 321a and most recently a 621a.
The 621a is interesting because its an Easi-light lantern which uses a schrader valve for the shut off. It also uses an o-ring for the seal around the control valve. While we were at the Coleman convention in Ohio that o-ring failed which resulted in fuel dripping out of the control valve. On a 550 candle power lantern with a great big old mantle that scared me so I poured the fuel out of it and set it aside for the rest of the trip.

Last week I received a set of new o-rings from OldColemanParts.com. Installation was surprisingly easy considering I hadn't been able to find much information on it.

With the top end of the lantern (vent, bail, glass, burner frame, collar) removed:


The nut in the picture comes off which allows the control detent to come off and the shaft to come out:


Which reveals the failed o-ring. Looking at it on the shaft I thought that it didn't look too bad. When I tried to pry it off it broke which proved to me it needed replacing...

Here with the new o-ring:


Reinstallation was super easy, I did have to bend the control detent slightly to get the knob to engage correctly but once it was all back together it lit right up with no leak.


The lantern is SUPER bright, it puts a 237 to shame. I've got a Peerless 24A mantle on mine now, I think it would be brighter with a 111 but I hate to remove a working mantle...

Thursday, July 23, 2015

The good and the bad

Weird day yesterday...

Figured I'd get to work on the second BQ lamp I bought in Ohio. I'd bought this one from Warren who took advantage of me being half in the bag ;). Actually I'd offered him a deal that I didn't expect him to take. Oh well right? I got the burner all cleaned up nice and then went after the fount, you might remember I had it passing air the other day. I dunked it into the citric acid bath and started scrubbing with a piece of steel wool:


The nickel was worse than I'd hoped for and I was debating if the fount was nice enough to re-nickel when I found:


My first ever stress crack. Actually theres 2 if you look close at the picture. These are pretty bad as stress cracks go. In retrospect I should have expected them, when I pressurized the fount to test the generator I noticed it didn't hold pressure very long. At the time I figured it was probably the gas cap. I put out a WTB ad on the CCF, we'll see if somebody has one. If not maybe I'll try the Caswells treatment. Thats a fancy sealant folks are using in this kind of situation, apparently the results have been excellent. This is probably a good candidate for the treatment since the cracks are in one place, and theres no pump tube to worry about. I'd have to shoot some air down the pickup tube to keep it from filling but my new air compressor will regulate down pretty low.

With the BQ off the table I went back to my third Tilley lantern. I'd traded a 202 for this lantern and an AGM but had never been able to get it to light bright and steady. Recently I bought a replacement vaporizer but that didn't seem to help. I figured maybe a good cleaning would at least make me feel better about the lantern so into the soak it went. The nickel on it isn't very good but after its bath it was presentable. I put it back together with its broken globe and played with lighting it.

At first I got nowhere which turned out to be a failed pip in the pump's non-return valve. The NRV keeps pressure from bleeding out of the tank through the pump. In this case the pip had swollen so bad I couldn't pump and pressure in.


I'd had this happen on another Tilley last spring. I'd bought a gasket set off eBay and when I messaged the seller who basically shrugged and suggested it was my fault. Fortunately for something like NRV pips I have a punch set and a sheet of Buna-N rubber which works well and doesn't swell.

This was when I realized the pressure pip in the lantern worked. I'll write more on that some other time but Tilley lanterns have a little gauge that tells you when they're fully pressurized. Well when this one was fully pressured it was tricky to light and wanted to flame up badly but once it settled down it was nice and bright. I've had trouble with the pump on this lantern, its got a pump cup from the kit I mentioned earlier and those cups seem to be made out of really cheap leather so I don't think I'm getting full pressure. Actually now that I think on it I KNOW I'm not getting full pressure because I could pump even when the pip wasn't admitting any air.

Anyway, the result:


Finally I decided to play around with my Mil-spec. Mines a 1982 SMP (State Machine Products) and while I'd had it lit it had given me a bunch of problems. It was always very difficult to light which is common with Mil-Spec lanterns but it was much harder than normal and the last time I'd had it lit it wouldn't shut off, it popped and spit for an hour or more before it ran out of air. I'd taken the valve out and polished the ring off of it. The ring occurs when somebody tightens the valve too far and puts a groove into the valve which then won't seal anymore. I'd also pulled the FA tube out to try and make it light easier. The next time I tried to light it I held my torch in one place on the generator too long and ruptured it which was VERY exciting but not what you'd call fun.

So now I try to light it with just a butane lighter. After a couple false starts where the pump wouldn't work and I was trying to light the lantern without any fuel (DOH!) I finally got it to hiss and gurgle like a normal lantern does. this was a first for me on this lantern so I figured it was a good sign. With the butane lighter preheating I looked away for a second when "WHOOMP" it lit.


Pretty exciting eh? No worries, close the valve, wait while the flames burn off, then crack the valve, it flames up, close the valve and wait, etc. I'd probably over pressured a bit since back in the old days this thing wanted quite a bit of pressure to get burning. Most folks suggest starting one with very little pressure, like 5 pumps. This is another lantern with pump problems so even then I'd figure 8 pumps on this is like 5 pumps with a good pump.

Anyway after a little bit it settled down:


It burned pretty nice, its loud but I didn't put much pressure in it since it doesn't really need much. I sat outside and read until it started to rain. This was a good test of shutdown and while it did pop and spit and complain some it finally settled down and went out.

So not the best day I've ever had lanterning but certainly not my worst. 1 broken, 2 fixed. I guess at that rate I'll call it progress...

Tuesday, July 21, 2015

Uh oh, I might be a lampie!


A collector of lamps that is. This is the enclosed porch on our house, they all Coleman here, right to left we've got a 117a, CQ, 152 and a BQ.
Now that I look at it I think the 117a actually has a CQ burner, its fitted with an R55 generator which doesn't make sense, the 117a had the new roto type burner assembly that used a 220 type generator with built in pricker. The 117 had a slant burner assembly that could potentially have sported an R55 generator but not in the orientation this one has.

The BQ is probably a little bent, the shade tips way forward in the picture and at first I thought it was just that the hook is too far from the wall, which it is, but no even with the base tipped out the shade still tips way forward. Theres a solder joint at the fount where somebody has obviously repaired a leak of some sort so I'm hesitant to mess with the tube since the lamp does burn nicely.

I just finished the CQ today, I'd pulled the burner a couple weeks ago to clean it and managed to bust the stud that holds the shade holder to the burner. I got a replacement burner from a nice guy on Facebook, then drilled and tapped the nut that holds it on. I cut the head off a 10-32 screw to use as a stud and it works fine. It burned good before I started, I should have left well enough alone.

Not in the picture is the Kerosafe lamp which started all this obsession or my other BQ which is on the bench now as my next project. It passes air through the R55 generator so I don't think it will take much to get it running. I want to polish up the nickel before I go too far getting it going.


Friday, July 10, 2015

ICCC Convention 2015!

Yup, another International Coleman Collectors Club convention, this year in Walnut Creek, Ohio. This is Amish country, hilly, south central Ohio. Its a strange land I tell you, the roads are narrow, they twist around, they're full of Amish folk in buggies and the speed limit is 55mph!

As always the convention was interesting but the camp ground was where its at. A couple quick shots:


Ryan warming water for the ladies. Thats his Peak 1 stove but my Optimus hiking pot and pickup. That pot got worked a lot over the weekend and is terrific, actually the combo of Peak 1 and Optimus pot work really well together and boil water super quick.


Bugs love to find their way into lanterns and die.


This is the second of two light ups, I don't remember why but we couldn't get our act together to make it to the first one. The layout looks weird from this angle but the other way up it would be a kero-lite lantern. There weren't all that many lanterns, maybe 50-60 but I didn't count or hear a number.


The light up was at the convention hotel which made for good viewing stations.


For me this was the big deal of the whole convention. Greg had this hollow wire setup with 5 or 6 lamp heads attached to it all running off one tank. Back around the turn of the 20th century these hollow wire systems would be in people's houses with 1/8" copper tubes running through the walls of the house. The thing is that the fixtures are all torch-lite so you'd have to preheat the fixture to get it lit, if you didn't preheat enough or the generator was dirty or whatever you'd have burning balls of gasoline falling on the floor of your house. Sounds exciting right?

The last and probably most important piece of news is that after a close vote Angie and I were chosen to host the 2017 ICCC convention here in Winchendon, MA. In the weeks since the convention I've been scrambling to lock down a location, we're still kind of up in the air about that for now, I'll let you know when I've got something firmed up. Right now it looks like we'll be sending campers to Lake Dennison and Otter River state parks and hotel folks to the Colonial Hotel in Gardner, MA or the Woodbound Inn in Rindge, NH. Not sure yet which will be the better hotel, it depends on where the convention actually ends up, as I say I'll let you know when I know.

Tuesday, July 1, 2014

Where you been?

Charlotte, MI. People there will tell you its Char-lotte which differentiates it from Charlotte, NC. Google says tis 770 mi from our house so last Tuesday (a week ago today) we loaded up the old Jetta and headed out. I'm pleased to say ~1500 miles later everything went pretty much perfectly. The car ran well, used about 40 gallons of diesel fuel. We spent a night each way in Niagara Falls, the first night was at the Radisson we spent our honeymoon in which was a treat.

The purpose of the trip was the 2014 Coleman Collectors Club Convention which was a hoot as always. We camped on site, my 413E made the trip as is usual:

Also as usual we camped with Ryan an Tara. A fun thing about camping with them is that we have the same tent, or rather we have the same tent model, they have a 2 person and we have a 4. Thats hilarious because both Ryan and Tara are 6 feet tall. I'm around 6 feet but Angie is significantly less...

Anyway some highlights of the convention include this beautiful hollow wire chandelier:


and a cool branding iron:

I have promised to work on a Colman rising sun brand. I'm thinking about having it printed in plastic on a 3d printer to make a mold to cast in bronze or brass.

There was more including a ride in two different Model A Fords, a horse and buggy ride and ice cream made with an old hit and miss engine. That ice cream was some of the best I've had in my whole life. The guy was making 5 gallons at a time and said he made 7 batches. 35 gallons over 2 days seems like a lot to me but it was that good, nobody had just one dose.

Of course there were a couple big light ups:


Of course I'm right in the middle of everything...

Light ups are interesting, they're a bit like herding cats. The organizers always want to lay out the lanterns in some pattern which requires everybody to pay attention. It seems like people want to just drop their lantern in the first spot they find and get out of the way...

Thursday, December 5, 2013

Sold a stove!

I think this marks the first time I've actually sold any Coleman anything. Oh no wait, I sold a 242C to Fuzz back at the original TrueNorth gathering.
What, no pic? I thought we had a pic...

Anyway the other day I sold my 502 single burner stove. Honestly I never really liked that stove, it didn't put out all that much heat for its size and when I bought my Peak 1 I knew it was time for the 502 to go. The Peak 1 is physically smaller, weighs less, lights easier and puts out way more heat than the 502. I also paid less for it. In the sale I got back what I paid for the 502 which I consider a win.


502 on the left, Peak 1 on the right. Its hard to tell in this picture how much more fire the Peak 1 puts out...

Wednesday, May 29, 2013

4 stoves, *snort*

I like looking through the analytics and seeing what people are reading from my blog. Apparently recently several people read my "4 stoves" post from 2009. Interesting how things can change in a couple years. Back then I listed my 4 stoves as:
#1 is the Coleman 425 I got from my grandmother
#2 is the Coleman 413 I got from Angie's grandfather
#3 is the Coleman 502 I bought on Craigslist
#4 is the Prepo I got from my grandmother

Now add to that, in no particular order:
#5 Coleman 425E my Dad bought at a charity auction, this one lives at camp now

#6 AGM KampKook I bought at the Coleman Convention auction

#7 Thermos Holiday Stove I traded a 220E for
Now undergoing restoration, I got so far as repainting the tank and burners, got stuck on the body, it really needs sandblasting but I haven't got a blaster. Need to find somebody who has experience on light metal so as not to warp it.

#8 Butterfly stove, a birthday present

#9 Coleman 520, found in my in-laws garage

#10 Thermos 3 burner, from a bundle of stuff, I still haven't worked out the NRV on the pump so I haven't played with it much.

#11. Optimus 8R bought at the Coleman Convention
Probably my favorite stove

#12. Coleman 413C, got this from Tim, it needed a new tank so I got a good deal, not sure why I bought this other than I'm a sucker for round tank stoves. Curiously I can't find a picture...

So anyway 12 stoves at this counting. I really should get rid of some of them and I tell myself "its only stuff" but then I can come up with a host of reasons I can't live without this one or that one. Its an addiction I swear. That said there have been a number of stoves I've turned down. When I bought my Sears bighat for instance. Recently I told a guy not only would I not pay for a stove I'd charge to take one...

It could be worse, I'm definitely not a stovie, my friend Steve has a shed that is packed floor to ceiling with stoves.


Tuesday, October 11, 2011

Rats!

Somedays you're the windshield, some days you're the bug...

Tim texted me Sunday with a good looking lantern, big hat, nickle base. I said "Get it!" which he did. Today he delivered, what a deal right?
I think its a 220C. With 5 and 5 on the bottom it could well be a war year lantern.

This afternoon I was fortunate to have a little time on my hands and started to disassemble. The burner tubes are missing but I've got a couple from a parts lantern. The air tube is tweaked a little but not enough to really bother anything. Needs new valve packing and has an interesting square valve stem.

Finally I get the burner frame and collar off and...
Yup, the hole goes right through. Gives an interesting insight into what the innards look like but means this fount is trash.

Its clearly a drilled hole but why is it there? My only theory is that somebody drilled it in preparation for converting this lantern to electric. The odd thing is there really ought to be another hole out the bottom. Did they run the cord out the fuel cap? Its the wrong one for this lantern.

All this explains the slipshod quickie way the lantern was reassembled and probably the missing burner tubes too.

Oh well, at least I didn't pay a lot.