Showing posts with label golf. Show all posts

Tuesday, May 12, 2026

Learning about VW brake calipers

 The challenge in keeping up with the blog is remembering to take pictures of stuff so I have something to show you.

Remember our 2005 VW Golf TDI?


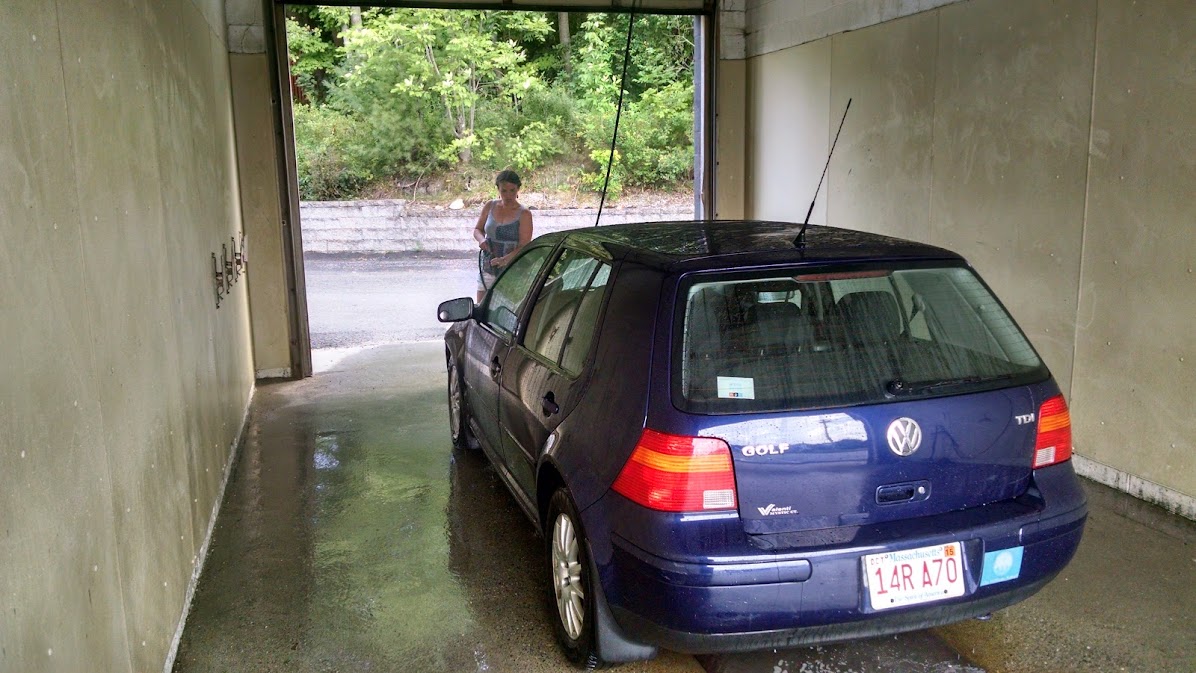
Pictured here at ChowdaQ in 2016 this is the car I've owned the longest. Actually it might be in the running for the vehicle I've owned the longest. I think I got it in 2015.

So the old Golf is hard on brakes, especially the rears. I've posted a bunch of times about doing brakes on that car. One of the things special about brakes on a newer VW is that the rear calipers need to be twisted as the piston retracts. An easy(ish) way to do that is with a tool like this:

And I've done it several times now, the tool quickly pays for itself and I don't think it was terribly expensive.

The problem is that every time I've done the brakes on this car I've ended up with terrible pedal feel and the parking brake didn't work well.

Recently the pedal started to pulse badly during braking so I knew it was time for yet another brake job. Fortunately the parts aren't too expensive so I ordered up new pads and rotors all around. At the same time I knew I'd have to address the parking brake which didn't work at all.

After finishing the brake job I knew I was in trouble, pedal feel was AWFUL. Pedal goes straight to the floor. I know what you're thinking "air in the lines" but I hadn't opened the system so where would the air have come from? Plus the parking brake didn't work at all.

So, since I'd never done it I figured I'd replace the parking brake cables. Not a terrible job and they're weren't too expensive. Sadly, after the job was done nothing had changed. So I decided to sleep on it for a couple nights.


Well, theres the problem. Sure, right. Let me explain...
What we're seeing here is the rear of the passenger side caliper. At the bottom left of the picture there is a pair of vice grips attached to the parking brake actuator. The actuator is fully extended in this picture, so its bottomed out but isn't causing the brake pad to contact the rotor.

When I retracted the piston I retracted it all the way so the new pads would clear. In doing so I've retracted the piston too much so the piston isn't moving enough to do its job. Disc brakes are self adjusting so eventually the piston would adjust itself but commonly the adjuster gets a little stuck. I could actually see that in the parking brake actuator, it didn't retract well. A little squirt of oil helped. I cycled the parking brake a couple hundred (no joke) times but it just wasn't adjusting, or at least not enough to matter.


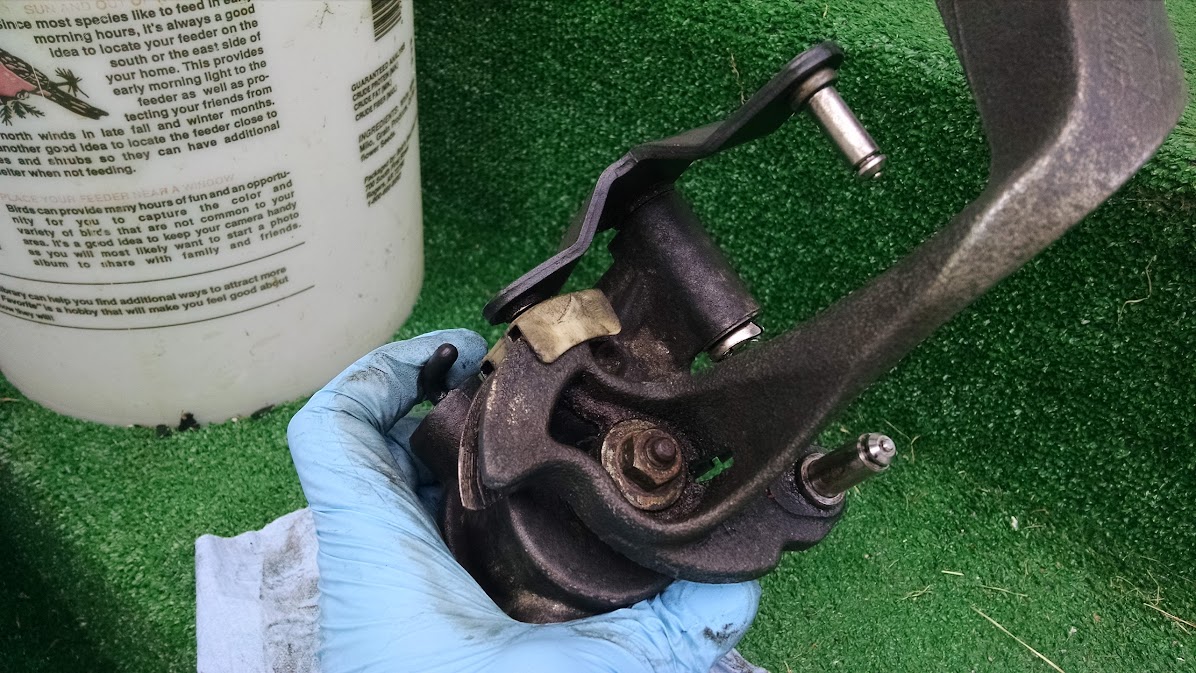
Heres the fix, you're looking at the caliper standing on its side. The cube thing inside the caliper has little nubs on it to engage the piston. Normally to retract the piston you turn it clockwise while pushing it in. The other tool won't work for that since you need to turn counter-clockwise which would also retract the tool.
Here my thumb is pushing down on the cube thing while I turn it with a big screwdriver. It takes a lot of force but fortunately it only needs to move like 1/8 of a turn.


This was all terribly difficult to photograph so please excuse the terrible pictures. I wanted to get the calipers balanced so I set them so the pads just touch the rotor when the jaw is open about 1/4" which is just under half the travel. In retrospect I'd probably go a little smaller, maybe 3/16 or about 1/3 of the travel.

With all that done pedal feel is MUCH improved and the parking brake finally works as it should.

The state of MA requires a yearly safety inspection. The parking brake was keeping me from getting it. Annoyingly these days they give you a sticker for the month your previous sticker expired so although I had it inspected in May I got an April sticker. Oh well...

Tuesday, August 17, 2021

Struttin some more

 Just a quick one today, remember a couple months ago when I had to replace the struts on my Jetta? Well for the last month or so the 2005 VW Golf has had a funny rattle when going over bumps. At first I thought it was the exhaust, the heat shield around the muffler had failed. I wrapped that with wire but it didn't help. I spent a bunch of time under the car wiggling things and found nothing until I finally took a wheel off.


That, friends, is half a coil off the passenger side spring. It was just laying in the spring perch. When going over bumps it would rattle. It's loss doesn't seem to affect the car at all so I'm leaving it out. If I have to I'll replace the struts but for now it doesn't seem like it matters. I'm glad, it's a bear of a job...

Wednesday, September 7, 2016

New Years resolutions down the tube

This year's resolution was to write every day. If you go back to my last couple blog posts you can see I was doing a pretty good job. I wrote a lot of stuff I didn't post too. Then March hit and everything ground to a halt. Its hard to explain why but a really crappy winter with no snow didn't help. Whats surprising is that when I'm busier I actually find time to get more done, when times are slow I get lazy...
In April we had a layoff at work and a couple close coworkers got the axe. That effected me more than I like to admit and made me even lazier.

So anyway its been mostly a summer off, here's something to get us back into the swing:

Angie's 2005 Volkswagen Golf has ugly front fenders, the driver's side especially. It looks like somebody backed into it just forward of the driver's door which caused the lip above the wheel to pooch out. I bought a pair of used fenders from a junkyard that were supposed to be A0 condition. A means good and 0 is supposed to mean zero defects. When I got them I found this:


Of course its the driver's side thats in worse shape.
First I removed the rust:


The bucket is full of citric acid, this is a trick I learned from lanterns and is the same system I used last year on the Dietz wick lantern. It took a couple days before they were completely rust free. Fortunately there was only rust in that corner, it'd have been annoying to build a tub to soak the whole fender.

I welded a patch over the hole which is hidden by the firewall anyway, then I fiberglassed over the whole thing. The fiberglass smooths everything out and covers the weld which is likely to rust otherwise.

Two cans of color match paint came from Paintscratch.com, I like their spray nozzles but one of the two cans was considerably better than the other. Unfortunately I used that can first. I had to paint the welded section a couple times because I didn't do a good enough job getting the patch perfectly smooth first. I should have scrapped the paint down on the whole fender, then primed and painted but I was trying to go quick and as usual ended up wasting a bunch of time and paint.

You can see the primer on the effected corner. I've already put color on the whole fender which is why it looks dull.
As of today I've got color and clear coat on the whole thing. The clear coat is terrible, it orange peeled like crazy, was very hard to get a solid coat down, like the paint was too thick in the can. I need another can of color but I'm going to try my local Fischer Autoparts and see if they can do better...

Sunday, March 6, 2016

Golf brakes

Our '05 Golf has had sticky brakes for far longer than I should have left it so yesterday I finally got off my duff and fixed 'em. I'd planned on calipers, rotors and pads, a sticky caliper will quickly ruin a set of pads which ruins the rotor. Replacing one caliper will generally make the car pull under braking so its best to do them all at once.

IDParts had brand new calipers for only a bit more than re-manufactured so I went with those since it'll allow me to clean up the old ones and keep them as spares.

Everything was going fine until:

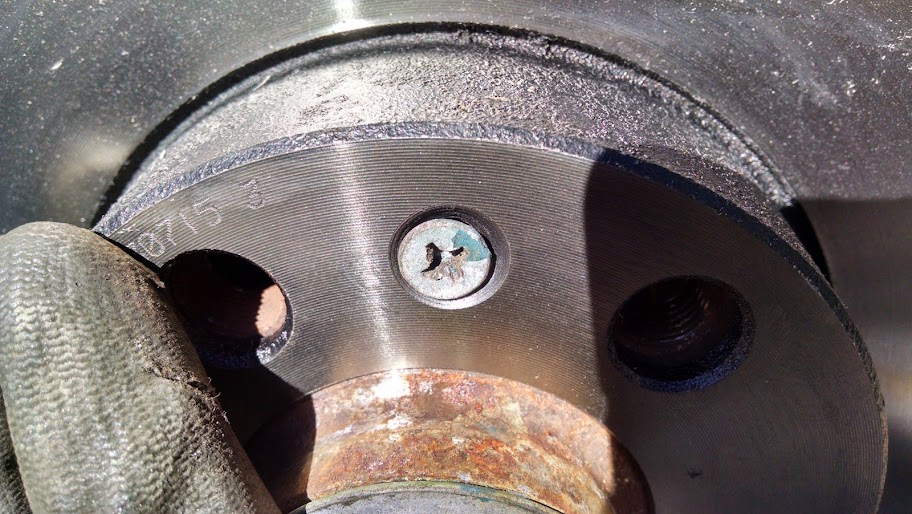
Its difficult to see in the picture but that screw isn't seated all the way. Thats the screw that holds the rotor to the hub. Really its not all that important, the hub and rotor are clamped together by the lug bolts when the wheel is installed, all the screw does is align things when the wheels are off, still it bugged me.


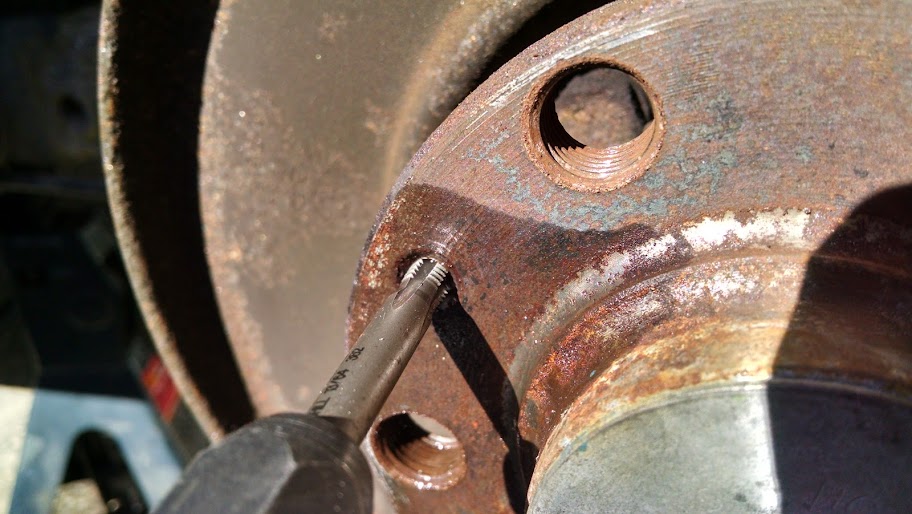
To fix it I used a tap to clean the hole in the hub,


and a die to clean the screw. With them cleaned up the screw seated nicely.


This is actually the heart of the whole problem, this is the caliper mount from the driver's side. Notice the two "bolts" at the top, those are actually caliper slide pins. Notice how the right side is compressed and the left isn't. The pins should slide freely (hence the name "slides") but that right side doesn't. I beat on it with a hammer, cranked it around with a wrench lubed it with Kroil and finally resorted to heat. The heat got it moving and I was finally able to pull the pin, clean out the nasty old grease and add some fresh. Now it moves in and out freely.

 The pin itself

The Golf has floating calipers which means that the two brake pads are actuated by one piston, this is possible because the whole caliper moves to pull on the outside pad. Because of this stuck slide pin the brakes couldn't retract and the inside pad never got released from the rotor. I'd thought this was happening because the parking brake actuator was stuck but you can't really judge with the caliper still on the car...

Anyway with all that work done theres no more squeaking from the dragging pad, performance is much improved and it appears that fuel economy has risen also although that will take some time to really judge.

Now the only mechanical thing wrong with the car is the driver's side power lock actuator seems to be hung up, this is a fairly minor complaint that I'll dig into once it warms up some.

Sunday, February 28, 2016

More diferenter

I've been bad at updating here, I realize I've made a couple things you haven't been notified about.
One of the parts suppliers I use has a yearly cold start contest. If you're not into diesel cars you need to realize that a diesel engine runs only on the heat of compression, if you can't get the engine warm it won't run. When its really cold out that can be an issue. So lots of YouTube space is devoted to cold start videos.
Its been really warm this winter and I was worried were weren't ever going to get any cold to make our cold start video but a sudden cold stap came along. There's price money on the line so on Valentines day we busted out the camera and made a video:


I dunno if having a ton of views and positive comments will make this video win the contest but it sure would make me feel good. :)

I need to find more video making challenges, it can be hard to come up with inspiration for what to make, its a lot easier when theres a challenge. Anyway with one cold start video down I'm already thinking about what next year's

Friday, January 22, 2016

Car fixin

You never really think about your ability to set the fan in the car at different speeds until all of a sudden you can't...

Angie has been driving our 2005 VW Golf and thus it wasn't for some time that I noticed the fan only worked on the high position. She doesn't complain much and since she had a work around she took it. Winter is an especially annoying time to have the fan not work at low speed since a warm car will tend to fog the windshield so I knew this had to be fixed.

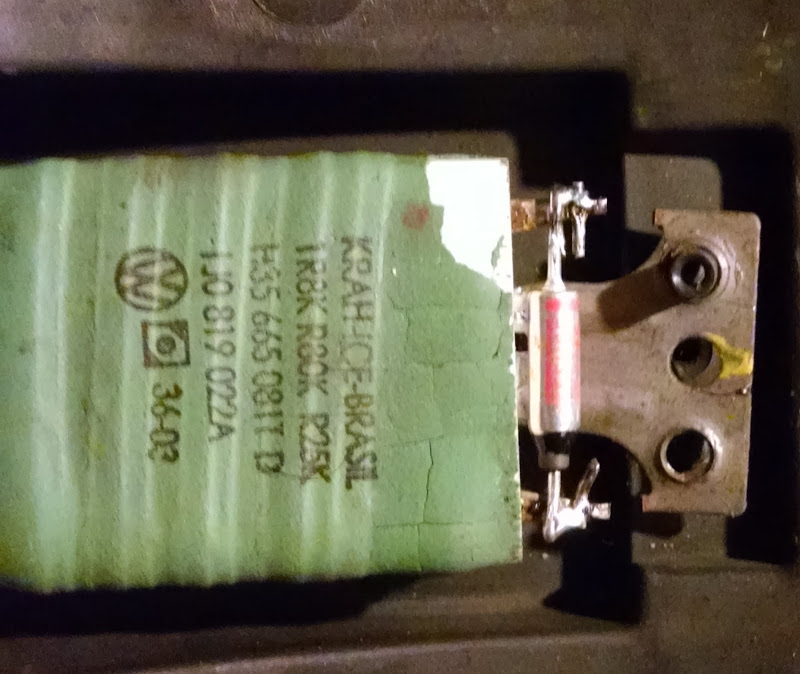
The problem turns out to be a common one caused by a failed thermal switch:

 That's the little blue headed pointy thing in the picture. The big green part is the resistor pack that actually runs the fan at lower speed. The thermal switch is there to keep the resistor pack from burning up if too much power is requested.

So I could just replace the thermal switch but that doesn't address the root cause of the problem which is a sticky fan. The 4th generation Golf and Jetta have a tendency to get some water in the fan which gums up the motor, the gummy motor draws more power and pops the thermal switch. So I popped out the fan, cleaned its bearings (well, bushings actually) good with carb cleaner and dripped a variety of lubricating substances in. I saw a YouTube video where the guy used WD40 but WD is "water displacing" its not really a lubricant. I started with Marvel Mystery oil lubricating formula and moved on to PB Blaster in an effort to find something that would make its way into the bushing. Then I reinstalled the fan and replaced the thermal switch.


I was a little nervous about soldering the new switch in, it is a thermal switch after all but I limited myself to just quick touches with the soldering iron and I'd bought a 5 pack of the switches from Amazon so I knew if my soldering didn't work out I could always resort to crimping on another one.

Fortunately I seem to have done a good enough job, the fan has been working correctly for a couple weeks now.

Of course I could have replaced the whole resistor pack, IDParts has them for $35 but for $1 and a couple minutes with a soldering iron I'm well pleased with this fix. If this happens again I'll probably replace the fan, its difficult to get oil in to the bushings on the old fan, although maybe if I used a needle oiler...

Wednesday, September 2, 2015

The continuing saga of the Golf

Apparently my mother reads my blog, she reminded me yesterday that I hadn't written anything for awhile.

Before I get started some good news, I'd been using Photobucket to host pictures but I've long been frustrated with the extremely slow Photobucket interface it took forever to access my pictures once I'd uploaded them. So recently I've been experimenting with Google Photos and I'm actually quite pleased with it. As with anything there was a ramp up period but I think I've got it worked out. I'll let you know if anything changes...

Oh geez, I realize I never told you... I bought a 2005 Volkswagen Golf TDI:


If I had told you about it I'd have mentioned that its transmission was decidedly not happy so it was off to the mechanic. I'd bought the car for a cheap enough price that even if I ended up parting it out I could still make some money. In the end we decided it was too nice to part so it got a new transmission. On the way home from the shop I noticed that the speedometer didn't work. That was a relatively easy fix in replacing the VSS or vehicle speed sensor which lives on top of the transmission. It also got a new windshield, I can without reservation recommend the Safelite office in Keene for that job, the guy was great. It was quick, he vacuumed the car, cleaned the windows and found that the goop on the paint (from a leaky roof at the place I bought it) can be cleaned off with polishing compound.

Anyway the last step was to get it inspected. Thats when I realized the reverse lights didn't work, which is a fail on inspection. A little testing proved that the lights actually work but weren't being turned on due to a failed reverse light switch which also lives on the transmission. I got a new switch and put it in but the lights STILL didn't work. A whole day of investigating revealed the problem to probably be the shift actuator:
  

Its the bit that translates the shifter movement into the bits inside the transmission. I had it in and out of the car repeatedly and can't see how it could possibly work. So back to the mechanic and I'm waiting to hear his verdict. This is fix work for him, both the VSS and reverse lights should have been working when he delivered the car to me...

So anyway, as I'd mentioned its a 2005 Golf TDI. Its got about 150,000 miles which is not that much, in fact its 110,000 less than my '98 Jetta. Its got very little rust and that which it does have will be gone once I replace the left front fender that had been hit at some point. The interior is perfect and it even has working AC which is a rarity on my cars. It came from NEAT which New England Adolescent Treatment, basically a program for troubled kids. A friend of mine is the executive director there. They take donation cars and sell them to help fund the program. This is where I got the Jetta too. Both cars were a good price and its nice to help the program.

To keep my spirits up I've puttered around a couple other minor things,

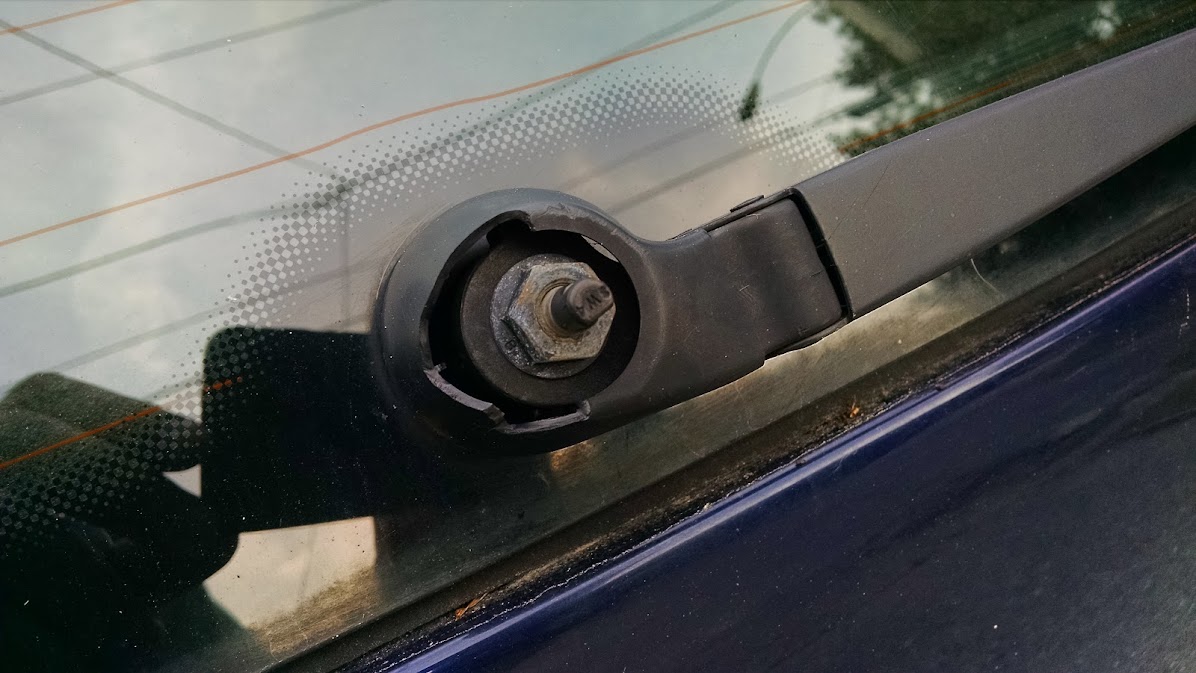
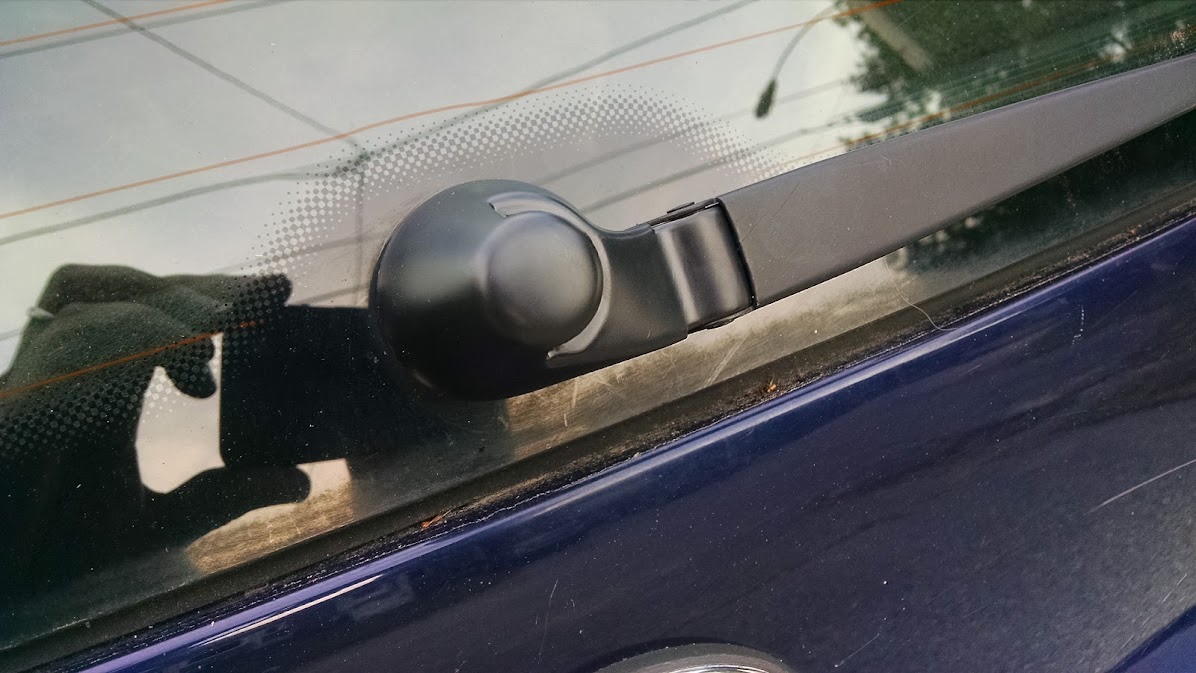
I was surprised to find the wiper cap was available, I also replaced all the wipers. I still need to clean the back seat but other than that and replacing the left front fender the car is basically ready to go. Theres a place in Tewksbury that claims to have a correct color fender for only $100, I need to call them and see if its for real. I like the idea of using an OEM fender but I'll go aftermarket if I have to...

Thursday, July 30, 2015

Oh geez, what now?

I've had my '84 190D for just about 6 years. In that time we've driven it just over 40,000 miles which realistically isn't all that much. Since we've had the Jetta I've been driving that a lot and the poor 190D has sat. Angie drives it some but when compared to the other vehicles in the fleet its really slow and sadly it handles poorly. A 190D thats correctly set up is quite spritely and handles nicely, mine never has done that even after replacing all the rubber components in the rear end.

So since neither of us really liked the car and since the tin worm was really getting its claws into the car I decided it was time to move on. My first step was to email Tom who sold me the Jetta. He runs a program for troubled teens and gets cars donated, because they didn't pay for the car and because they have no history I can generally get a really good deal. Tom had a 2005 Golf TDI with "a transmission problem." that nobody really knew anything about. We agreed on a price and the 190D went onto a U-Haul trailer.


The minimum tax deduction I'll get from the car is just slightly less than the amount I would have asked for the car but its much easier to just haul it down to Tom than to have a parade of tire kickers come to my house and offer me their sympathies but no money. Also it'll help Tom's program do their good work so I feel good about that.

Then we returned with a Golf:


Its actually both better and worse than I'd expected.
The good:
Good tires, perfect interior, good running 150,000 mile engine, very little rust

The bad:
Bent/rusted front fenders, bad transmission

The transmission is the really bad part. When we picked it up I backed the car up about 4 feet and the transmission locked completely. Fred thinks its probably the output shaft bearing on the transmission which has failed and is causing the transmission to lock when torque is applied, if the car is out of gear it rolls nicely. I hauled it directly to KMH Motors in Lowell and let Keith have his way with it. He's going to put in a new transmission, clutch and flywheel. These cars came with a dual mass flywheel (DMF) that is known to fail prematurely so we're going with a single mass flywheel (SMF) instead. This might give some clutch chatter but its probably a good choice, its cheaper too.

You might wonder why we're doing a clutch. As far as I know theres nothing wrong with the one in there but since the engine has to come out anyway this is quite an inexpensive time to do the job. He's also going to replace the rear main seal on the engine, again something smart to do while he's there.

At the other end of the engine he'll replace the timing belt and water pump. On a diesel engine if the timing belt fails the engine is junk. Since we have no history on this engine I don't want a failed timing belt to ruin the engine after putting all this work into the transmission. The water pump is driven by the timing belt, if it seizes it will ruin the timing belt and the engine and its another one of those things that should be done at this time since 90% of the labor is already taken up in replacing the timing belt.

The front fenders will want to be replaced, I need to get a price from a shop on this before I decide if I'll do it myself. Fortunately the parts are relatively cheap. If I had a shop do it we'll use new fenders, if I do it myself I'll get used fenders. My worry doing it myself with brand new fenders is that they won't fit correctly and I don't have the proper skills to get them just right. With luck I'll be able to get the right color in used fenders but even if I can't they should be relatively easy to paint.

Anyway I'm excited about this car, its engine is the Pump Deuse type which makes around 100hp stock compared to the Jetta's 90hp so it should be a little quicker than the Jetta at the cost of a little fuel. For about $300 I can raise that to 124hp just with a computer upgrade which will make the car even faster and might actually get a little of the fuel economy back. Making more power generally means raising efficiency which generally results in increased fuel economy, especially if I can keep from driving too fast. Once more into the breach!