Showing posts with label car repair. Show all posts

Thursday, September 3, 2026

Well geez

 Continuing the theme of everything breaking, here's this week's foolishness.

Monday: 

Sure looks like we got our money's worth from those brake pads, huh? This is our 2018 RAM 1500. Unfortunately, it started making noise while we were away in Maine.

Anyway, brakes, especially front disc brakes, are pretty easy. Well, until...


Those of you who have been here before will recognize the effort here. In short, the rotor was stuck to the hub. If you look at the braking surface, you'll see a bunch of dents. That's where I hit it with a hammer. You can't see that I'd already heated it with the torch. Yes, the hub got a little scarred up. No, I'm not going to do anything about it. The other side was pretty much exactly the same, although it shed a lot less rust while I beat on it.

A real bastard of a job, but not really that hard. My local Federated Auto Parts supplier, shout-out to Fisher Auto Parts, had the pads and rotors on hand for only $25 more than Rock Auto. Rock needed 3 days to get them here, and I feel better about buying local anyway.

In other news, Tuesday:


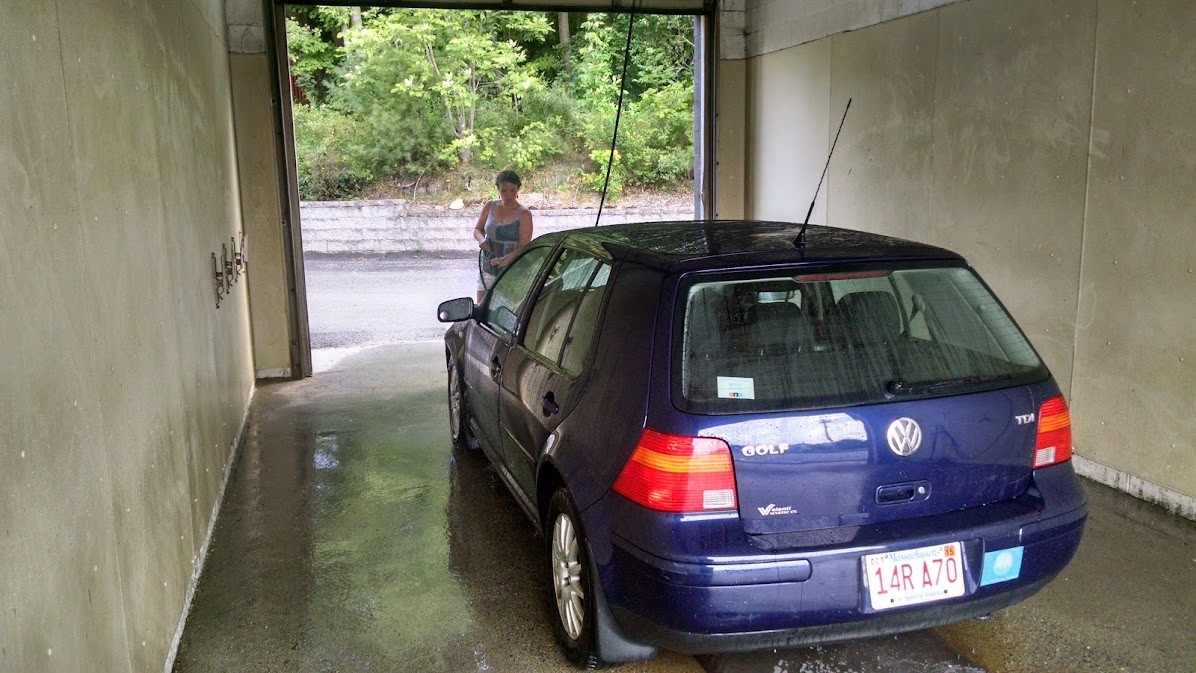
 This is the pipe from the intercooler to the EGR on our 2005 VW Golf TDI. Just above the VW symbol, you can see a little bent metal clip. That's what holds the pipe to the intercooler. After 20+ years of restraining 13+ psi, something has worn down, and it'll no longer hold the pressure. Its real exciting when the pipe pops off. There's a big pop accompanied by a smoke screen from the tailpipe. Meanwhile, the engine sounds like it's on the verge of explosion.


 Fortunately, the aftermarket has addressed the issue. A simple metal bracket with 2 bolts, 2 spacers, and a new O-ring. It's not really an O-ring since it's not circular in cross-section, but they call it an O-ring, so whatever.

The holes for the bolts already exist in the EGR, so this is a pretty quick fix, made only a little longer by forgetting to put in the O-ring. I did put a little blue Loctite on the bolts. I'll check them when I change the oil, but I don't think they're going to back out. 

Okay, last one- well, two, I hope... Wednesday:


This is the output pipe from the kitchen sink. The side that doesn't have the garbage disposal. The circle on the right used to be the nut that held it in place. It tore apart as I tried to tighten it.

The circle right under the pipe is the "Tailpiece washer" which was somehow messed up. I don't know what happened to it, but it wouldn't seal anymore.

I'm sorry I wasn't good about taking pictures. As you might guess, I'm a little salty about this...

Anyway, the tailpiece is the bit that attaches to the strainer what drains the sink. I damaged the old one getting it apart, and the instructions for the new one specifically mention the tailpiece washer but, annoyingly, the replacement tailpiece doesn't include one. Fortunately, on my second trip to the hardware store, I mentioned it to the clerk, who knew what I was talking about and where to find it. I was going to bodge it back together with a bunch of sealant. I still used a bunch of sealant. There was a zero percent chance this was going to leak again.


 Okay, I wasn't going to take a picture of this one, but I figured we ought to be complete...

Looking down into the toilet tank...

The hose is the filler for the tank. It jets down into a tube. I don't know why. When I was a kid, the riser pipe had holes in it. Now they all seem to have a hose. A couple of days ago, there was a little pop, and the toilet got louder while it was filling. This exact thing happened at Cushman house back in May, but that hose just has a little clip. This thing is way over-engineered. Apparently there was some kind of tab inside the cap that held it to the tube under it. The tab broke, and now nothing holds the hose to the tube. I haven't even tried to buy a replacement. I suspect it only comes as an assembly. Two quick holes drilled, two zip ties installed, and we're done. I probably didn't even need to drill the holes, but the zip ties I had in my hand were too short, and I didn't want to go back to the garage for longer ones. I'm not even going to cut them off.

*Sigh*

On a positive note, after Wednesday's repairs, we went for Chinese food. Winchendon finally has a decent Chinese restaurant. If you're ever passing through Koi is worth the stop.

Tuesday, June 17, 2025

Well heres a stupid thing

 Dad has a 2017 Jeep Renegade. During their last trip to Caribou the external thermometer quit and set to 128 degrees.

When that happens the car suddenly decides "You don't need any cabin heat" unless you use the defrost setting which is 100% heat all the time.

So I jump on the google machine and find that the exterior thermistor has failed. Chrysler says you need to replace the passenger side mirror, $350. Fortunately I found a YouTube video with a link to the part required. Its too bad that the video stinks because its got good information in it.

Anyway the hardest part of the job is disassembling the mirror:


I really shouldn't make fun of the video creator too much because I didn't get pictures of the clip locations either.

With the back of the mirror off there is a little like pimple down at the bottom of the mirror that houses the thermistor. Digging that out with a little screwdriver caused it to totally fall apart.


Putting the new thermistor on is easy although I did break off all the extra plastic to get 2 clean wires I could slide heat shrink tubing over so there wouldn't be a short. I then potted the new thermistor into the little pimple with some silicone sealant.

Totally fixed the problem and the new thermistors were like $10 for 60...

Unfortunately the failed thermistor sets a persistent check engine light. I own an OBD-II adapter for my phone but it was, of course, at home. I'd bought another one for dad but he's lost it...

When we're up in July I'll reset the check engine light but the good news is that it doesn't seem to hurt anything else...

Wednesday, March 22, 2023

That which bears me

 About this time last year Angie and I took a trip to Pennsylvania. During the return trip my 2015 VW Jetta TDI started to make a weird humming noise at about 65mph. Interestingly if you went a little faster or slower the noise went away.

I ignored it up until about a month ago when the humming turned into a grinding noise at all speeds. Sounded like a wheel bearing to me. I jacked up the car and, yup, definitely a wheel bearing gone bad in the rear passenger side. I ordered parts and then had to order tools. The wheel bearing is held in by an 18mm triple square bolt. I had a 14mm triple square socket to remove the caliper bolts but not one any larger. I was unable to find one locally so Amazon sent me a set of Capri brand. Hopefully the set will have all the bits I need..

The bearing itself is really easy to replace, jack the car up, remove the wheel, remove the brake caliper with that 14mm triple square socket, remove the torx (t30? I forget) screw that holds the brake rotor on and remove the rotor. Then pound a screwdriver into the gap that holds the cap on. Mine was really stuck, took a lot of pounding.

Then use the 18mm triple square socket to remove the axle bolt. This was REALLY tight. It just laughed at my Makita 1/2" cordless impact. I put the 30 inch breaker bar on it and added a 24" piece of jack handle. Took a lot of body weight even then.


As you can see the old one was really grungy. There are two bearings there, the inner one was okay, the outer was pretty terrible.


Installation is reverse of removal, no tricks here. I torqued the bolt to 130ft-lb and then 90 degrees. Along with the locktite on the bolt explains why they were so hard to remove. These are torque to yield fasteners, single use only. I ordered a new bolt but the bearing came with one so I've got a spare for what it's worth.

A test drive shows that the noise is gone but now I'm thinking there might be another failed bearing in the front. I didn't check those since I only had the rear of the car jacked up, I did check the passenger side, it was silent.

Oh well, in a day or two I'll jack it up again and have a look see...

Tuesday, August 17, 2021

Struttin some more

 Just a quick one today, remember a couple months ago when I had to replace the struts on my Jetta? Well for the last month or so the 2005 VW Golf has had a funny rattle when going over bumps. At first I thought it was the exhaust, the heat shield around the muffler had failed. I wrapped that with wire but it didn't help. I spent a bunch of time under the car wiggling things and found nothing until I finally took a wheel off.


That, friends, is half a coil off the passenger side spring. It was just laying in the spring perch. When going over bumps it would rattle. It's loss doesn't seem to affect the car at all so I'm leaving it out. If I have to I'll replace the struts but for now it doesn't seem like it matters. I'm glad, it's a bear of a job...

Wednesday, June 9, 2021

Struttin'

It's been a busy time so I've neglected you dear readers. So now I'll take you back a couple months. Angie and I jumped in the 2015 VW Jetta TDI to go to dinner. As we backed out of the driveway the front end of the car made a funny sound and as we headed down the road it pulled hard to the left. Here in the US we drive on the right side of the road and the road is crowned in the middle so you generally steer a little left to fight that crown. So its a weird feeling to have to steer right to fight a left hand pull.

When I jacked the car up to look at it I found: 


What are we looking at? Well the picture is actually upside down, this is the top of the strut and that spring should be pushing down (well, up, the picture is upside down remember) into the cup.

Yeah, broken spring. I've never had that happen before. By the look of the rust the break occurred a while before I found it. The noise and weird steering were from the bearing at the top of the strut disintegrating.

This is a job I DEFINITELY should have farmed out. I'd done rear struts on the '98 Jetta and '05 Golf but the fronts turn out to be held in by a totally different mechanism. On these the strut tube is clamped at the bottom. Replacing the driver's side I ruined a big screw driver prying the clamp apart. Then I didn't have the right socket to get the axle nut off so I decided I'd remove the axle from the inside, at the transaxle.

Big mistake, I'd already disconnected the strut at the top so when I undid the last inner bolt the whole assembly fell out on my head. It gashed my forehead and rang my bell pretty good. I finished the job on pure pig headedness.


After that debacle I bought the proper tools. ID Parts sells a cam action spreader for the strut clamp. They also had the proper 24mm triple square socket for the axle nut and the triple square driver for the pinch bolt in the clamp. The passenger side has clearance issues but the correct tools made the job MUCH easier. I still need to pick up a 16mm socket, this car is plagued with 16mm bolts but the sockets don't come in most kits...

Working on the passenger side I did manage to rip the wheel sensor cable apart. 

From VW they're VERY expensive. Parts Geek had one at a much more reasonable price. You do still have to splice it into the line. I find this pretty cheezy, any cable that hangs out in space is going to get ripped off occasionally, they should be easier to replace.


Carnage, you can see how, with the bearing failure, the spring could come right out of the one strut.

Did I need to replace both struts? Technically no, the car would have been fine with only one replacement but the driver's side sat a little higher after replacement so it made sense to do both. They came as a set anyway...

Monday, May 4, 2020

All speeds ahead

Back in November I noticed that the second speed on the blower motor in my 2010 Dodge Ram 1500 didn't work anymore.


All the other positions worked but not the second one. Interestingly this very same thing happened in my '96 Dodge Dakota back in the day. You might also remember a similar problem with Angie's 2006 VW Golf. Holy Toledo that was all the way back in 2016. For the price of the thermal switch (about $1) that was a really good fix! I notice I was a little nervous about it but its stood the test.

I lived with the problem in the truck for awhile. I had planned on buying a new truck in the fall but with the world doing what its doing I've switched into money save mode for the foreseeable future.

So I searched around a little and discovered the problem was probably the blower motor resistor. Rock Auto had one for about $25 delivered so I ordered it up and in less time than I expected (good job Rock Auto) the part had arrived.


 Here we are up above the passenger's feet, its just two phillips head screws to remove the old resistor pack.


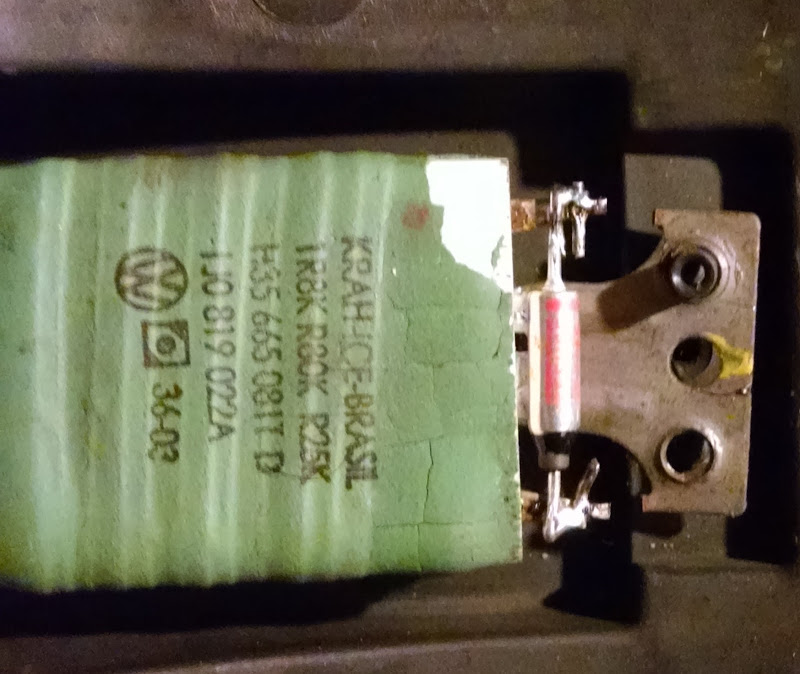
 Well theres your problem lady! Theres definitely supposed to be more resistor pack in that resistor pack! The resistor pack sits in the airflow from the fan to keep it cool. Over the last year or so the 3rd brake light was leaking water into the cabin of the truck. The 3rd brake light on this truck is high on the back of the cab. I goobered it with sealant and it doesn't leak anymore. It took me a long time to find the leak because it would either leak down the rear window and under the back seat or down the A pillars at the front of the truck and onto the front floorboards. I spent a bunch of time sealing the windows before I figured it out. So I think the high humidity is what caused the issue, probably combined with some of that water going down the vents.


This is the replacement part, its actually the second one I ordered. The first was supposed to come from Amazon but what arrived was a "Speed Sensor" of some sort. The seller refunded my money and removed the listing, I suspect they were selling a part they didn't actually have...

Anyway with the new part installed the blower works correctly on all settings. The replacement took me maybe 2 minutes. I love the quick fixes!

Friday, April 3, 2020

STOP!

The brakes on my Jetta started to make noise, this was back in November, remember I'm still catching you up. Disk brakes are wicked easy to replace so I figured I'd do it myself.

In getting it apart I discovered 2 things, first the caliper bolts are triple square. Triple square is also called XZN, imagine a square, now put another one on top of it but rotate the new one 33.3 degrees, then add a third square and rotate it 33.3 degrees the other way, thats triple square. I didn't have any triple square tools and the set from Autozone turns out to be too small. In the end I took a torx socket and beat it into the bolt. It was terrible but good enough. Amazon sold me the proper tool but of course it arrived after the fact.


Then I discovered I couldn't push the calipers back. I've always done this with a big c-clamp but these calipers need to turn as they go in. Autozone sells you a little cube thing which is just about worthless, don't waste your money. After I broke my favorite c-clamp I went to Harbor Freight and bought the right tool.


This is one of those jobs where the right tool makes thing so much easier I wonder why I never bought one before. The way the tool pushes and the thread pitch on the tool make it very easy to push the calipers. I should have bought one of these years ago. I think the list price is $40, I had a 20% off coupon so like $32 out the door in New Hampshire with no sales tax.


Assembly is the easiest part. Should be good for a long while. I ordered the bits to do the front too but  it looks like what actually happened is one of the pads on the driver's side got stuck and ate itself. I used a generous application of slide paste so hopefully it won't happen again. I'll check them when I rotate the tires in the spring and keep an eye out for that issue.

Friday, December 28, 2018

New car day +2

After yesterday's running around today should be easy, get the car inspected. Well, the plans of men...

Its raining today and I noticed the driver's wiper wasn't doing a great job, that'll fail inspection so I grabbed new ones, figured I might as well replace both.


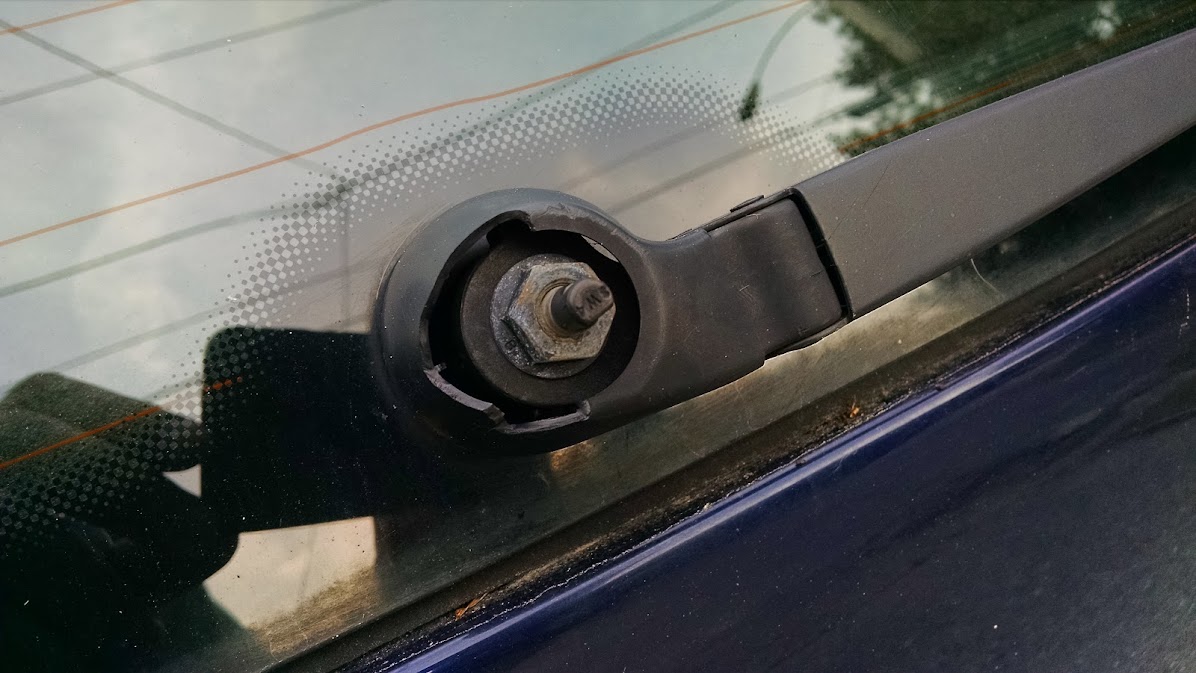
Thats the end of the wiper, its a weird slide in sleeve thing. The wipers have to be in "wipe" position to lift the arms too, weird...


Much fiddling with adaptors


Until finally...

Okay, off to the inspection station:


Rats!

This actually isn't so bad, a black R is not safety related and you can drive the car, in this case its because some emissions sensors are reading "not ready". This is probably because the dealer I bought the car from had to have a DPF regen performed at the dealer. DPF = Diesel Particulate Filter, and a regen is when it burns off the built up particulate. If the car had been mostly city driven on short trips the filter could fill up early and not get to burn off which is why it needed a dealer regen. I drive mostly on the highway which is ideal and shouldn't have an issue, also VW has been forced to issue a long warranty on the DPF and finally the aftermarket has "DPF Delete" options for "off road use only".
So anyway the plan is to put a couple hundred miles on the car and try again in a couple weeks.

Finally I tried to set the clock and clear the "Oil/Inspect" notice in the dash. Both require pressing the odo reset button which I tried and didn't seem to work. So being an optimist I pulled the dash cluster.


 Its super hard to see but the problem is right where my finger is, the contacts for the button are on the green board under that white lump and theres a white bump of powdery corrosion. I squirted a little De-Oxit in there and worked a piece of paper towel in to remove the corrosion.


Reinstalled, tested and the clock is correctly set. You might also notice in this picture I've forgotten to reinstall the two screws that hold the cluster in place. I didn't remember until I started writing this blog entry, I had to pull the trim again and reinstall.

Even with having to redo the trim the whole process took less than an hour. Yes I could have made then dealer fix it but its a half hour drive to the dealer, time to get it fixed and half an hour home, in the end its just as fixed and I know more about the car and I took a moment to De-Oxit the other side while I was there.

Last thing, I picked up some nylon washers for the license plate screws. I'd bought some stainless steel screws but they're just a little too long. I could have cut them but I was a little worried about corrosion on the cut edge, the stainless screws you get at the hardware store aren't the finest stainless in then world...

Sunday, March 6, 2016

Golf brakes

Our '05 Golf has had sticky brakes for far longer than I should have left it so yesterday I finally got off my duff and fixed 'em. I'd planned on calipers, rotors and pads, a sticky caliper will quickly ruin a set of pads which ruins the rotor. Replacing one caliper will generally make the car pull under braking so its best to do them all at once.

IDParts had brand new calipers for only a bit more than re-manufactured so I went with those since it'll allow me to clean up the old ones and keep them as spares.

Everything was going fine until:

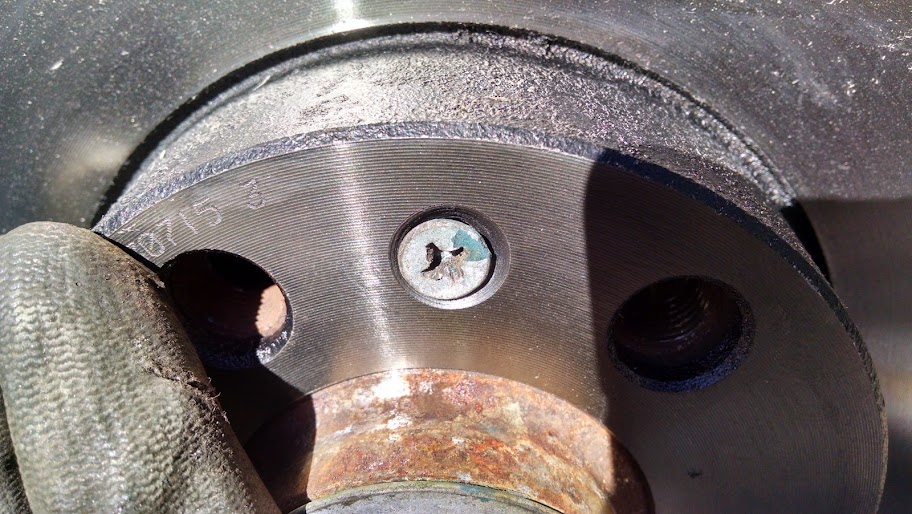
Its difficult to see in the picture but that screw isn't seated all the way. Thats the screw that holds the rotor to the hub. Really its not all that important, the hub and rotor are clamped together by the lug bolts when the wheel is installed, all the screw does is align things when the wheels are off, still it bugged me.


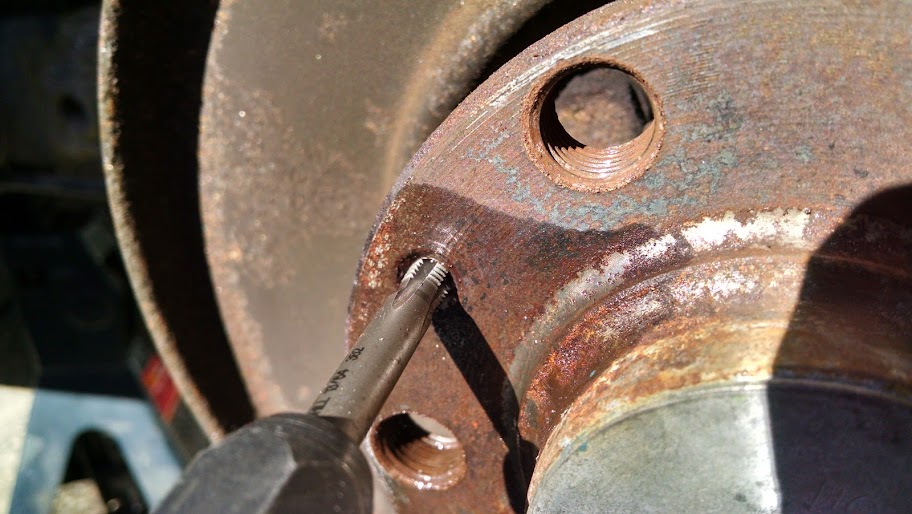
To fix it I used a tap to clean the hole in the hub,


and a die to clean the screw. With them cleaned up the screw seated nicely.


This is actually the heart of the whole problem, this is the caliper mount from the driver's side. Notice the two "bolts" at the top, those are actually caliper slide pins. Notice how the right side is compressed and the left isn't. The pins should slide freely (hence the name "slides") but that right side doesn't. I beat on it with a hammer, cranked it around with a wrench lubed it with Kroil and finally resorted to heat. The heat got it moving and I was finally able to pull the pin, clean out the nasty old grease and add some fresh. Now it moves in and out freely.

 The pin itself

The Golf has floating calipers which means that the two brake pads are actuated by one piston, this is possible because the whole caliper moves to pull on the outside pad. Because of this stuck slide pin the brakes couldn't retract and the inside pad never got released from the rotor. I'd thought this was happening because the parking brake actuator was stuck but you can't really judge with the caliper still on the car...

Anyway with all that work done theres no more squeaking from the dragging pad, performance is much improved and it appears that fuel economy has risen also although that will take some time to really judge.

Now the only mechanical thing wrong with the car is the driver's side power lock actuator seems to be hung up, this is a fairly minor complaint that I'll dig into once it warms up some.

Friday, January 22, 2016

Car fixin

You never really think about your ability to set the fan in the car at different speeds until all of a sudden you can't...

Angie has been driving our 2005 VW Golf and thus it wasn't for some time that I noticed the fan only worked on the high position. She doesn't complain much and since she had a work around she took it. Winter is an especially annoying time to have the fan not work at low speed since a warm car will tend to fog the windshield so I knew this had to be fixed.

The problem turns out to be a common one caused by a failed thermal switch:

 That's the little blue headed pointy thing in the picture. The big green part is the resistor pack that actually runs the fan at lower speed. The thermal switch is there to keep the resistor pack from burning up if too much power is requested.

So I could just replace the thermal switch but that doesn't address the root cause of the problem which is a sticky fan. The 4th generation Golf and Jetta have a tendency to get some water in the fan which gums up the motor, the gummy motor draws more power and pops the thermal switch. So I popped out the fan, cleaned its bearings (well, bushings actually) good with carb cleaner and dripped a variety of lubricating substances in. I saw a YouTube video where the guy used WD40 but WD is "water displacing" its not really a lubricant. I started with Marvel Mystery oil lubricating formula and moved on to PB Blaster in an effort to find something that would make its way into the bushing. Then I reinstalled the fan and replaced the thermal switch.


I was a little nervous about soldering the new switch in, it is a thermal switch after all but I limited myself to just quick touches with the soldering iron and I'd bought a 5 pack of the switches from Amazon so I knew if my soldering didn't work out I could always resort to crimping on another one.

Fortunately I seem to have done a good enough job, the fan has been working correctly for a couple weeks now.

Of course I could have replaced the whole resistor pack, IDParts has them for $35 but for $1 and a couple minutes with a soldering iron I'm well pleased with this fix. If this happens again I'll probably replace the fan, its difficult to get oil in to the bushings on the old fan, although maybe if I used a needle oiler...

Thursday, September 10, 2015

Tire rotation

I'm terrible about remembering to rotate tires. Recently I'd noticed that the rear tires on the Ram were getting kind of worn down. We've put nearly 20,000 miles on the truck in a year so thats not unexpected. Knowing that if I don't rotate them it'll seriously impact their lifespan I knew this needed doing and yet somehow I kept putting it off. So at this point its a bit like closing the gate after the horse is out but I still dragged out the jacks and did the deed.

Having an air compressor and impact wrench makes this job way easier than it would be otherwise as does having a couple jacks. I lifted up the rear end with my floor jack and used the 12 ton bottle jack to do the front one side at a time.

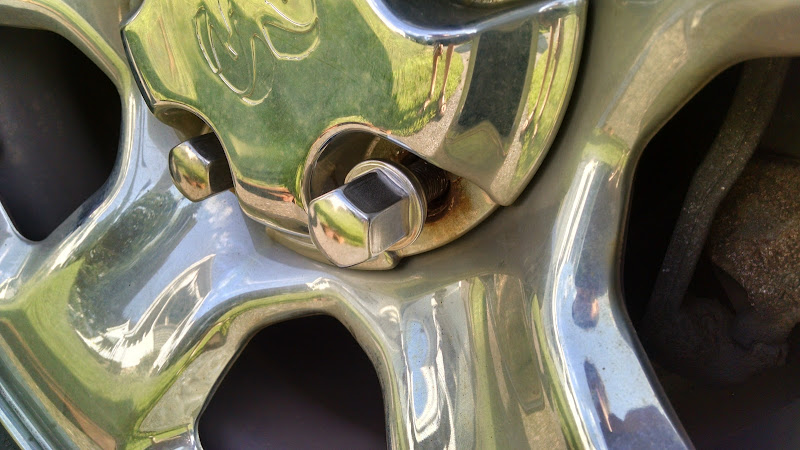
Then tragedy struck, I cross threaded a lug nut and couldn't get it straightened out. The nuts are soft so they don't bugger the studs which are much harder to replace. So off to Autozone where I bought their ONLY Dodge lug nut, lucky day for me.

One annoying thing about tire shops and mechanics in general is that they put the wheels back on using the impact gun. Oh they'll tell you "I just barely seat it with the gun" but when you go to remove you find there is no frickin way. I'm lucky to have a four foot cheater bar that will take just about anything apart (200# guy on a 4 foot bar gives you 1000 lb/ft) but on the side of the road with only a lug wrench this would be a big deal.

When I put wheels back on I snug them up with the gun and finish with a torque wrench

Sure the tire monkeys finish with a torque wrench too but they don't turn the nut with the torque wrench, they just confirm the nut is at LEAST as tight as the wrench is set to. If the nut doesn't turn before the wrench clicks its too tight already. I've never made them back one off but I should, I usually just bring the car home, bust 'em all loose and do it the right way.


With the lugs all set by torque wrench I can bust 'em loose easy with the lug wrench and they won't accidentally come loose while driving...

Wednesday, September 2, 2015

The continuing saga of the Golf

Apparently my mother reads my blog, she reminded me yesterday that I hadn't written anything for awhile.

Before I get started some good news, I'd been using Photobucket to host pictures but I've long been frustrated with the extremely slow Photobucket interface it took forever to access my pictures once I'd uploaded them. So recently I've been experimenting with Google Photos and I'm actually quite pleased with it. As with anything there was a ramp up period but I think I've got it worked out. I'll let you know if anything changes...

Oh geez, I realize I never told you... I bought a 2005 Volkswagen Golf TDI:


If I had told you about it I'd have mentioned that its transmission was decidedly not happy so it was off to the mechanic. I'd bought the car for a cheap enough price that even if I ended up parting it out I could still make some money. In the end we decided it was too nice to part so it got a new transmission. On the way home from the shop I noticed that the speedometer didn't work. That was a relatively easy fix in replacing the VSS or vehicle speed sensor which lives on top of the transmission. It also got a new windshield, I can without reservation recommend the Safelite office in Keene for that job, the guy was great. It was quick, he vacuumed the car, cleaned the windows and found that the goop on the paint (from a leaky roof at the place I bought it) can be cleaned off with polishing compound.

Anyway the last step was to get it inspected. Thats when I realized the reverse lights didn't work, which is a fail on inspection. A little testing proved that the lights actually work but weren't being turned on due to a failed reverse light switch which also lives on the transmission. I got a new switch and put it in but the lights STILL didn't work. A whole day of investigating revealed the problem to probably be the shift actuator:
  

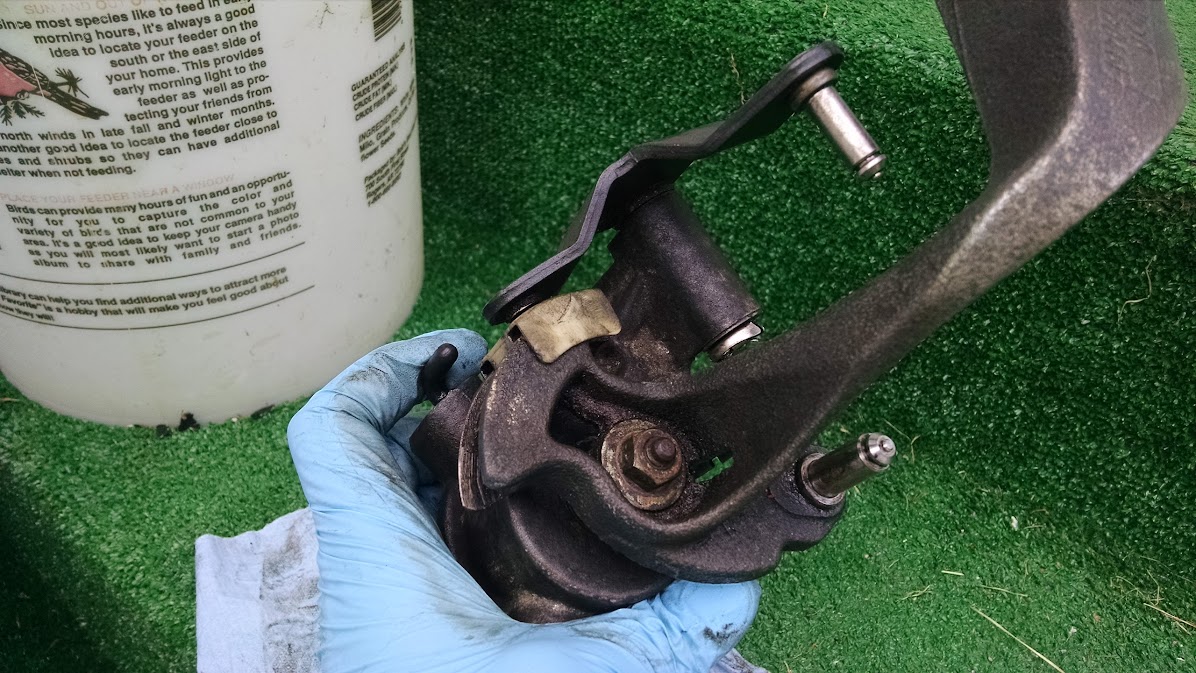
Its the bit that translates the shifter movement into the bits inside the transmission. I had it in and out of the car repeatedly and can't see how it could possibly work. So back to the mechanic and I'm waiting to hear his verdict. This is fix work for him, both the VSS and reverse lights should have been working when he delivered the car to me...

So anyway, as I'd mentioned its a 2005 Golf TDI. Its got about 150,000 miles which is not that much, in fact its 110,000 less than my '98 Jetta. Its got very little rust and that which it does have will be gone once I replace the left front fender that had been hit at some point. The interior is perfect and it even has working AC which is a rarity on my cars. It came from NEAT which New England Adolescent Treatment, basically a program for troubled kids. A friend of mine is the executive director there. They take donation cars and sell them to help fund the program. This is where I got the Jetta too. Both cars were a good price and its nice to help the program.

To keep my spirits up I've puttered around a couple other minor things,

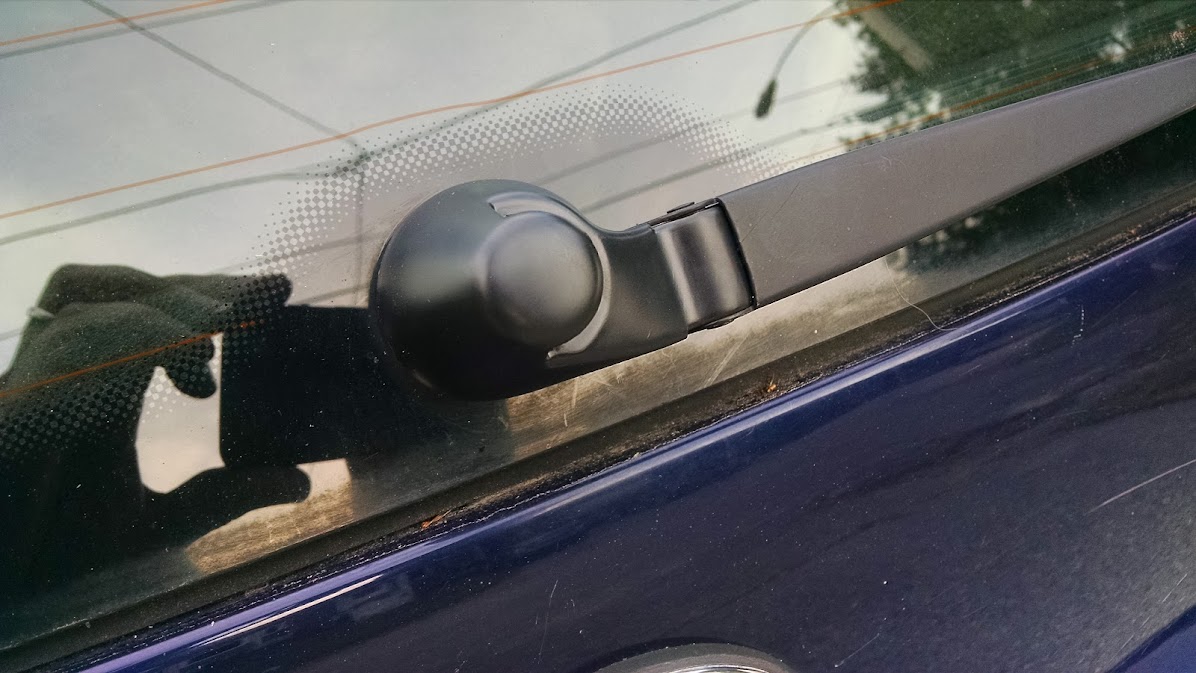
I was surprised to find the wiper cap was available, I also replaced all the wipers. I still need to clean the back seat but other than that and replacing the left front fender the car is basically ready to go. Theres a place in Tewksbury that claims to have a correct color fender for only $100, I need to call them and see if its for real. I like the idea of using an OEM fender but I'll go aftermarket if I have to...

Thursday, July 30, 2015

Oh geez, what now?

I've had my '84 190D for just about 6 years. In that time we've driven it just over 40,000 miles which realistically isn't all that much. Since we've had the Jetta I've been driving that a lot and the poor 190D has sat. Angie drives it some but when compared to the other vehicles in the fleet its really slow and sadly it handles poorly. A 190D thats correctly set up is quite spritely and handles nicely, mine never has done that even after replacing all the rubber components in the rear end.

So since neither of us really liked the car and since the tin worm was really getting its claws into the car I decided it was time to move on. My first step was to email Tom who sold me the Jetta. He runs a program for troubled teens and gets cars donated, because they didn't pay for the car and because they have no history I can generally get a really good deal. Tom had a 2005 Golf TDI with "a transmission problem." that nobody really knew anything about. We agreed on a price and the 190D went onto a U-Haul trailer.


The minimum tax deduction I'll get from the car is just slightly less than the amount I would have asked for the car but its much easier to just haul it down to Tom than to have a parade of tire kickers come to my house and offer me their sympathies but no money. Also it'll help Tom's program do their good work so I feel good about that.

Then we returned with a Golf:


Its actually both better and worse than I'd expected.
The good:
Good tires, perfect interior, good running 150,000 mile engine, very little rust

The bad:
Bent/rusted front fenders, bad transmission

The transmission is the really bad part. When we picked it up I backed the car up about 4 feet and the transmission locked completely. Fred thinks its probably the output shaft bearing on the transmission which has failed and is causing the transmission to lock when torque is applied, if the car is out of gear it rolls nicely. I hauled it directly to KMH Motors in Lowell and let Keith have his way with it. He's going to put in a new transmission, clutch and flywheel. These cars came with a dual mass flywheel (DMF) that is known to fail prematurely so we're going with a single mass flywheel (SMF) instead. This might give some clutch chatter but its probably a good choice, its cheaper too.

You might wonder why we're doing a clutch. As far as I know theres nothing wrong with the one in there but since the engine has to come out anyway this is quite an inexpensive time to do the job. He's also going to replace the rear main seal on the engine, again something smart to do while he's there.

At the other end of the engine he'll replace the timing belt and water pump. On a diesel engine if the timing belt fails the engine is junk. Since we have no history on this engine I don't want a failed timing belt to ruin the engine after putting all this work into the transmission. The water pump is driven by the timing belt, if it seizes it will ruin the timing belt and the engine and its another one of those things that should be done at this time since 90% of the labor is already taken up in replacing the timing belt.

The front fenders will want to be replaced, I need to get a price from a shop on this before I decide if I'll do it myself. Fortunately the parts are relatively cheap. If I had a shop do it we'll use new fenders, if I do it myself I'll get used fenders. My worry doing it myself with brand new fenders is that they won't fit correctly and I don't have the proper skills to get them just right. With luck I'll be able to get the right color in used fenders but even if I can't they should be relatively easy to paint.

Anyway I'm excited about this car, its engine is the Pump Deuse type which makes around 100hp stock compared to the Jetta's 90hp so it should be a little quicker than the Jetta at the cost of a little fuel. For about $300 I can raise that to 124hp just with a computer upgrade which will make the car even faster and might actually get a little of the fuel economy back. Making more power generally means raising efficiency which generally results in increased fuel economy, especially if I can keep from driving too fast. Once more into the breach!

Sunday, January 18, 2015

Radiatin'

A couple weeks ago I took the Jetta to the grocery store. When I came out there was a little pool of pink coolant behind the driver's front wheel. Whoops! It appeared to be leaking from the lower driver's side corner of the radiator. So I had the guy down the street replace the radiator with one I'd picked up.
I no sooner got it home (about 100 yards) and it was leaking again. So last week I got a Uhaul trailer and ran it in to my TDI guy. He pulled out the radiator and it turns out the replacement was leaking in the same dang place as the first one. Furthermore it turns out the mount holes were all rusted out and the problem was that there was really nothing to hold the radiator in place. The bottom mounts are just two holes and the top mount is just two pins. With the bottom rusted out the pins couldn't hold the radiator so it flopped around and thrashed a hole. The TDI guy drilled a couple new bottom holes which set the radiator over half an inch so while the bottom was held good the top pins now missed the radiator entirely.

We zip tied the radiator in place so it couldn't hurt itself and I hauled it home. Once home I made a couple brackets that slot into the top of the radiator and use the original pins so it can't move in any direction. This summer when the weather is warm I'll pull the front end apart again and weld up the original holes so the radiator can use its original mounts again. When we had it apart I noticed the frame horn on the driver's side is rusted out so I'll weld up that too.

No pictures of this sadly and I've missed a couple days of writing with all the excitement, now I've got to write a couple things to make it up...

Tuesday, January 6, 2015

190D back to legal again

Since I haven't been driving my 190D it's legally inspected status had slipped so yesterday I set out to wrest it from its sleep and get it inspected. It was a mere 25F when I went out but the car started nicely enough. Unfortunately there was some ice on the inside of the windshield so I let it run while I scraped the outside, then left it running and went inside to warm up.After the ice had some time to melt I started checking all the inspectables, lights, horn etc. everything was good until I tried the washer and found a no-go. Started digging in and found the whole system was frozen up solid.
I dug out the bottle and brought it in the house. It took a lot of hot water to melt the green Rain-X out. Apparently its not rated for below freezing...With the bottle clean and charged with good orange Rain-X I could finally hear the pump running but now water was spraying out from a white thing in the line, is that a check valve? Turns out its plastic housing wouldn't stay clamped, a couple zip ties fixed that. 
Finally the last few inches of hose had to spend a few minutes inside my coat to melt an ice plug.

Only took an hour an a half but we finally passed inspection. Then made a run up to Keene to get coolant for the Jetta's radiator replacement. I'm going to let a local guy do the replacement, its gotten all the way up to 12F today and since my car has AC the whole front bumper has to come off for the job, not a big deal but not something I want to do outside in the cold...