Friday, January 22, 2016

Car fixin

You never really think about your ability to set the fan in the car at different speeds until all of a sudden you can't...

Angie has been driving our 2005 VW Golf and thus it wasn't for some time that I noticed the fan only worked on the high position. She doesn't complain much and since she had a work around she took it. Winter is an especially annoying time to have the fan not work at low speed since a warm car will tend to fog the windshield so I knew this had to be fixed.

The problem turns out to be a common one caused by a failed thermal switch:

 That's the little blue headed pointy thing in the picture. The big green part is the resistor pack that actually runs the fan at lower speed. The thermal switch is there to keep the resistor pack from burning up if too much power is requested.

So I could just replace the thermal switch but that doesn't address the root cause of the problem which is a sticky fan. The 4th generation Golf and Jetta have a tendency to get some water in the fan which gums up the motor, the gummy motor draws more power and pops the thermal switch. So I popped out the fan, cleaned its bearings (well, bushings actually) good with carb cleaner and dripped a variety of lubricating substances in. I saw a YouTube video where the guy used WD40 but WD is "water displacing" its not really a lubricant. I started with Marvel Mystery oil lubricating formula and moved on to PB Blaster in an effort to find something that would make its way into the bushing. Then I reinstalled the fan and replaced the thermal switch.
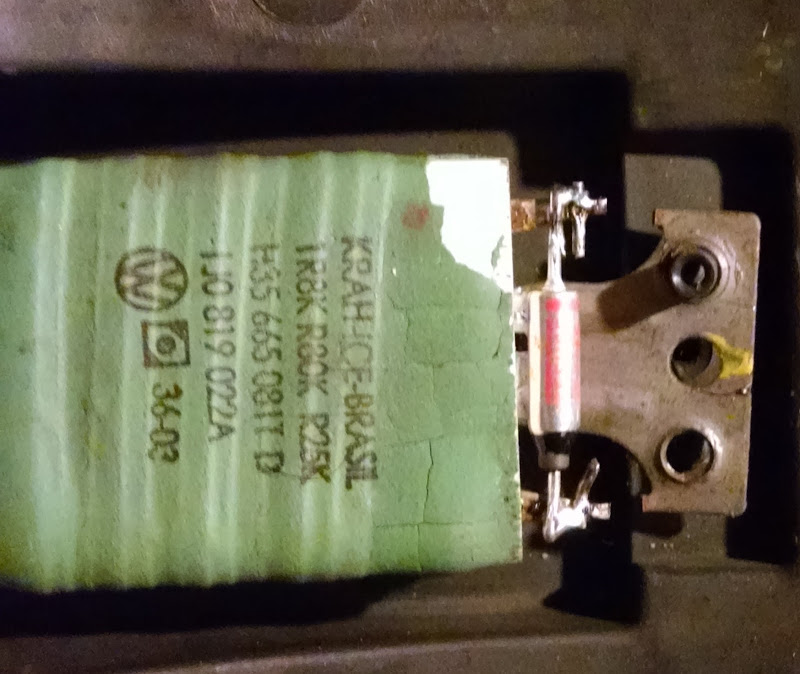

I was a little nervous about soldering the new switch in, it is a thermal switch after all but I limited myself to just quick touches with the soldering iron and I'd bought a 5 pack of the switches from Amazon so I knew if my soldering didn't work out I could always resort to crimping on another one.

Fortunately I seem to have done a good enough job, the fan has been working correctly for a couple weeks now.

Of course I could have replaced the whole resistor pack, IDParts has them for $35 but for $1 and a couple minutes with a soldering iron I'm well pleased with this fix. If this happens again I'll probably replace the fan, its difficult to get oil in to the bushings on the old fan, although maybe if I used a needle oiler...

Friday, January 8, 2016

Lamp oil

With the onset of winter I always try to be prepared should we have a big power outage like back in '08. That time we were without power for a day and a half which was quite bearable with minimum supplies but if it'd have lasted much longer we wouldn't have been so well off. These days I keep more supplies around just in case. One of those supplies is kerosene, the other is lamp oil.
I use lamp oil because kerosene by itself smells pretty bad, even in the Aladdin lamps that are designed to burn it. This is especially noticeable in the summer time, when its warm the lamps will off gas a little and can really stink up the room. To fix that issue in the summer I drain the kerosene out and put just a bit of lamp oil in.
Lamp oil is derived somehow from wax, when you put out a lamp burning lamp oil it smells like you're melting crayons. The problem with anything made from wax is that it has a relatively high temperature at which it'll turn solid, its waxing temp if you will. So to get around that I've been mixing some kero with my lamp oil. This also helps to control costs, the lamp oil is SUPER expensive, like $5 a quart. Kerosene at the hardware store is expensive too but at $10/gallon its about half the price of lamp oil. I can get Jet A at a local airport for $4/gallon, Jet A is basically very low sulfur kerosene, it burns well with low odor on its own. I haven't Jet A in an Aladdin lamp yet but I've burned a lot in Colman and Tilley lamps and friends assure me its good in wick lamps too. Using Jet A my cost comes way down and I think I can reduce the percentage of lamp oil since the Jet A doesn't smell too bad anyway.


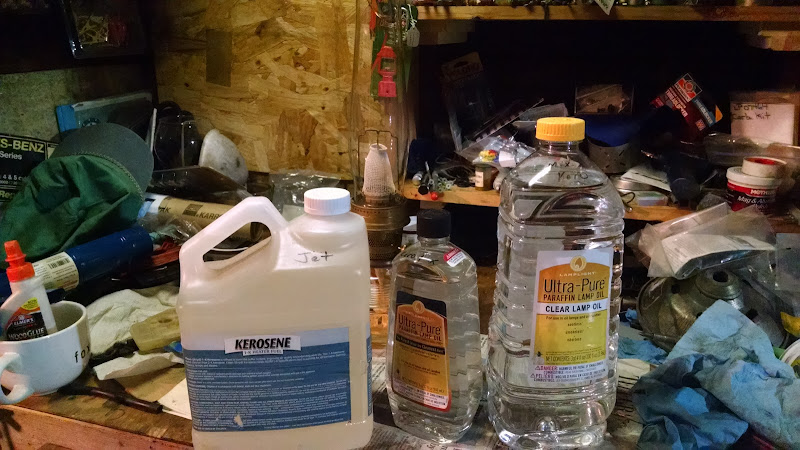
Anyway on a recent evening I picked up a new bottle of lamp oil, its the big one on the right in the picture. The little bottle in the middle is full of a 50:50 mixture of lamp oil and kerosene, the kero came from the bottle on the left which you can now see is marked "Jet". I refilled the kero bottle with Jet A because its easier to pour out of than a bigger jug. The big bottle has about 30 percent kero and 70 percent lamp oil.


I took this picture this morning, the temps were hovering just about freezing although the interior of the garage hadn't really warmed up yet. You can see the large bottle with the 30:70 mix has turned solid, its real hard, like ice. The smaller bottle is still liquid, no sign of gelling or waxing at all.

So the extra percentage of kero in the smaller bottle is clearly doing its job.

Here's the result:


Burning well, basically no scent. There was a little smell when I first lit the lamp but once it warmed up all the way the smell was gone. I've had it burning for about four hours now and its steady as a rock.

Tuesday, December 22, 2015

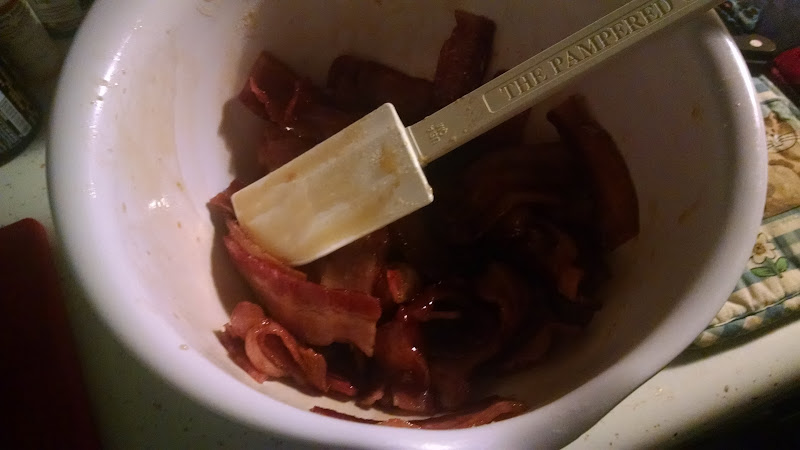
BACON!

Some of our friends invite us to a cookie party every year around Christmas. The idea is you bring a dozen or more cookies and go home with a mixed bag of cookies that everybody else made. Its pretty fun and we really like going.

The first year we went I tried to make bacon cookies. The plan was flawed from the start I didn't really have enough time so I tried taking pre-made sugar cookie dough and stuffing bits of cooked bacon in it. In the end I had really thing crunchy cookies with overcooked bacon inside. Since I had some extra bacon I coated it with maple syrup calling it "candied bacon". The cookies were blah but the candied bacon was a big hit. The following year I refined the technique and today I've got it down to a science, so to spice up your parties heres my magical candied bacon.

This year I used 3 1/2 pounds of bacon but more is of course better. Cook the bacon halfway. I do it on baking sheets in the oven, this step takes around 15 minutes, I use two pans and rotate them between the two racks halfway through. For easier cleanup line the pans with aluminum foil.
While the bacon is cooking put 2 cups of maple syrup in a pan, add 2/3 cup dark brown sugar, warm the mix until the sugar dissolves.

When the bacon is all half cooked cut it into 2-3 inch strips, put in a bowl with the maple syrup, stir and let it cool some.

Pour the bacon grease out of your pans (keep the same aluminum foil), put bacon on a single layer in the pan and cook for another 10 minutes or until the bacon is completely cooked. Let the bacon cool in a container before you transfer it to another container for eating. This step is important as the bacon will tend to stick together while it cools.


Friday, December 18, 2015

Something NEW

Well its been a whole day and my pics still show up Picasa may have saved the day...

So lets get something new on here, first an update.


You might remember when I built the mk2 mod2 wood rack for camp that I cut enough wood to make two of 'em. This is the other one installed at the house. The mk1 it replaced is actually in pretty good shape, I'm going to push it over to the side of the yard where the big woodpiles are and use it there. I've had terrible luck building woodpiles this year which is to say my wood piles have had a tendency to fall over this year so I'll use that once its full of wood as a brace for the other piles. We've had a heckuva lot of rain lately and I'm sure glad I built this new rack.

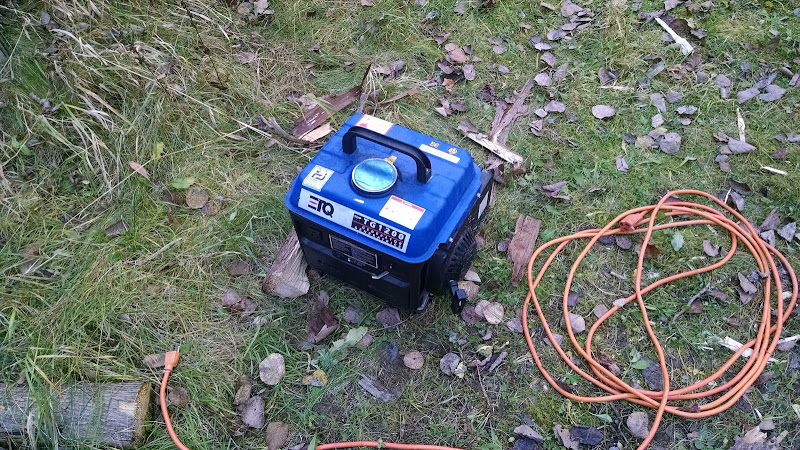
This here:


is a Chinese made ETQ 1200w 2 stroke generator. I picked it up in 2008 when we had the big ice storm. I ran it a couple times just to make sure it ran but never really used it as such. I'd planned to take it to camp a couple times but kept forgetting. In November I finally took it to camp. We've got a little solar electricity system at work (more on that in another post) that isn't really big enough for our needs in the fall when the sun is low in the sky so I hauled the generator up so we could use it top off our batteries. The battery charger only provides 6a at 12v which is only 72w. The generator is rated for 8 hours of run time on 1 gallon of gas at 50% load. I figured it'd run a good long time with this teeny load on it.

So I got it up to camp and went to fire up when the fuel petcock broke right off.
 Fortunately our local CarQuest (now Advance Auto, *sigh*) had a replacement:

The only problem was that the replacement drains from the side and the original went out the bottom so the gas line was a little short. It worked well enough that I didn't worry about it at the time, once I got it home I replaced the line with one slightly longer. To do that the airbox has to come off. Two of the airbox screws also hold on the carb in place and just as I started to reassemble things I managed to break the seal between the carb and the engine tearing the gasket. Fortunately I had some gasket paper in pretty much the same thickness as the original and within a few minutes I'd made a new gasket.


I find making my own gaskets very satisfying, I didn't have to wait a week for parts, all I needed was a pencil, scissors, utility knife and a punch. I didn't have a punch big enough for the carb throat but it wasn't so hard to cut that out with the knife and get a pretty good circle.

Sadly the generator doesn't like to start now, and by now I mean from the time I replaced the petcock. I think the carb has some varnish built up in it and I really should take it all the way apart, give it a good soak and put it back together. I'm reasonably sure thats going to mean some more seals will get ruined but I'd like to have the thing reliable in case Angie needs it while I'm away. Back when I first bought it it started real easy but now it wants a shot of starting fluid into the carb every time it starts. Oh well, I might as well give it a try right?

Thursday, December 17, 2015

Oh Google, you're going to make me drink

So the pics clearly are not fixed, or not reliably anyway. Strange that some of my Google Photos show just fine and some don't.

Anyway today I discovered that since Picasa is part of the Google family my Google Photos are available through there. Perhaps I can get Picasa to give me clear links to the photos which Google Photos won't.

Turns out that Picasa will indeed provide a clear link. Heres an example of what I'm talking about. Here's a picture of potatoes harvested from our garden:


Here's the link Picasa provides: https://lh3.googleusercontent.com/-YCXP_OgIDJs/VdH5KfSZ3-I/AAAAAAAAAgc/thAfLdZJvqI/s800-Ic42/IMG_20150817_100726153.jpg

Notice how it ends in "IMG_20150817_100726153.jpg" this is what I refer to as a "clear link", meaning its an actual web path to the actual file residing on some server somewhere.

For the same image Google Photos provides: https://goo.gl/photos/A9nPix8cVc67MDn49
This is not a clear link, it takes you to a web page, not the picture. I got that using the "share" link in the photo, the alternative is what I did with Picasa, right click on the image and choose "Copy image address" which is something it would appear Google doesn't want you to do because sometimes you need to right click two, three or four times before you can get that option. Anyway the link it provides looks like this: https://lh3.googleusercontent.com/NJEes5mtUxLWrPHn0tAbFdGnUw0pdccXbdWnFOnqN8Nx9XhW_sWwAeOEEQOGMqU8DV9IGkld4pmXOlnGZ8w39ZBi0Dn_gfIKUd-wsQd8oPBPYxSPWMRFJKDz7XhQd9hSlHjdMLv815pEMRze7ZgU-imMMZ5uimU4GAeMf-yGtrsRyW4FdRYsuyeMKLvA28alg_gEAucDbhIOM_JkfEzdu8RbMTCux3CqtqT_R5myHkBDq04XQWkHOqL1LvwUKcWF0a-xWJZ49NCwKyGTktf7IiFJTbFGofe23v7-vDSJj6yaeovmv-Q4pf-nQ5m_8qyn7Manx0h52lel7IrQart3uLi52INL6jEfn4XQYUFns-CZE5YoL_1xaGQBcl11CK5p4H9wYGkD3k_LTgJ2d3Ww5QJG12rMZRmq1VlIHafT91f3G5aqT7uqPZ9lyxW2QXCGSdJqfX9sS66CsTl2qc9mvxcmCbd8AE5LmKYGsrppdVu4bvHlI4tzUNANew2ggB_DayxAU532I_Kg3VP6NJB2LA-0zma5Dqf6QMDWjUWP0TDsgzb_7Z-N4silHcjljJyyCm83=w1216-h2158-no

which is sort of a direct link in that it takes you directly to the photo but it isn't a clear link because theres no file name in it. Because theres no file name its useless for posting pictures on webpages and I think this is the reason Blogger has been having a hard time with it. Interestingly my wick lantern post hasn't had half the issues some of the others have and I don't know why...

Anyway hollar at me if you can see the pictures on the first couple posts below, if it doesn't work this time I'll go back to Photobucket. PB has a pretty good system for providing clear links but their web page is soooo sloooow it takes forever to work with. I think they do this so you'll click on the ads, but thats not working for me at all...

Sunday, December 13, 2015

Pics is fixed

Okay gang, looks like I got all the pics worked out. If you find any that don't show up let me know so I can fix them!

Wednesday, December 2, 2015

Stupid Google Photos

Google owns blogger so you'd think it'd be easy to use Google Photos to share my pics with you guys, not so apparently.

Somebody mentioned that they couldn't see my pictures. I took a look from my phone and couldn't see them, rats. So I logged into my computer and COULD see them. Thats odd right? So I logged out of my Google account and now I can't see the pictures.

The odd thing is that I actually have 2 Google accounts and I can see the pictures if I'm logged into either of them but not if I've logged out. So apparently I've got a setting wrong somewhere but I'll be dammed if I can find it. Google is surprisingly no help at all, they apparently don't know that Google Photos exists, they only ever reference Picasa which I think is dead now anyway...

So the search for a good photo host goes on...