Showing posts with label house repair. Show all posts

Thursday, September 3, 2026

Well geez

 Continuing the theme of everything breaking, here's this week's foolishness.

Monday: 

Sure looks like we got our money's worth from those brake pads, huh? This is our 2018 RAM 1500. Unfortunately, it started making noise while we were away in Maine.

Anyway, brakes, especially front disc brakes, are pretty easy. Well, until...


Those of you who have been here before will recognize the effort here. In short, the rotor was stuck to the hub. If you look at the braking surface, you'll see a bunch of dents. That's where I hit it with a hammer. You can't see that I'd already heated it with the torch. Yes, the hub got a little scarred up. No, I'm not going to do anything about it. The other side was pretty much exactly the same, although it shed a lot less rust while I beat on it.

A real bastard of a job, but not really that hard. My local Federated Auto Parts supplier, shout-out to Fisher Auto Parts, had the pads and rotors on hand for only $25 more than Rock Auto. Rock needed 3 days to get them here, and I feel better about buying local anyway.

In other news, Tuesday:


 This is the pipe from the intercooler to the EGR on our 2005 VW Golf TDI. Just above the VW symbol, you can see a little bent metal clip. That's what holds the pipe to the intercooler. After 20+ years of restraining 13+ psi, something has worn down, and it'll no longer hold the pressure. Its real exciting when the pipe pops off. There's a big pop accompanied by a smoke screen from the tailpipe. Meanwhile, the engine sounds like it's on the verge of explosion.


 Fortunately, the aftermarket has addressed the issue. A simple metal bracket with 2 bolts, 2 spacers, and a new O-ring. It's not really an O-ring since it's not circular in cross-section, but they call it an O-ring, so whatever.

The holes for the bolts already exist in the EGR, so this is a pretty quick fix, made only a little longer by forgetting to put in the O-ring. I did put a little blue Loctite on the bolts. I'll check them when I change the oil, but I don't think they're going to back out. 

Okay, last one- well, two, I hope... Wednesday:


This is the output pipe from the kitchen sink. The side that doesn't have the garbage disposal. The circle on the right used to be the nut that held it in place. It tore apart as I tried to tighten it.

The circle right under the pipe is the "Tailpiece washer" which was somehow messed up. I don't know what happened to it, but it wouldn't seal anymore.

I'm sorry I wasn't good about taking pictures. As you might guess, I'm a little salty about this...

Anyway, the tailpiece is the bit that attaches to the strainer what drains the sink. I damaged the old one getting it apart, and the instructions for the new one specifically mention the tailpiece washer but, annoyingly, the replacement tailpiece doesn't include one. Fortunately, on my second trip to the hardware store, I mentioned it to the clerk, who knew what I was talking about and where to find it. I was going to bodge it back together with a bunch of sealant. I still used a bunch of sealant. There was a zero percent chance this was going to leak again.


 Okay, I wasn't going to take a picture of this one, but I figured we ought to be complete...

Looking down into the toilet tank...

The hose is the filler for the tank. It jets down into a tube. I don't know why. When I was a kid, the riser pipe had holes in it. Now they all seem to have a hose. A couple of days ago, there was a little pop, and the toilet got louder while it was filling. This exact thing happened at Cushman house back in May, but that hose just has a little clip. This thing is way over-engineered. Apparently there was some kind of tab inside the cap that held it to the tube under it. The tab broke, and now nothing holds the hose to the tube. I haven't even tried to buy a replacement. I suspect it only comes as an assembly. Two quick holes drilled, two zip ties installed, and we're done. I probably didn't even need to drill the holes, but the zip ties I had in my hand were too short, and I didn't want to go back to the garage for longer ones. I'm not even going to cut them off.

*Sigh*

On a positive note, after Wednesday's repairs, we went for Chinese food. Winchendon finally has a decent Chinese restaurant. If you're ever passing through Koi is worth the stop.

Wednesday, September 20, 2023

Progress on the great northern estate


You might remember the house and barn we bought in northern Maine. After mucking about for a couple years I finally made contact with the builder who worked on our camp and got him to work on the house.

Step one was to put garage doors on the south end of the barn.

The original builder never bothered to put doors into those openings, they were covered with a kind of conveyor belt like matting used for making paper. This spring I spotted a raccoon sneaking in through a gap and knew we needed to do something.

One substantial application of money later and we've got doors. If you look carefully you'll notice that the cap between the garage doors and the hayloft door has increased. The door openings were originally 9'x9'. Nine foot tall garage doors are very expensive, like double the price, so our builder shrank the door opening a foot and put in 8'x9' doors. We don't need the big height here because of the big barn doors on the east and west walls which allow the tractors to pass through.


Looking back at these old pictures I'd forgotten how much stuff was in the house...

The next plan is for the kitchen and bathroom. As a summer house you could get away with bad windows and no insulation in bedrooms but you can't really use a house that has no kitchen or bath.

Of course the first step is demolition.

This is ahead and to the right of the first picture above. I actually did this work, there was a little stub wall where the ladder is, which I removed. The window in the left of the picture has been removed. That's the north wall of the house which is the coldest so a window there is kind of silly. The window in the center of the picture has been replaced with a larger one.


This is facing into the bathroom looking north. The window pictured here has been replaced with one just over half the height. I like having natural light in the bathroom but there is no need for a big window. This door is new, this used to be the "stairway to nowhere" which went up and stopped at a chimney with little steps up to the right and left to get into bedrooms.

Looking into the bathroom facing west, this is where the door used to be. The shower will be just on the other side of this wall. We decided to go with a stand up shower rather than a tub, who takes baths anymore?

I talked to the builder this week, the drywall is all hung and kitchen cabinets are ready to go in. This project has consumed way more money than I expected but this is really the most expensive phase of construction because of needing to buy things like cabinets and the shower and whatnot. Hopefully in a few weeks I'll have an update where things are going in, not just getting torn apart.

Tuesday, July 18, 2023

Well that was weird

 Growing up my family had a gas stove with a wall mount oven. The two were separated but both fired the same way, propane from a tank outside. Since moving out on my own I've only had electric stoves, our apartment had an elderly push button range, our house has a glasstop Whirlpool unit.

Not so long ago I was sitting in my recliner reading while dinner cooked, from the kitchen I heard "BZZZZT" and saw a bright light. Fortunately Angie was sitting by the stove, jumped up and shut it down.

Upon investingation I found:


 I'd never really thought about how an electric stove/oven burner works. Of course I knew that there was a wire that got heated but it had never occurred to me that of course that element has to be insulated or it will arc to the frame of the stove.

So what happened here is a failure of the coating allowing the angry pixies to get out of the element.

Looking online there are lots of options for replacement burners. The official Whirlpool replacement is around $60. Aftermarket get as cheap as $15. 

I went for a $25 unit. These are super easy to replace, two screws and then the two wires above, pull the failed on out and put in a replacement.


The new one is thinner than the original but it's otherwise the same size and hooked up the same.


It works perfectly, there must have been some kind of coating on it but that burned off quickly with just a little smell. As of this writing it's been working fine for 3 months. Chalk another one up for the do it yourselfer, cheap and quick replacement.

Sunday, September 5, 2021

Things have escallated

 Oh the joys of working on a 100+ year old house.

For my next magical trick I decided I ought to jack up the enclosed porch, it had a case of the sags...


It's hard to tell from the picture but it sags to the front and to the center. The sag had then caused the step under the door to tip in which let water in and rotted the step out.

I started jacking under the left side, the corner in the front of the picture. That went pretty well, I've done work like this before and we have the right equipment for the job.


This is the "small" jack, it's a 4 ton unit, handy for these kind of jobs because it's short. We've also got a 6 ton that is a little beefier and a massive 12 ton for big jobs.

It's important to put a piece of scrap lumber between the jack and what you're jacking to prevent these kind of problems. However this was just a symptom of a larger issue.


That south end of the porch was just rotted away to nothing. The beam was a 6"x6"...

The last couple feet of the beam were still good so I opted to keep it. I went underneath and added a 4 foot section of 2"x8" and then put 174" of 2x8 to replace what we had removed.


With 6x6 beams in short supply I opted to use 4x 2x8s to make up the thickness. They match up nicely to the beam that remains while being a little bit taller.


The porch sits on these pipes. I think the screw part was an attempt to make the height adjustable but years of sitting outside have seized the threads. We ended up cutting off the part sticking above the pipe.


I cut these plates to go between the pipes and the wood to keep the pipes from pushing up into the wood. They're 4" wide and 7.5" long to distribute the load. I'm not sure of the thickness, probably 1/8", less than 1/4" certainly. For now they're just held in place by gravity but I probably should tack weld them to the pipes, they're kind of annoying to handle while jacking up the house.


The trim boards came apart when I removed them so I made new ones, they're just 1x6. The new step is 2x8 left over from the beam replacement. It fits perfectly for height. I had to cut away more on the right than the left to get rid of some rot. In retrospect I should have made it go all the way under the trim boards. I may revisit this again later, I was fighting rain and just wanted to get the job done. You can see we'll need to replace some flooring at some point in the future.

We had just a little paint left over after painting the house so I slapped it into the new work to protect it for the winter.

Also on the list for this trip but not photographed were a new light in the kitchen. The thing that was there hung on a chain right at head level so it had to go. I also finally replaced the door handle on the screen door. The inside handle was broken which made getting out a tricky proposition. Finally I put in a couple screws where the screen door was broken. The previous occupant had "fixed" it with tape. Maybe in October I'll take it apart and glue it for a better repair.


Wednesday, July 21, 2021

A secret revealed

 I've been hiding something from you, something that has eaten up a significant amount of my time and energy. Actually, some of you probably already know about this but for the rest of you.


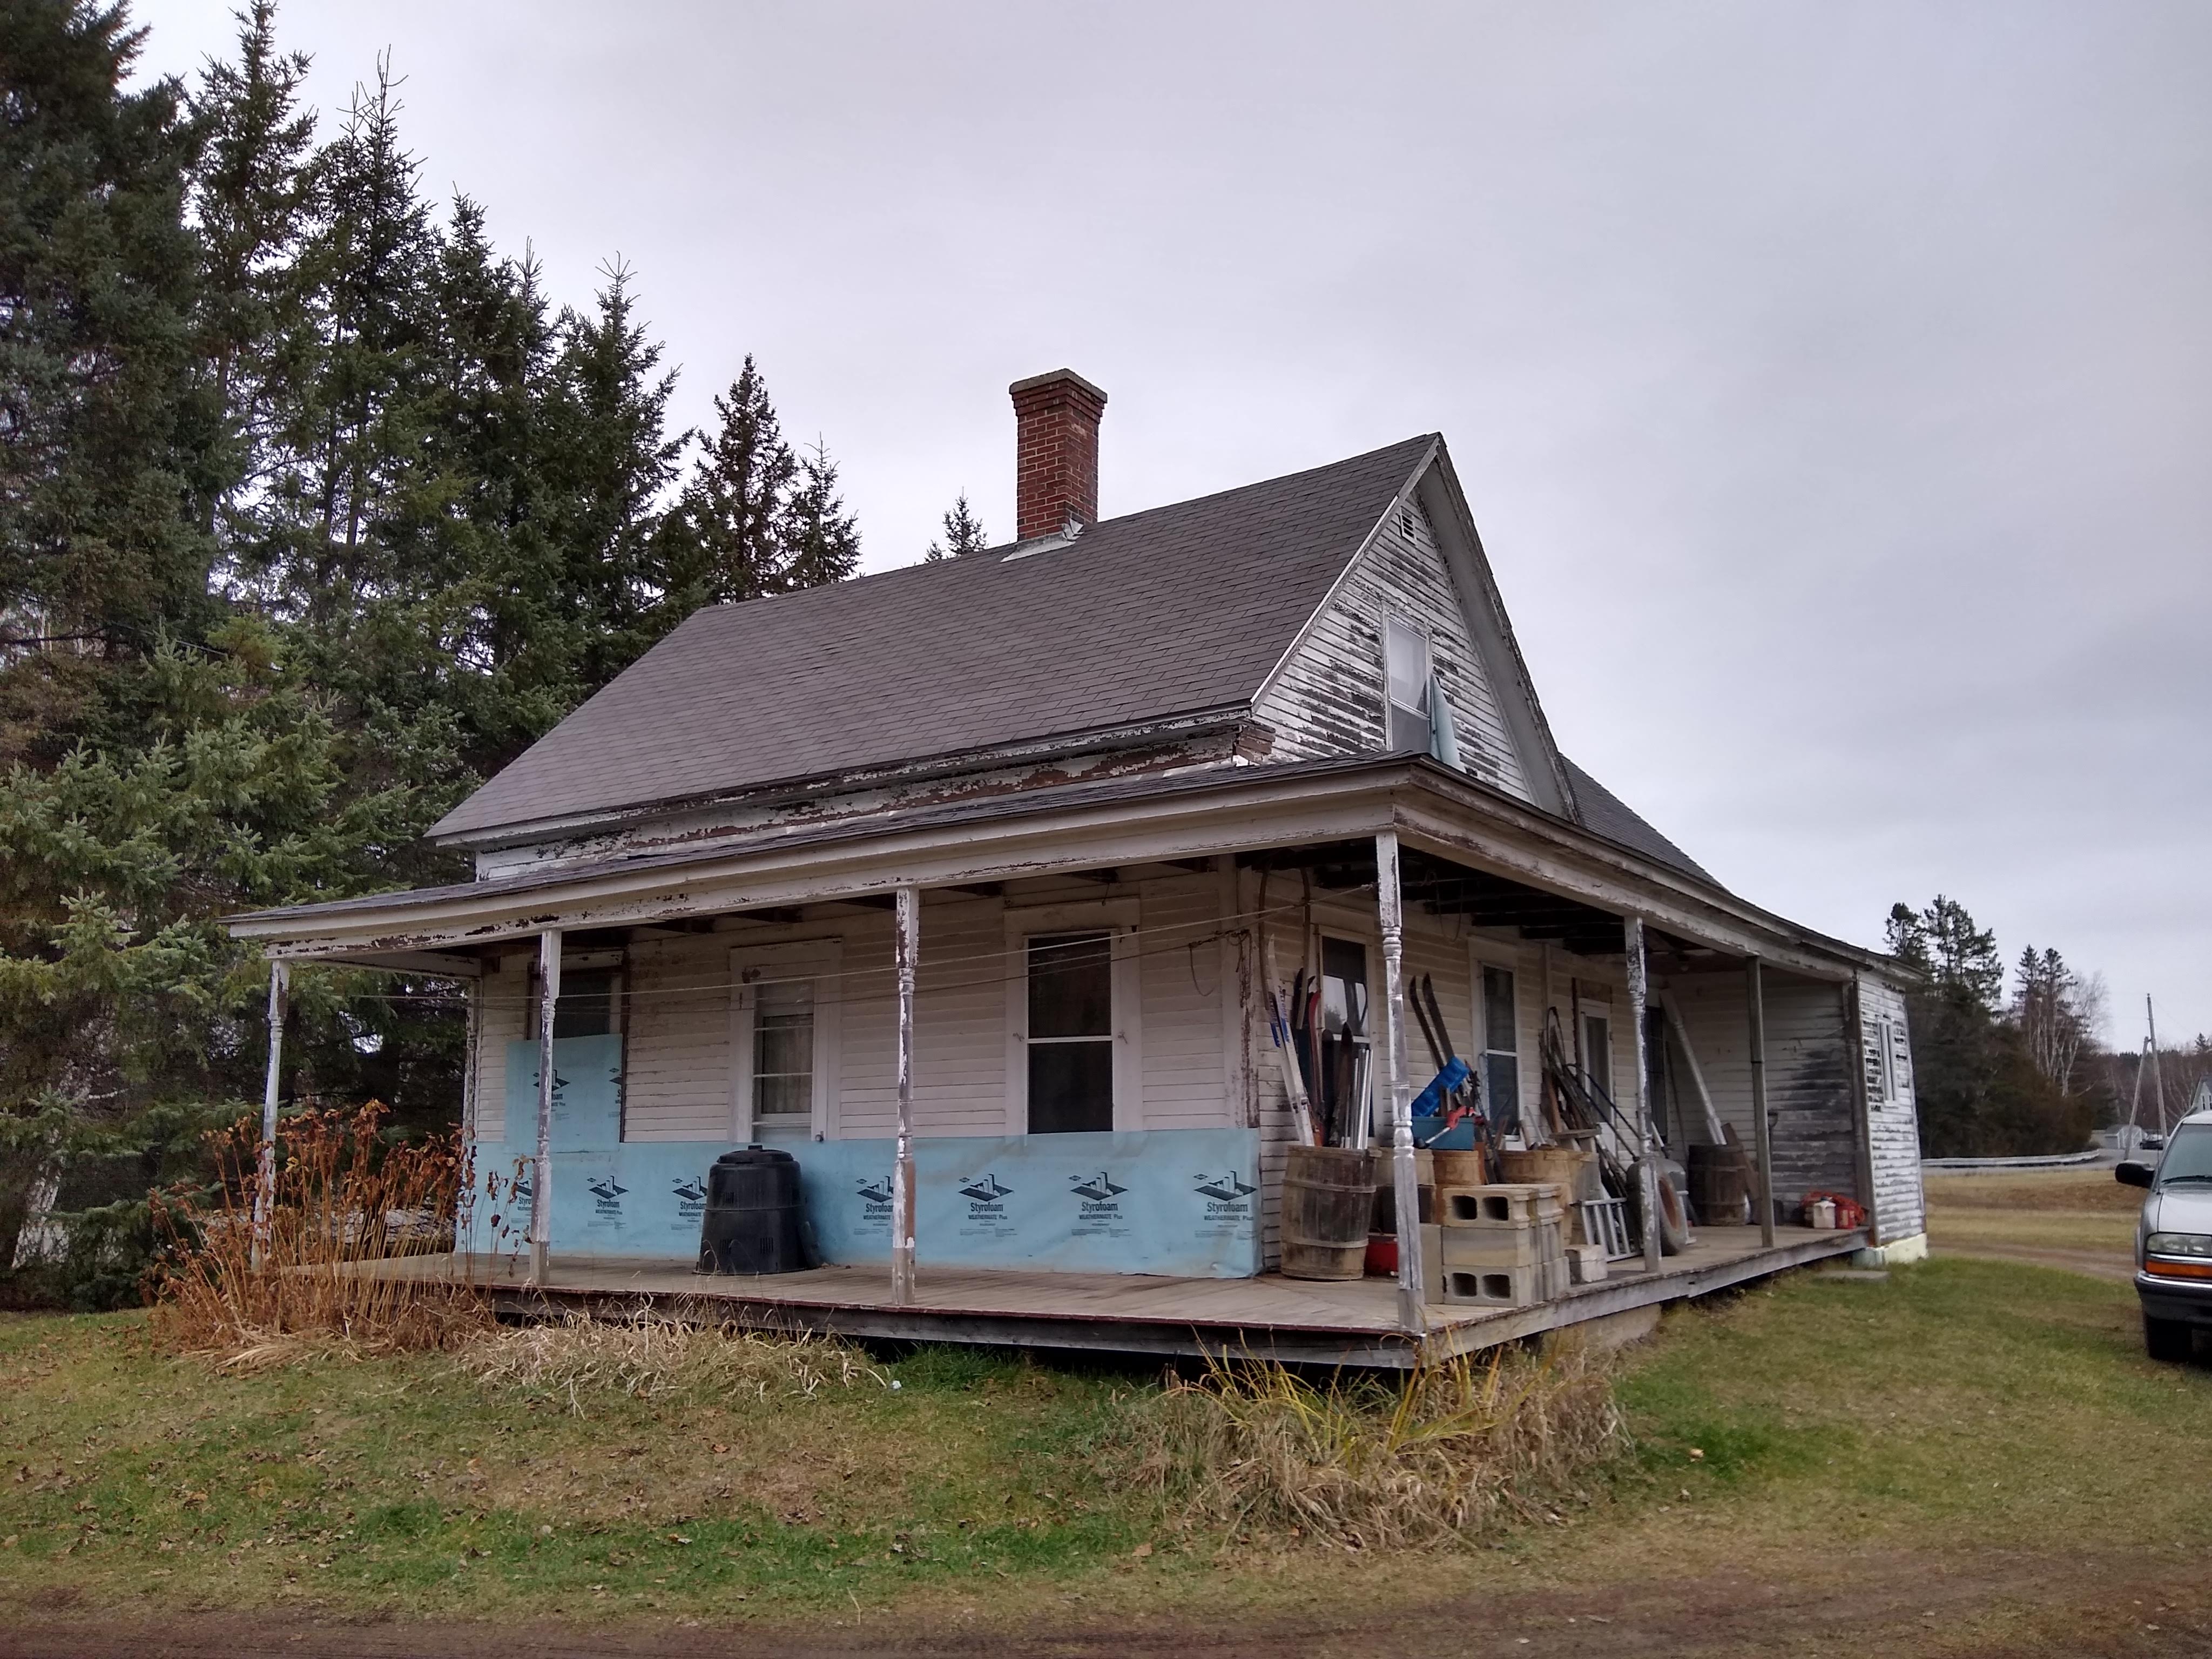
This is the Cushman house, the parcel of land it sits on wraps around the southern end of our property. Last fall we got word that it was for sale at quite an attractive price. Dad asked me what I thought and I replied "If you don't buy it I will."


The house is originally from about 1888 but was added on to before 1920. We know that because the last owner's grandparents moved there in 1920 and the addition was already there. In this shot we're facing south west, this is what I call "the new house" because its the addition.


Facing north west, this is the original house. I haven't gotten pictures yet but from the basement it's easy to see the separation, the original house sits on hand hewn beams that are basically trees made flat on one side. The addition is sawn lumber. The house is kind of sad, not much has been done to it for the last 30 years.


The barn is a completely different story, it was build around 2007. We actually watched it's construction over several years.

The south face of the barn still doesn't have doors, that black stuff is fabric. The previous owner joked that he never did anything with the doors because "the town might jack up the taxes if it was actually finished."

The first time dad I went into the house we expected it to be musty and moldy. It's an old house and the last occupant was an elderly widower. We were surprised to find it dry and not smelly, the floors don't squeak or bounce and although nothing in the house is square there isn't anything structurally wrong with it.

Knowing that the house was sound I spent the whole winter pondering. Our first notions were to knock the place down or to sell it. In the end neither really suited, its too good a house to knock down but not really valuable enough to sell and in selling it we lose the barn, you couldn't really sell the house without the barn...

So this spring, like an idiot, I decided it needed painting.


We spent a whole day power washing and scraping paint. Remember dad's power washer? This is why I took the time to get it going.

Another day was spent masking windows. I planned to spray the paint on and I'm really glad we did.


An airless paint sprayer is basically a hydraulic paint gun. The pump pressurizes paint in the hose and it atomizes when you pull the trigger on the sprayer. This allows the pump to draw paint directly from a bucket which simplifies reloads.


With the sprayer we were able to paint the whole house in a day.


This is the north face of the house and one I really wanted to get right as its the most visible from the road. You can see the huge difference the new paint makes. I left the insulation on the window at the bottom right since that window is in the bathroom, right next to the toilet. Eventually that window will be replaced with a small window, high in the wall. It'll give some light into the bathroom but will be more private.

The whole house takes about 6 gallons of paint. With 10 gallons we painted almost everything twice but ran out of paint before we could make a second coat on the high up areas. The spraying took 2 days but the first day we only painted up about 8 feet. The explanation of that is a story in itself...

Anyway, whats next? Well I've already bought a new water heater. The one in the house was turned off 30 years ago because "it cost too much to use" and sat full for all that time. The state of Maine had a great rebate on a hybrid water heater so one is now there waiting to be installed. After that the house needs "a new everything" starting with the kitchen and bathroom. I don't have good pictures but the kitchen was torn apart 30 years ago and never put back together. The bathroom is basically functional but really ugly.

After that it'll be a long term project reworking each room, replacing windows and adding insulation. Hopefully improving the livability and maintainability of the whole place. The thinking is that we really can't make the house any less valuable than it is right now so why not give it a shot...