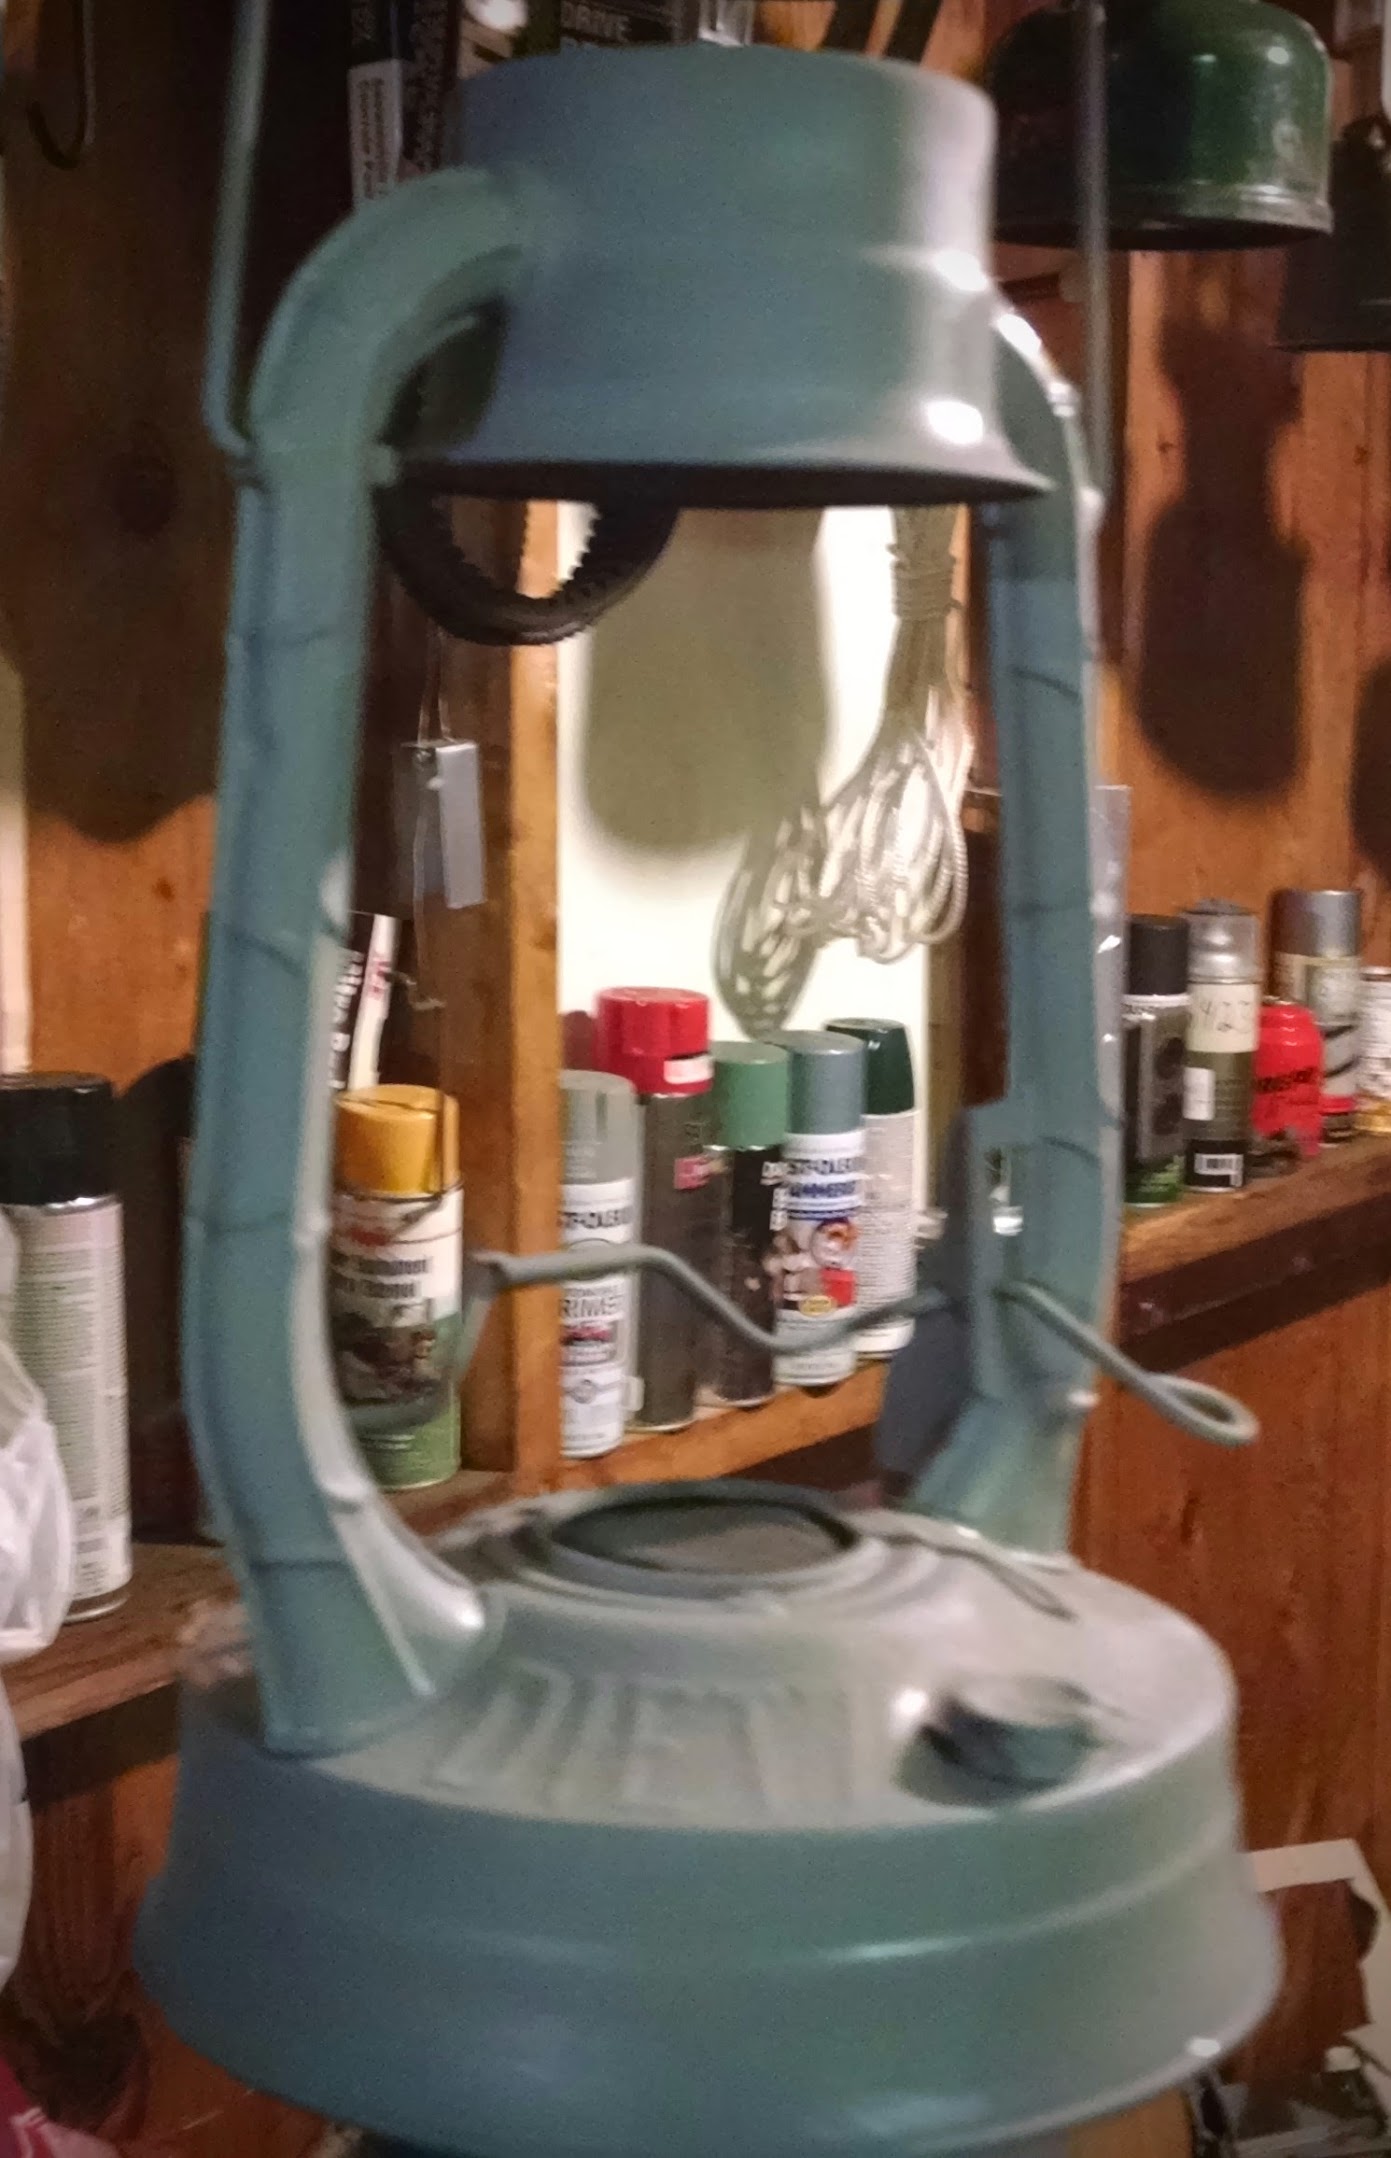
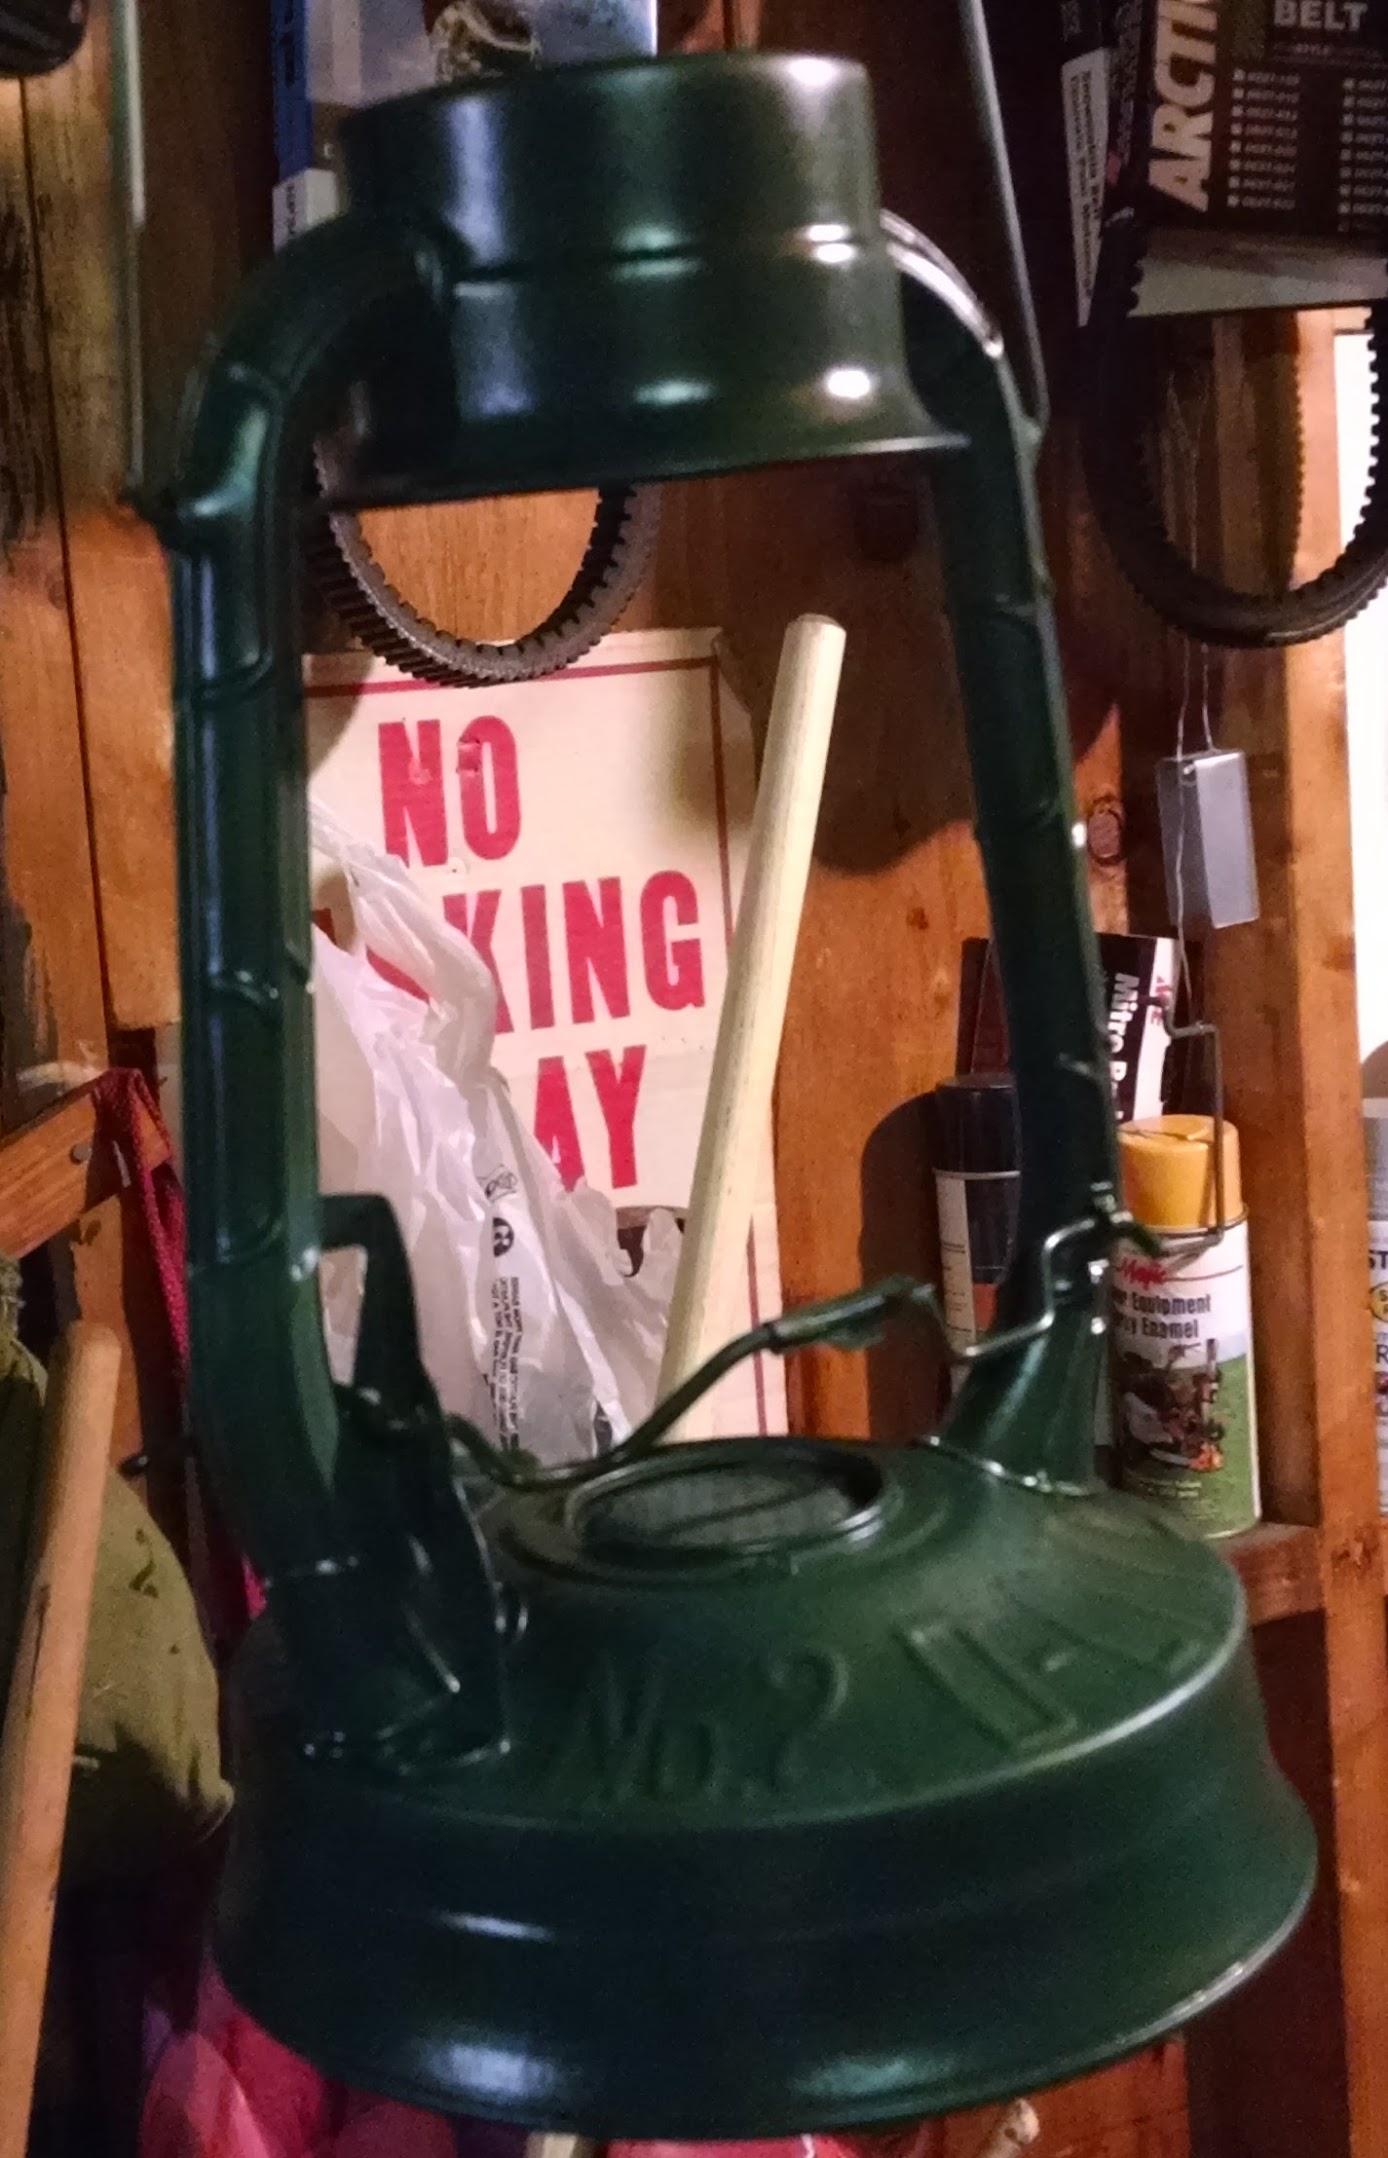
Weird weather here in north central MA, Saturday night it was -19F, today (Tuesday) it got overy 50F.
Anyway to capitalize on the warm weather I figured I'd paint the torch. The plan was to shoot one coat of etching primer to get a good base, then a coat of high build to fill the pits and finally a couple color coats. In the end I shot one coat of etching primer and one of color.
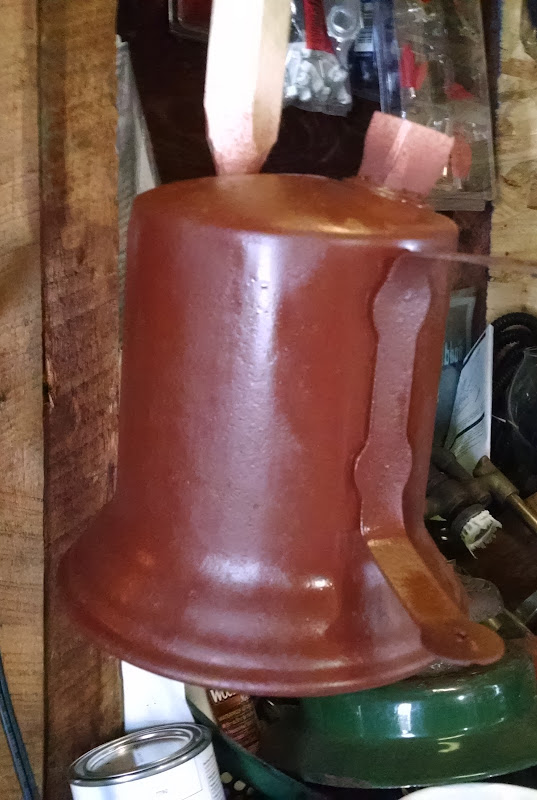
Thats the primer, heres the color coat:
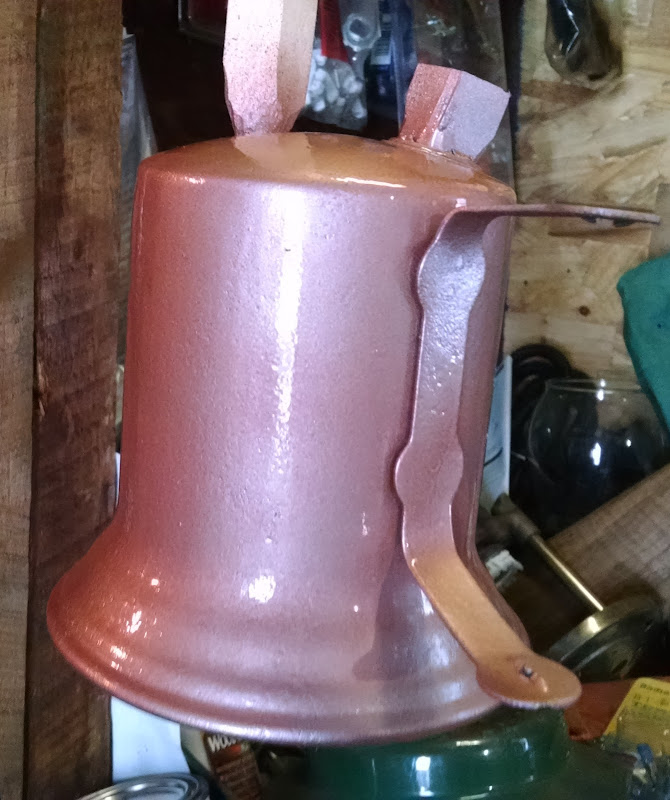
I'm pleased with the color, there are a lot of imperfections in the surface of the torch but I'm going to weather the color coat down substantially anyway so I don't think it'll really matter. I'm weathering it because theres no good way to keep the torch head clean on a user torch. Since its going to get used I want to make it look like a user.
So once the paint is fully dry in a couple days I'll take a piece of wood and work over my new beautiful paint until it looks like its been in use for 50 years. Finally in a couple weeks when the paint is fully cured (and we get another warm day) I'll hit it with some clear coat to lock everything in place and prevent future rust.
Also I got in the mail today a piece of a mop which will replace the piece of wick I had to ruin to get the torch head out of the body. Sent to me gratis which I thought was pretty nice.
Showing posts with label rust repair. Show all posts
Tuesday, February 16, 2016
Tuesday, February 9, 2016
Something different
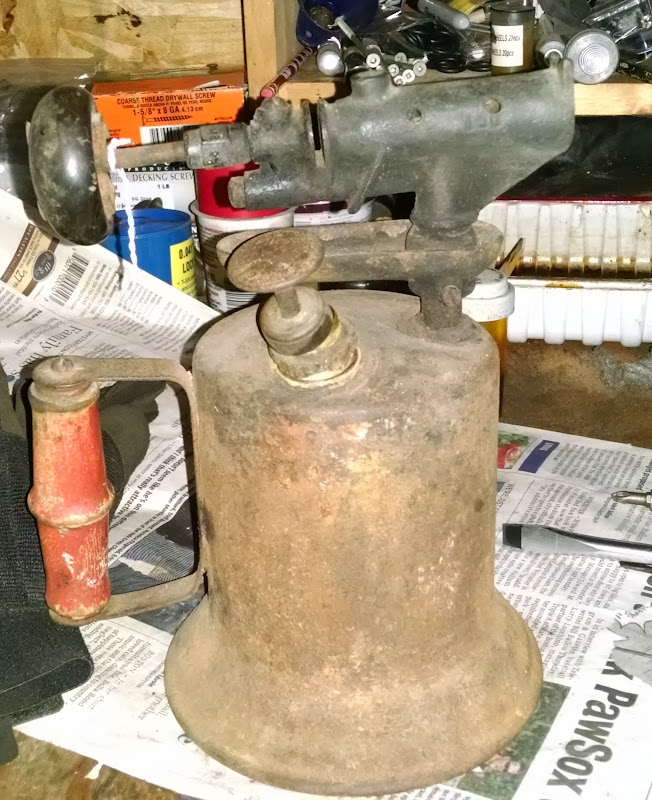
My folks came for a visit right after Christmas. We took a ride around and it turns out the antique shops of Fitzwilliam were having a thing. We hit a couple places and I snagged this:
I didn't pay much, less than $20 certainly though I don't remember the exact price.
The valve was stuck and the pump leather dried. I had some fun messing with the old ladies in the shop when they asked "Do you think it could run again?" I replied "It WILL run again." which they really didn't understand.
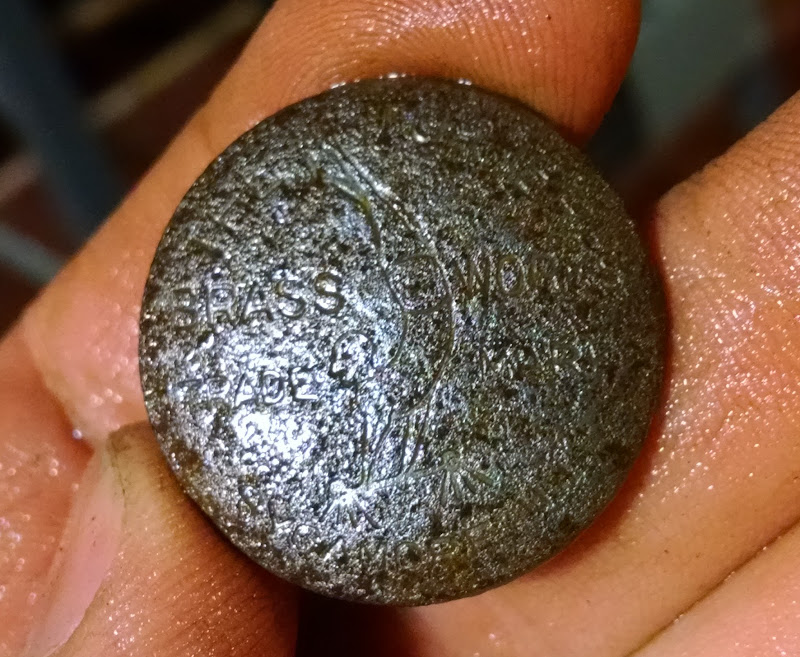
Theres no makers mark anywhere on the torch itself but after I soaked the pump handle in citric acid and scrubbed on it with a wire brush a little some markings started to appear.
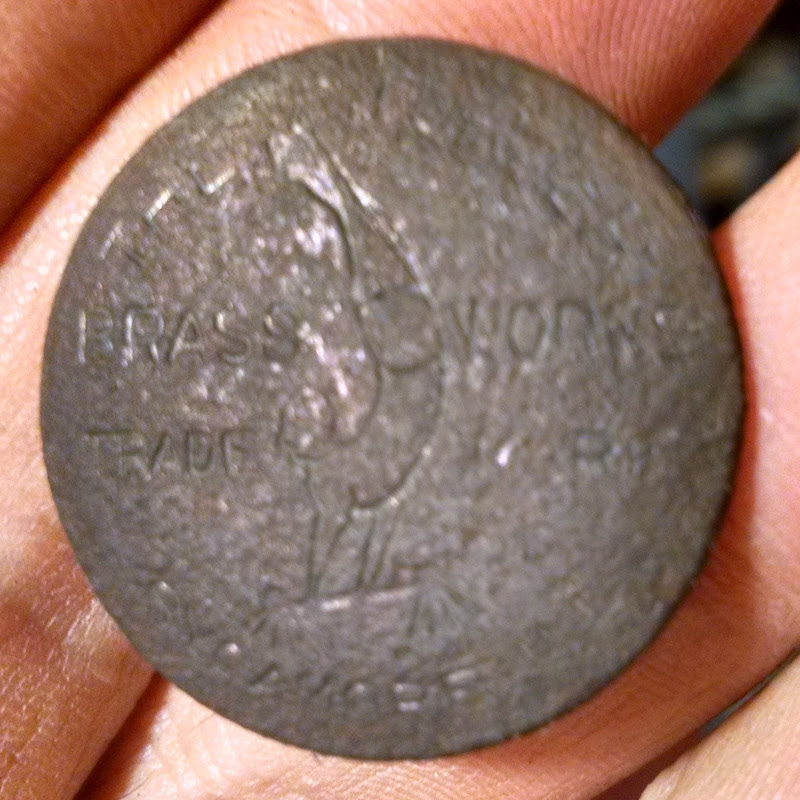
Its difficult to see in the picture but frankly it was difficult to see in person too. I soaked it some more and scrubbed some more until finally.
I had trouble getting the camera to focus this close in, it says:
I didn't pay much, less than $20 certainly though I don't remember the exact price.
The valve was stuck and the pump leather dried. I had some fun messing with the old ladies in the shop when they asked "Do you think it could run again?" I replied "It WILL run again." which they really didn't understand.
Theres no makers mark anywhere on the torch itself but after I soaked the pump handle in citric acid and scrubbed on it with a wire brush a little some markings started to appear.
Its difficult to see in the picture but frankly it was difficult to see in person too. I soaked it some more and scrubbed some more until finally.
I had trouble getting the camera to focus this close in, it says:
The Turner
Brass Works
Trade Mark
Sycamore, Ill
The thing in the middle is a gymnast on his hands with his feet over his head.
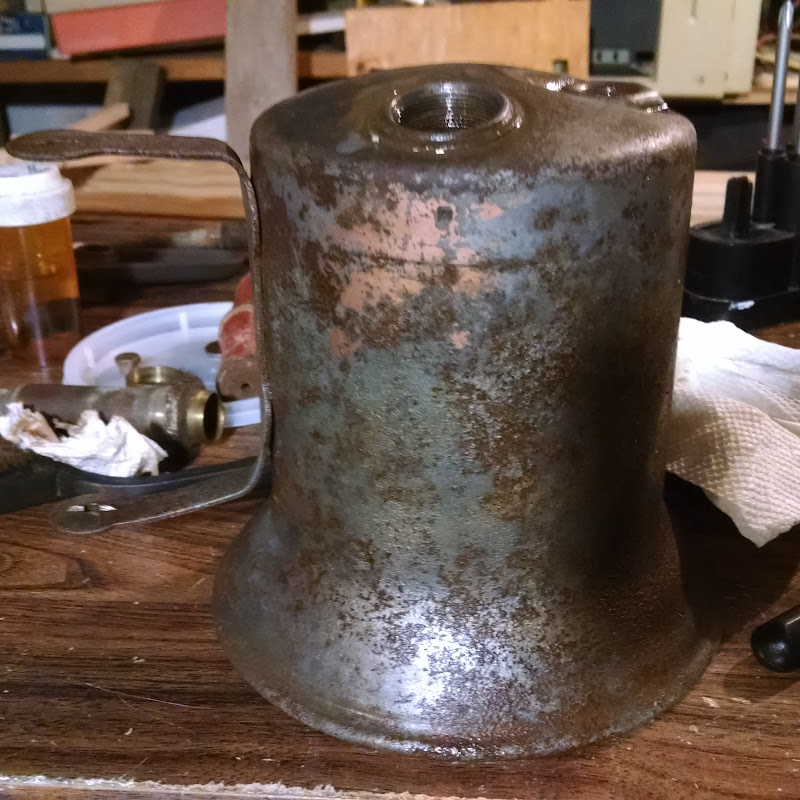
After more searching I found "150" on the burner. So I think this is a Turner 150 torch. I think is a fairly late model, the tank is steel which had been painted a copper color, you can see just a trace of the copper remaining
The handle mounting is pretty primitive as is the handle itself. The "screws" that hold the handle are actually fluted nails. The burner is fairly substantial and a design Turner used on many torches.
My plan right now is to de-rust the tank and spray some high build primer on it to fill the pits. Then I'll hit it with copper paint and weather that back to match the condition of the handle which I don't intend to paint. Finally I'll clear coat the whole thing to prevent future rusting.
I've debated back and forth about restoring the whole thing but the pump assembly been chewed pretty badly where somebody used pliers instead of a wrench to remove it. I could never clean that up enough to make it look new so instead I'll clean and get rid of the rust and take it back to "used" condition.
Monday, August 17, 2015
Wickie time!
So in the interminable delay between posts I've kept working on the wickie. It took maybe 4 days in the citric acid before all the rust came off the main part of the lantern although the smaller assemblies were done in a day or two. I think I was right in my estimation that this sat somewhere that it got dripped on, the horizontal (or nearly horizontal) surfaces on it were the worst. In the end I could just scrub the rust off with a steel brush.
Since the rust was pretty gross I bought some "Rustoleum Rusty Metal Primer" which is supposed to give a really good adhesion and rust prevention. I found that it was dammed hard to get a good coating of the stuff on the vertical surfaces without it running. I sanded off runs 3 or 4 times. Worse the runs would take forever to dry although sunlight really seemed to help in that regard. I did finally get it on good after spraying a couple super thin coats that I then had to blend carefully together. I finished it with a coat of filler primer to fill in any sanding scratches I might have not seen.
For paint I went with Krylon Hunter Green which is the same color I used for my Coleman 237. I feel like it matches the older Coleman green nicely. Its also very nice paint to work with, it comes out in a much thinner spray than Rustoleum.
Sadly after getting the lantern covered I ran out of Krylon and was completely unable to find any locally. It appears that Rustoleum has absolutely cornered the market for spray bombs. Other than a couple cheap no-name paints and some specialized tractor paints thats all I could find anywhere. Fortunately Amazon saves the day. They had the right stuff which should arrive at the end of the week.
On a side note I'm DONE with Photobucket. Their app is slow, and the webpage is pitifully/painfully slow. Today I wanted to crop the images above and even after hitting reload 4 times the image editor just wouldn't open my image. In the time it took for Photobucket to not work I uploaded 9 images to Google Images, cropped those two and figured out how to post them. Its not perfect but it'll do...
Since the rust was pretty gross I bought some "Rustoleum Rusty Metal Primer" which is supposed to give a really good adhesion and rust prevention. I found that it was dammed hard to get a good coating of the stuff on the vertical surfaces without it running. I sanded off runs 3 or 4 times. Worse the runs would take forever to dry although sunlight really seemed to help in that regard. I did finally get it on good after spraying a couple super thin coats that I then had to blend carefully together. I finished it with a coat of filler primer to fill in any sanding scratches I might have not seen.
For paint I went with Krylon Hunter Green which is the same color I used for my Coleman 237. I feel like it matches the older Coleman green nicely. Its also very nice paint to work with, it comes out in a much thinner spray than Rustoleum.
Sadly after getting the lantern covered I ran out of Krylon and was completely unable to find any locally. It appears that Rustoleum has absolutely cornered the market for spray bombs. Other than a couple cheap no-name paints and some specialized tractor paints thats all I could find anywhere. Fortunately Amazon saves the day. They had the right stuff which should arrive at the end of the week.
On a side note I'm DONE with Photobucket. Their app is slow, and the webpage is pitifully/painfully slow. Today I wanted to crop the images above and even after hitting reload 4 times the image editor just wouldn't open my image. In the time it took for Photobucket to not work I uploaded 9 images to Google Images, cropped those two and figured out how to post them. Its not perfect but it'll do...
Labels:
dietz,
lantern,
paint,
repair,
rust repair,
tubular lantern
Thursday, September 26, 2013
More bodywork and a trip to a real mechanic
Sorry kids, no pics of this just trust me that it was a horror show.
If you look back you'll see that I replaced about a 1 foot portion of the rocker under the driver's feet just aft of the front wheel. Well this time I cut from the rear of that part nearly to the rear wheel (and that wasn't far enough) and over the course of two days spent four hours each day welding back in.
In the course of the work I managed to cut a hole through the rusty floor under the driver's seat which required the removal of said seat (so I wouldn't burn the carpet) and produce some of the best (and not so best) body work I've ever done.
It still needs just a couple more inches at the rear of the car but I ran out of time, with luck I'll finish that side on Saturday. Not looking forward to the fact that the other side of the car needs equal time...
Tuesday I took the car for its longest single run to date, all the way to work. It behaved perfectly other than the sloppy shift bushings that prevented me from finding 5th gear. I was real worried about the timing belt (which turned out to be a good worry) so I wanted to keep the rpms down, thus I commuted 56 miles at 65mph which is about 3,000 rpm. The car acted perfectly even in heavy traffic and drove pleasantly.
The reason for taking the car to work pre-inspection was to drop it over at KMH Motors in Lowell. On the fixing list for Keith:
If you look back you'll see that I replaced about a 1 foot portion of the rocker under the driver's feet just aft of the front wheel. Well this time I cut from the rear of that part nearly to the rear wheel (and that wasn't far enough) and over the course of two days spent four hours each day welding back in.
In the course of the work I managed to cut a hole through the rusty floor under the driver's seat which required the removal of said seat (so I wouldn't burn the carpet) and produce some of the best (and not so best) body work I've ever done.
It still needs just a couple more inches at the rear of the car but I ran out of time, with luck I'll finish that side on Saturday. Not looking forward to the fact that the other side of the car needs equal time...
Tuesday I took the car for its longest single run to date, all the way to work. It behaved perfectly other than the sloppy shift bushings that prevented me from finding 5th gear. I was real worried about the timing belt (which turned out to be a good worry) so I wanted to keep the rpms down, thus I commuted 56 miles at 65mph which is about 3,000 rpm. The car acted perfectly even in heavy traffic and drove pleasantly.
The reason for taking the car to work pre-inspection was to drop it over at KMH Motors in Lowell. On the fixing list for Keith:
- Timing belt - plus the tensioners and seals right by it
- Water pump - this is not technically required but the pump lives behind the timing belt and if the pump failed I'd essentially need to do the belt again...
- Coolant flush and fill - important since after the water distribution pipe job its mostly water
- Shifter bushings - get 5th gear back!
- Diagnose Check Engine light - I went over to Autozone and they pulled a P1550 code which is a pressure differential, could be a vacuum line, worst case could be the turbo
Today I got the call from Keith, most everything had been done, the CEL is probably the N75 valve which controls boost. They're known for crapping out and aren't too expensive. Interestingly when I dropped off the car the CEL was out, Keith said that kind of behavior was stereotypical for the N75, I said to do it. He also noticed a big oil leak from the oil pan gasket. I'd noticed a bunch of oil down there when I did an oil change (forgot to write about that, oops, next post!). I told him to go ahead and do the pan gasket too, I want to start my ownership of this car with as few problems as possible!
Thursday, September 12, 2013
RUST!
I'll admit I got a little taken in on this car, its pretty much rust free from the top of the rockers up but pretty heavily rusted from the rockers down but only about 4 inches wide, the bottom of the car is actually pretty good.
To start I took the wire wheel on my angle grinder and ground off some surface rust. I started at the front of the car on the driver's side working from the rocker up so just above the really bad part.
Once I ground off the rust back to clean metal I brushed on some POR15. I'm using their gas tank sealer because I had some. I like using the gas tank sealer because its very thin and brush strokes are pretty well hidden.
So then I'm left with a choice, the surface rust is stabilized and while there aren't any holes underneath I know that there will be holes soon and since winter is on its way this problem will become very bad by next year and that will ensure this is a three year car, maybe even just a two year car. So after a lot of debate and some poorly considered fiberglass I went to the hardware store and bought some new cutting wheels. So with my new cutting wheels I sliced out a 4" x 12" segment from the front of the car and welded in a piece of old computer case. I like working with old computer cases because the metal is very dense, this is because we'd like to have computer cases be non-magnetic. This is actually some of my better welding, I wish I'd gotten a picture. Its a LOUSY place to weld, I jacked up the car and got a stand under it but I still had to lie on my back and weld up, the outside wasn't bad but the inside was a drag. Once that was done I ground down the welds and wire brushed the whole thing before brushing on more POR15. In a couple places I filled in little holes with fiberglass and more POR15. It would have been very hard to weld behind the front fender and I didn't want to go through pulling the fender. Maybe next spring I'll have a chance.
So anyway I figure this side of the car needs 2 more feet of 4" wide on this side and if this side needs it I'd bet the other side needs it too. Thats probably going to use up this whole computer, fortunately we just replaced our microwave and I'm told old microwaves make good repair metal too.
To start I took the wire wheel on my angle grinder and ground off some surface rust. I started at the front of the car on the driver's side working from the rocker up so just above the really bad part.
Once I ground off the rust back to clean metal I brushed on some POR15. I'm using their gas tank sealer because I had some. I like using the gas tank sealer because its very thin and brush strokes are pretty well hidden.
So then I'm left with a choice, the surface rust is stabilized and while there aren't any holes underneath I know that there will be holes soon and since winter is on its way this problem will become very bad by next year and that will ensure this is a three year car, maybe even just a two year car. So after a lot of debate and some poorly considered fiberglass I went to the hardware store and bought some new cutting wheels. So with my new cutting wheels I sliced out a 4" x 12" segment from the front of the car and welded in a piece of old computer case. I like working with old computer cases because the metal is very dense, this is because we'd like to have computer cases be non-magnetic. This is actually some of my better welding, I wish I'd gotten a picture. Its a LOUSY place to weld, I jacked up the car and got a stand under it but I still had to lie on my back and weld up, the outside wasn't bad but the inside was a drag. Once that was done I ground down the welds and wire brushed the whole thing before brushing on more POR15. In a couple places I filled in little holes with fiberglass and more POR15. It would have been very hard to weld behind the front fender and I didn't want to go through pulling the fender. Maybe next spring I'll have a chance.
So anyway I figure this side of the car needs 2 more feet of 4" wide on this side and if this side needs it I'd bet the other side needs it too. Thats probably going to use up this whole computer, fortunately we just replaced our microwave and I'm told old microwaves make good repair metal too.
Sunday, September 8, 2013
New battery
First order of repair had to be a new battery. For a car that starts so easy it seemed wrong to have to jump start. I was dismayed to find the Group 49 I pulled out of the '84 190D (when I replaced the battery in that car I turned in the one from my '83 240D which was really old keeping this one as a spare) would fit the battery box acceptably well but the cables wouldn't stay on. My local Car Quest sold me a group 48 for $25 less than Autozone wanted for a smaller group 47, love my local Car Quest.
Before installing the battery I thought I should clean up the battery box some. Battery boxes (really a battery platform in this car) get all nasty and corroded from battery acid dropping on them. I couldn't get the box out so I brushed the worst of the rust an corrosion off and vacuumed out the debris, then hit it with some Rustoleum.
I soaked the hold down bracket overnight in Evapo-rust and painted it also. Hopefully this will keep rust at bay for awhile.
Next step: Why don't the interior lights and sunroof work?
Before installing the battery I thought I should clean up the battery box some. Battery boxes (really a battery platform in this car) get all nasty and corroded from battery acid dropping on them. I couldn't get the box out so I brushed the worst of the rust an corrosion off and vacuumed out the debris, then hit it with some Rustoleum.
I soaked the hold down bracket overnight in Evapo-rust and painted it also. Hopefully this will keep rust at bay for awhile.
Next step: Why don't the interior lights and sunroof work?
Thursday, August 6, 2009
Ranger repairs
My dad always said that when you buy a used car you buy somebody else's problems. My Ranger is a 2003 but when we bought it only had 25,000 miles. That means at some point it sat... Well when things sit the rust monster gets to make a play for them. On the Ranger the rust monster got to the bed and in places got to it BAD. It had 3 or 4 good size rust holes and when I attacked with a screwdriver they got worse. So Monday I pulled the bed off (lousy job when working alone) and started cutting. I ended up with about 1.5 square feet of bed cut out. I'd bought a repair panel from JC Whitney and some angle iron from the hardware store. The angle iron is to remake some of the bracing underneith that had rusted. Its MUCH stronger than the origninal. The repair panel doesn't match the bed exactly but isn't too bad.
Tuesday I had to take off because I'd hurt my back pulling the bed (bad job as I said). Yesterday and today were spend grinding and welding, welding and grinding but finally all the repairs are done. The underside of the bed has been painted and then covered in rubberized undercoating. Tomorrow I'll get Randy and Chuck to come over and remount the bed (no big job with 3 guys) and then I'll paint the patch panels and coat the whole bed with Herculiner.
I used Herculiner on the Dakota 10 years ago this year and that bed had no rust inside when I traded the truck. Its good stuff and helps keep stuff from sliding in the bed. I hadn't coated the Dakota thick enough because cold weather caught me, this time I'm going to do both coats in 2 days so I should be okay.
I think the patch looks like hell but Angie says it looks good to her and anyway its way better than rust so that makes me feel good. Still I think I'll either put a piece of plywood or a rubber bedmat over it...
Tuesday I had to take off because I'd hurt my back pulling the bed (bad job as I said). Yesterday and today were spend grinding and welding, welding and grinding but finally all the repairs are done. The underside of the bed has been painted and then covered in rubberized undercoating. Tomorrow I'll get Randy and Chuck to come over and remount the bed (no big job with 3 guys) and then I'll paint the patch panels and coat the whole bed with Herculiner.
I used Herculiner on the Dakota 10 years ago this year and that bed had no rust inside when I traded the truck. Its good stuff and helps keep stuff from sliding in the bed. I hadn't coated the Dakota thick enough because cold weather caught me, this time I'm going to do both coats in 2 days so I should be okay.
I think the patch looks like hell but Angie says it looks good to her and anyway its way better than rust so that makes me feel good. Still I think I'll either put a piece of plywood or a rubber bedmat over it...
Subscribe to:
Posts (Atom)