Sunday, March 6, 2016

Golf brakes

Our '05 Golf has had sticky brakes for far longer than I should have left it so yesterday I finally got off my duff and fixed 'em. I'd planned on calipers, rotors and pads, a sticky caliper will quickly ruin a set of pads which ruins the rotor. Replacing one caliper will generally make the car pull under braking so its best to do them all at once.

IDParts had brand new calipers for only a bit more than re-manufactured so I went with those since it'll allow me to clean up the old ones and keep them as spares.

Everything was going fine until:
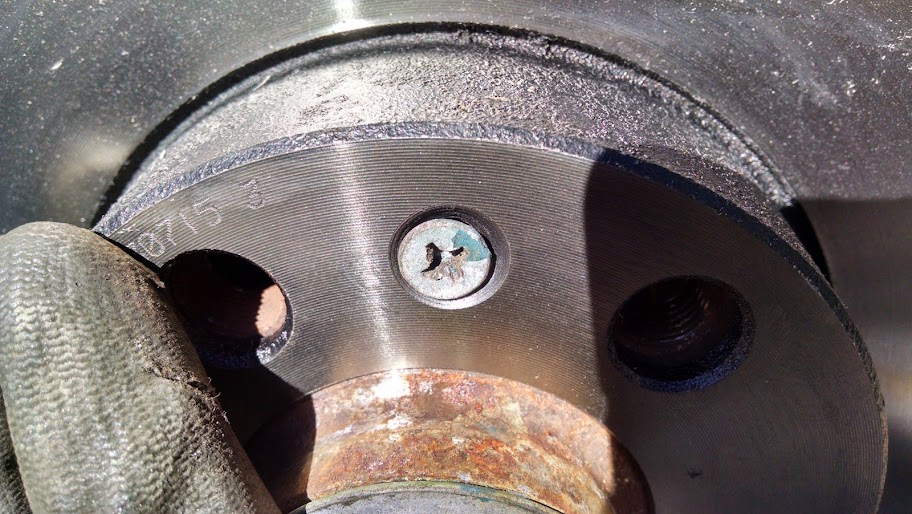
Its difficult to see in the picture but that screw isn't seated all the way. Thats the screw that holds the rotor to the hub. Really its not all that important, the hub and rotor are clamped together by the lug bolts when the wheel is installed, all the screw does is align things when the wheels are off, still it bugged me.
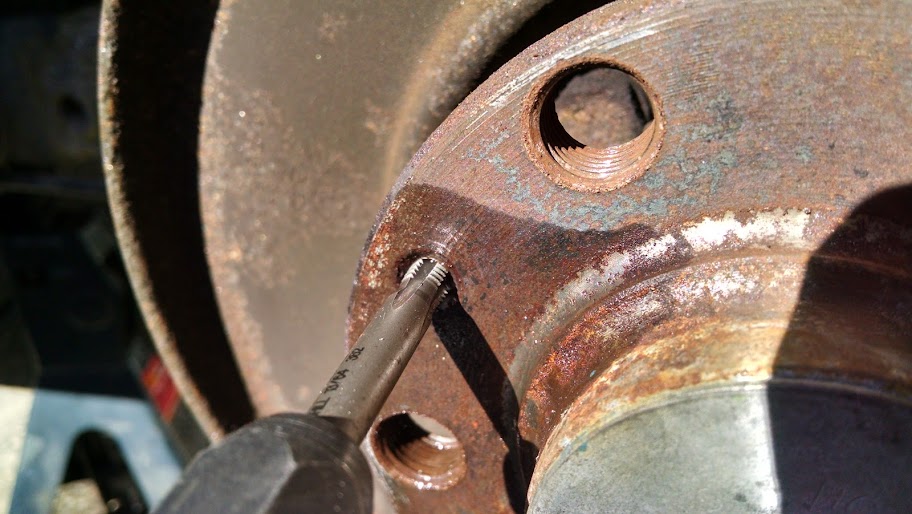


To fix it I used a tap to clean the hole in the hub,


and a die to clean the screw. With them cleaned up the screw seated nicely.


This is actually the heart of the whole problem, this is the caliper mount from the driver's side. Notice the two "bolts" at the top, those are actually caliper slide pins. Notice how the right side is compressed and the left isn't. The pins should slide freely (hence the name "slides") but that right side doesn't. I beat on it with a hammer, cranked it around with a wrench lubed it with Kroil and finally resorted to heat. The heat got it moving and I was finally able to pull the pin, clean out the nasty old grease and add some fresh. Now it moves in and out freely.

 The pin itself

The Golf has floating calipers which means that the two brake pads are actuated by one piston, this is possible because the whole caliper moves to pull on the outside pad. Because of this stuck slide pin the brakes couldn't retract and the inside pad never got released from the rotor. I'd thought this was happening because the parking brake actuator was stuck but you can't really judge with the caliper still on the car...

Anyway with all that work done theres no more squeaking from the dragging pad, performance is much improved and it appears that fuel economy has risen also although that will take some time to really judge.

Now the only mechanical thing wrong with the car is the driver's side power lock actuator seems to be hung up, this is a fairly minor complaint that I'll dig into once it warms up some.

Sunday, February 28, 2016

More diferenter

I've been bad at updating here, I realize I've made a couple things you haven't been notified about.
One of the parts suppliers I use has a yearly cold start contest. If you're not into diesel cars you need to realize that a diesel engine runs only on the heat of compression, if you can't get the engine warm it won't run. When its really cold out that can be an issue. So lots of YouTube space is devoted to cold start videos.
Its been really warm this winter and I was worried were weren't ever going to get any cold to make our cold start video but a sudden cold stap came along. There's price money on the line so on Valentines day we busted out the camera and made a video:


I dunno if having a ton of views and positive comments will make this video win the contest but it sure would make me feel good. :)

I need to find more video making challenges, it can be hard to come up with inspiration for what to make, its a lot easier when theres a challenge. Anyway with one cold start video down I'm already thinking about what next year's

Tuesday, February 16, 2016

Oh Google...

Today Google announced its going to end Picasa starting in May. I've been using Picasa for a couple months now because Google Photos won't give me a clear link to my pictures thats suitable for using in this blog. I wrote about it back in December and the problem still exists for the same reason.

So what Google is going to do is make Google Photos effectively useless to me. If that goes down the way it looks like its going to I'll probably go back to Photobucket. I left them because their website is insanely slow... I should ask around and find if going the paid route with PB is faster than their free system. If thats true it might actually be worth it.

More on the torch

Weird weather here in north central MA, Saturday night it was -19F, today (Tuesday) it got overy 50F.

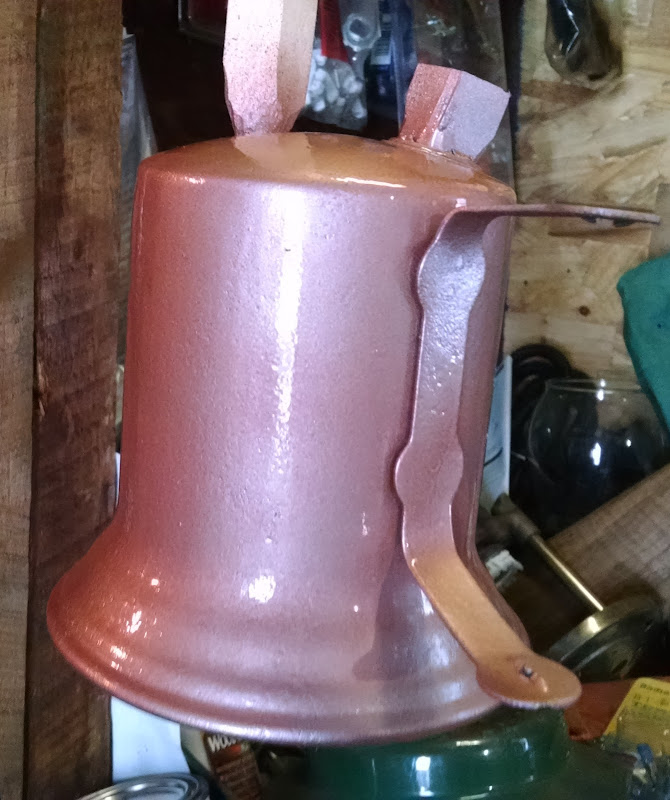
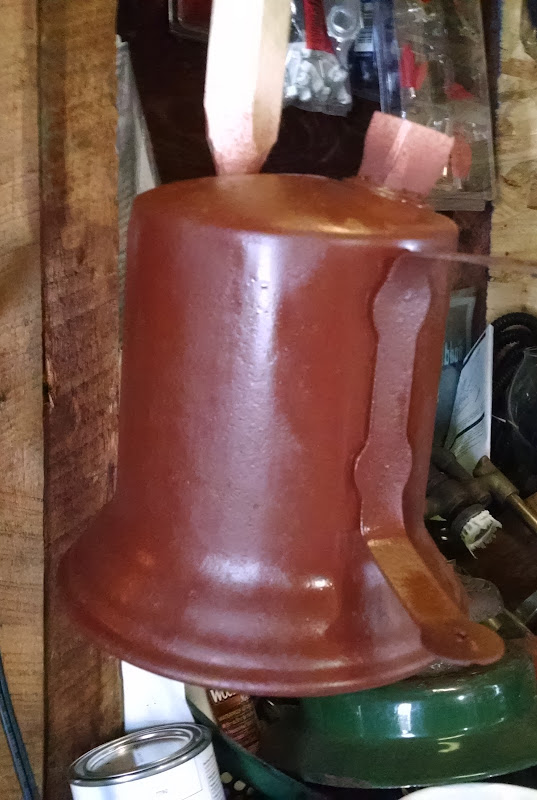
Anyway to capitalize on the warm weather I figured I'd paint the torch. The plan was to shoot one coat of etching primer to get a good base, then a coat of high build to fill the pits and finally a couple color coats. In the end I shot one coat of etching primer and one of color.

Thats the primer, heres the color coat:


I'm pleased with the color, there are a lot of imperfections in the surface of the torch but I'm going to weather the color coat down substantially anyway so I don't think it'll really matter. I'm weathering it because theres no good way to keep the torch head clean on a user torch. Since its going to get used I want to make it look like a user.
So once the paint is fully dry in a couple days I'll take a piece of wood and work over my new beautiful paint until it looks like its been in use for 50 years. Finally in a couple weeks when the paint is fully cured (and we get another warm day) I'll hit it with some clear coat to lock everything in place and prevent future rust.

Also I got in the mail today a piece of a mop which will replace the piece of wick I had to ruin to get the torch head out of the body. Sent to me gratis which I thought was pretty nice.

Tuesday, February 9, 2016

Something different

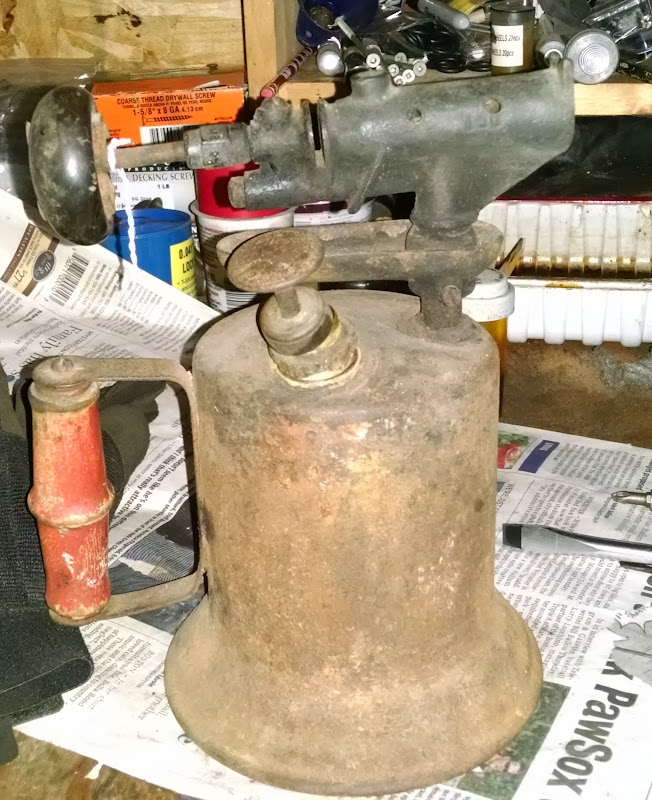
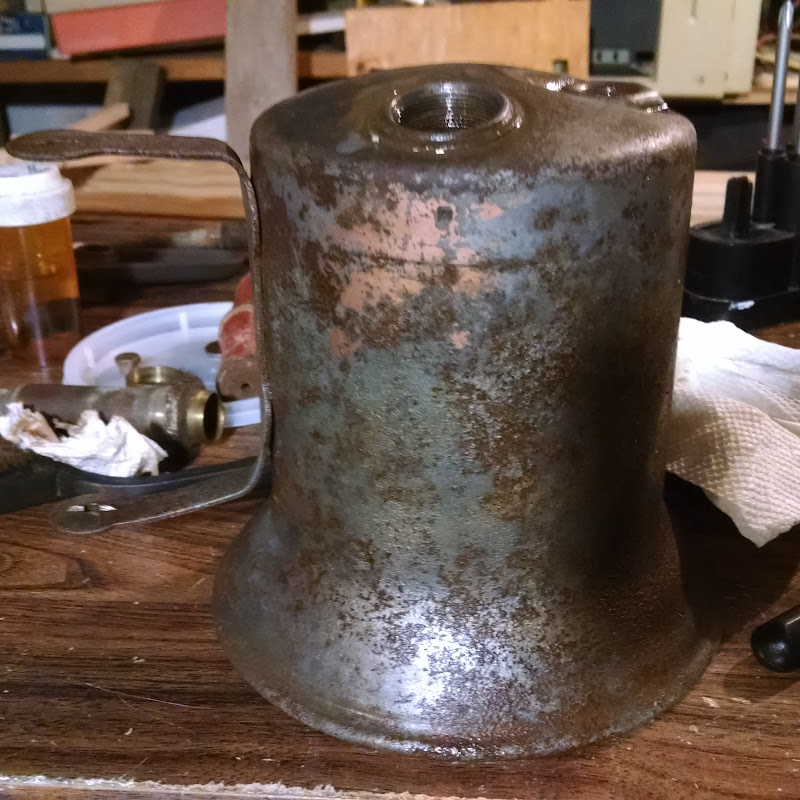
My folks came for a visit right after Christmas. We took a ride around and it turns out the antique shops of Fitzwilliam were having a thing. We hit a couple places and I snagged this:


I didn't pay much, less than $20 certainly though I don't remember the exact price.
The valve was stuck and the pump leather dried. I had some fun messing with the old ladies in the shop when they asked "Do you think it could run again?" I replied "It WILL run again." which they really didn't understand.

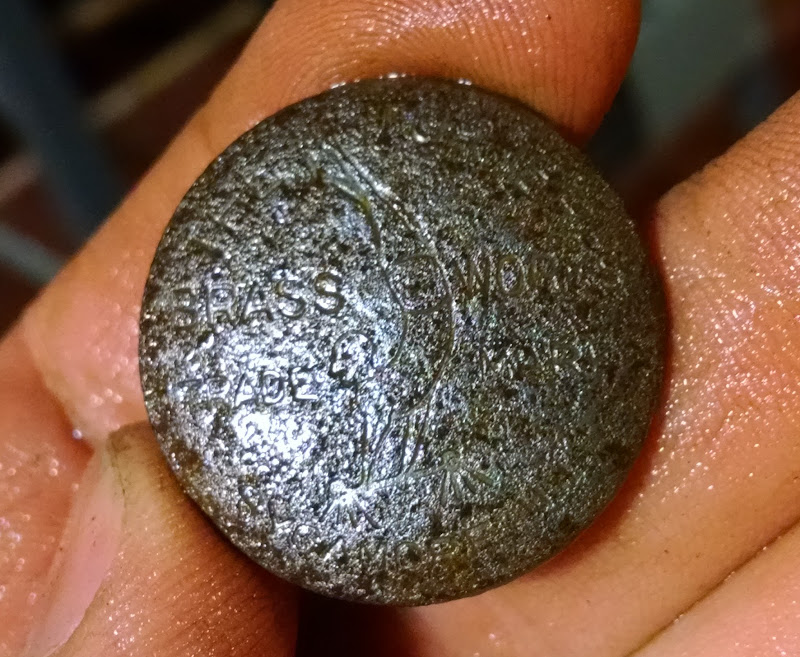
Theres no makers mark anywhere on the torch itself but after I soaked the pump handle in citric acid and scrubbed on it with a wire brush a little some markings started to appear.


Its difficult to see in the picture but frankly it was difficult to see in person too. I soaked it some more and scrubbed some more until finally.


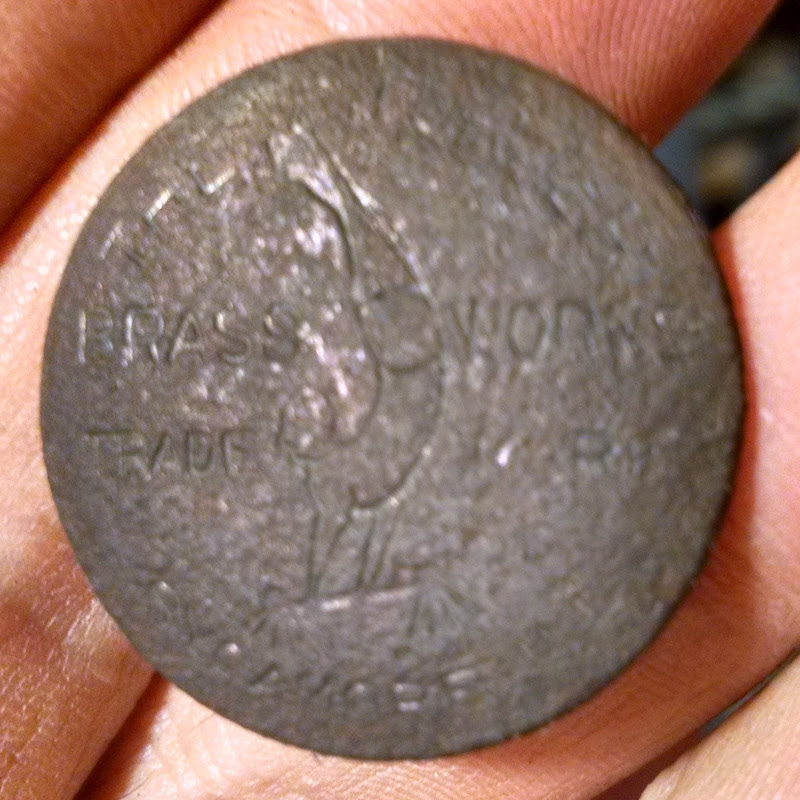
I had trouble getting the camera to focus this close in, it says:
The Turner
Brass Works
Trade Mark
Sycamore, Ill
The thing in the middle is a gymnast on his hands with his feet over his head.
After more searching I found "150" on the burner. So I think this is a Turner 150 torch. I think is a fairly late model, the tank is steel which had been painted a copper color, you can see just a trace of the copper remaining


The handle mounting is pretty primitive as is the handle itself. The "screws" that hold the handle are actually fluted nails. The burner is fairly substantial and a design Turner used on many torches.

My plan right now is to de-rust the tank and spray some high build primer on it to fill the pits. Then I'll hit it with copper paint and weather that back to match the condition of the handle which I don't intend to paint. Finally I'll clear coat the whole thing to prevent future rusting.

I've debated back and forth about restoring the whole thing but the pump assembly been chewed pretty badly where somebody used pliers instead of a wrench to remove it. I could never clean that up enough to make it look new so instead I'll clean and get rid of the rust and take it back to "used" condition.

Friday, January 22, 2016

Car fixin

You never really think about your ability to set the fan in the car at different speeds until all of a sudden you can't...

Angie has been driving our 2005 VW Golf and thus it wasn't for some time that I noticed the fan only worked on the high position. She doesn't complain much and since she had a work around she took it. Winter is an especially annoying time to have the fan not work at low speed since a warm car will tend to fog the windshield so I knew this had to be fixed.

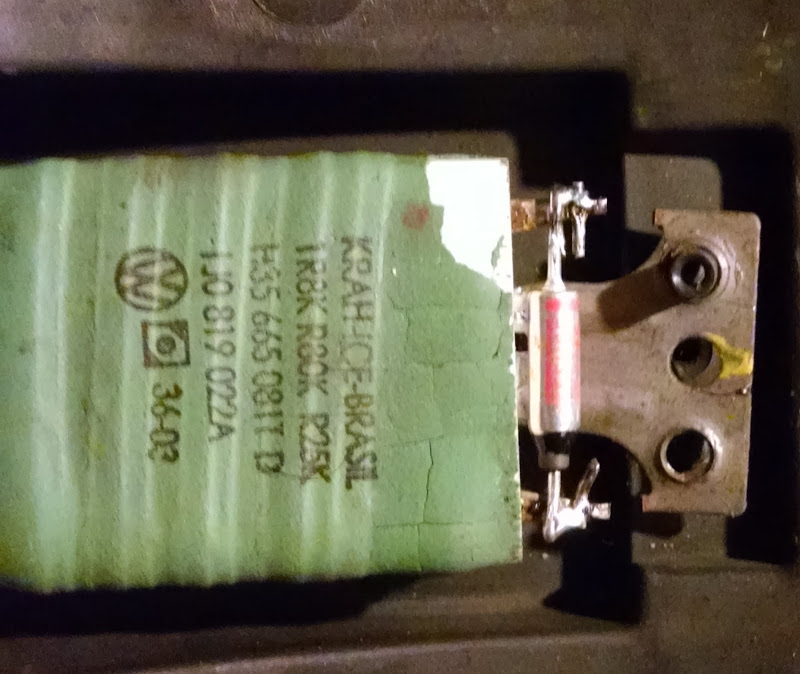
The problem turns out to be a common one caused by a failed thermal switch:

 That's the little blue headed pointy thing in the picture. The big green part is the resistor pack that actually runs the fan at lower speed. The thermal switch is there to keep the resistor pack from burning up if too much power is requested.

So I could just replace the thermal switch but that doesn't address the root cause of the problem which is a sticky fan. The 4th generation Golf and Jetta have a tendency to get some water in the fan which gums up the motor, the gummy motor draws more power and pops the thermal switch. So I popped out the fan, cleaned its bearings (well, bushings actually) good with carb cleaner and dripped a variety of lubricating substances in. I saw a YouTube video where the guy used WD40 but WD is "water displacing" its not really a lubricant. I started with Marvel Mystery oil lubricating formula and moved on to PB Blaster in an effort to find something that would make its way into the bushing. Then I reinstalled the fan and replaced the thermal switch.


I was a little nervous about soldering the new switch in, it is a thermal switch after all but I limited myself to just quick touches with the soldering iron and I'd bought a 5 pack of the switches from Amazon so I knew if my soldering didn't work out I could always resort to crimping on another one.

Fortunately I seem to have done a good enough job, the fan has been working correctly for a couple weeks now.

Of course I could have replaced the whole resistor pack, IDParts has them for $35 but for $1 and a couple minutes with a soldering iron I'm well pleased with this fix. If this happens again I'll probably replace the fan, its difficult to get oil in to the bushings on the old fan, although maybe if I used a needle oiler...

Friday, January 8, 2016

Lamp oil

With the onset of winter I always try to be prepared should we have a big power outage like back in '08. That time we were without power for a day and a half which was quite bearable with minimum supplies but if it'd have lasted much longer we wouldn't have been so well off. These days I keep more supplies around just in case. One of those supplies is kerosene, the other is lamp oil.
I use lamp oil because kerosene by itself smells pretty bad, even in the Aladdin lamps that are designed to burn it. This is especially noticeable in the summer time, when its warm the lamps will off gas a little and can really stink up the room. To fix that issue in the summer I drain the kerosene out and put just a bit of lamp oil in.
Lamp oil is derived somehow from wax, when you put out a lamp burning lamp oil it smells like you're melting crayons. The problem with anything made from wax is that it has a relatively high temperature at which it'll turn solid, its waxing temp if you will. So to get around that I've been mixing some kero with my lamp oil. This also helps to control costs, the lamp oil is SUPER expensive, like $5 a quart. Kerosene at the hardware store is expensive too but at $10/gallon its about half the price of lamp oil. I can get Jet A at a local airport for $4/gallon, Jet A is basically very low sulfur kerosene, it burns well with low odor on its own. I haven't Jet A in an Aladdin lamp yet but I've burned a lot in Colman and Tilley lamps and friends assure me its good in wick lamps too. Using Jet A my cost comes way down and I think I can reduce the percentage of lamp oil since the Jet A doesn't smell too bad anyway.


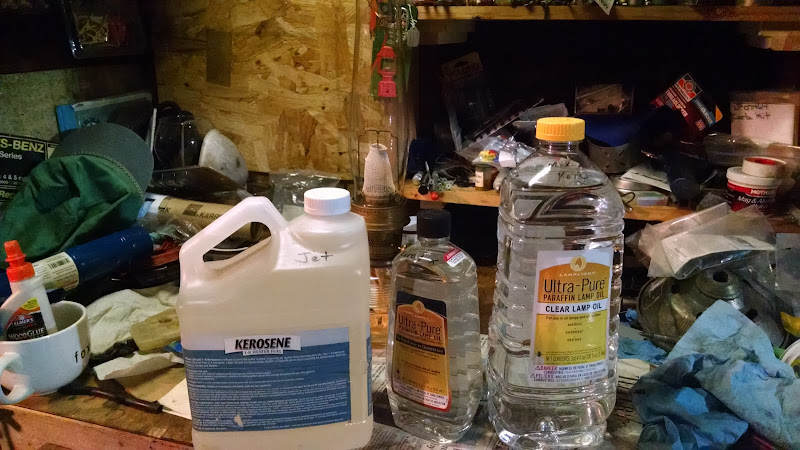
Anyway on a recent evening I picked up a new bottle of lamp oil, its the big one on the right in the picture. The little bottle in the middle is full of a 50:50 mixture of lamp oil and kerosene, the kero came from the bottle on the left which you can now see is marked "Jet". I refilled the kero bottle with Jet A because its easier to pour out of than a bigger jug. The big bottle has about 30 percent kero and 70 percent lamp oil.


I took this picture this morning, the temps were hovering just about freezing although the interior of the garage hadn't really warmed up yet. You can see the large bottle with the 30:70 mix has turned solid, its real hard, like ice. The smaller bottle is still liquid, no sign of gelling or waxing at all.

So the extra percentage of kero in the smaller bottle is clearly doing its job.

Here's the result:


Burning well, basically no scent. There was a little smell when I first lit the lamp but once it warmed up all the way the smell was gone. I've had it burning for about four hours now and its steady as a rock.