Monday, November 28, 2016

Prepping for winter

Had a little spare time the other day so I pulled my 51 year old Snapper rear engine riding mower out of the garage and chewed up the leaves. They had been down for awhile so they were already pretty far gone. I worked from one side of the yard to the other pushing the leaves along so when I got to the other side it was easy to scoop the leaves and grass clippings directly into the compost bin. This makes excellent compost and it was heating up the next day.

With the yard clear I let the engine in the mower cool down a little and drained the oil. I refilled with Mobil 1 15w50 which is heavier than the 5w40 I usually use but won't cause any issues. I'll let it warm up a little longer next year before really putting load on the engine.


I use blue painters tape to remind me when the oil was changed, I like to change it before putting the mower into storage but I don't always get the opportunity. The painters tape removes easily when I do the next change. I do the same thing with the snowblower. Now I just need to find time to pull out the snowblower and push the Snapper back into that spot.

Tuesday, November 15, 2016

Another week at camp

Deer camp was last week. For context deer camp is the week we hunt deer, as opposed to moose camp which was the week we hunted moose or just any regular trip to camp.

We didn't shoot any deer although Dad saw two which is always nice. Deer are pretty scarce in northern Maine. Back around 1980 there was a spruce bud worm infestation which killed a lot of the spruce trees. Its not unlike the asian bark beetle thing people are all worried about now. In the wake of the worm big sections of the forest were clear cut which removed much of the habitat for the deer. In the winter the little buds on the spruce trees are just about all the deer have to eat and theres no place to hide in the clear cuts. So the deer moved out and the moose moved in. The moose don't mind behind out in the clear cut and they browse on all sorts of things that come up in the first regrowth so they had lots of food.

Now its almost 40 years later and the spruce trees planted in the wake of the worm are nearing full maturity, they've grown in thick in the way that the forests used to be and in ways that the moose don't like. If you're an 800# moose you don't want to be pushing through thick spruce forests so you head out to more open spaces. Today the moose population is in decline and the deer population is on the rise. When I shot a moose in 1999 our butcher skinned and quartered 14 moose in one day. This year when Dad shot his moose the same butcher figured he might do 14 moose in 2 weeks. In '99 he thought he might process a couple deer, this year he figured on 50 or 60.

Anyway I do bring a couple projects for deer camp, this year I installed a couple 12v reading lights:

This is above my bunk, to the right of the light is the mount for Angie's battery powered light. Dad's bunk is on the other side of the wall, theres a hole behind my light with another wire that goes to another light at Dad's bunk. The lights are 2.5w when on full and have a low power blue light setting as well. They throw lots of light and are great for reading. Now that we have solar it seemed silly to have batteries for flashlights as a continuing expense, these lights were a test and since they worked so well I'll be ordering some more.
Last summer Dad installed a 20w LED fixture over the kitchen table, the gas light was producing too much heat to be comfortable. If it'd been me I'd have looked for about 10w, the one he got is really bright but its nice when you first get to camp to be able to turn on the inverter and hit the switch without having to turn on the gas. I'm going to get another 12v light to go over the sink, the inverter draws .25A all by itself, the reading lights are about .20A.

A few years ago I spent a bunch of time learning to make the best french fries possible. One thing I learned is you can't beat frying in lard, nothing works as well or tastes as good. This year we tried something new and made fried shrimp:

The batter is just ploy mix, the trick is getting the right consistency and letting the shrimp dry a little before battering them. Dad tried to recreate my shrimp a few nights later but couldn't get the batter to stick as well as I could. He didn't let his shrimp drip so his batter got too wet. Maybe I should make a video on this...

We didn't see much game but one day I spotted this little critter:


In this picture I'm about 3 feet away from him and he's finally starting to get upset. When I spotted him we were in the truck, I rolled down the window and called out but he didn't move. I got out of the truck and he didn't move. It wasn't until I got this close that he finally got upset with me. A second or two later he ran down a hole under the stick and wouldn't come back out. Weird squirrel...

Wednesday, October 19, 2016

A very Maine week

Went moose hunting with my dad last week. Its kind of a big deal since there were only 2140 permits this year. Dad drew wildlife management district 19 which is waaay outside of our normal range. This is "downeast" which is to say the far eastern corner of Maine.

Dad rented the Mickey Finn cottage at Shoreline Camps in Grand Lake Stream, Maine population 109. Driving to Grand Lake Stream takes half an hour less than driving to our camp in Caribou although its nearly 50 miles closer...

A few months ago dad went up to scout around since we don't know the area. Fortunately there woods roads just like up north.  My uncle Guy and dad's friend Dave also came out so the four of us piled into my pickup truck and into the woods we went.
This is good moose country and we saw tons of tracks:


The first day was mostly a bust, we saw one partridge but it was really windy so Dave couldn't get close enough. Dave said he heard a couple others in the woods at different times in the day but no luck there. We saw a porcupine on the side of the road and dad took a couple shots at him with the .410 but he didn't seem terribly bothered by it. We also saw a turkey, I had never seen a turkey on a woods road before since we don't have all that many in Arostook county. I'd also never seen a lone turkey before but we didn't see any others.

Late in the day we found this cow moose:

She was big, probably in the 500-600# range, about 80 yards from the truck. Dad's permit specified a male so she was safe. We all agreed that if she had been a male it would have been worth shooting but she was out in a big swamp and it would have been a long hard job to retrieve the body.

On the way back to camp I noticed a couple roads I hadn't seen in the morning and made a note to try them the next day and I'm glad I did, on day 2 we hadn't even reached the end of the first road when there was a moose standing right in the middle of the road. Moose are big critters and standing in the middle of the road this one looked like a giant towering over the truck even though it was a good 50 yards off.

Being that we were heading east and the moose was right in front of us the glare from the sun made it hard to tell if there were antlers or not. I was quick with the field glasses and called out "Antlers!" Dad sent an 11.5mm, nearly 1oz bullet down range and the moose dropped like a stone. The bullet took him in the right shoulder and while it was a good shot and he wasn't going to get up again he wasn't dying with any real speed. The other barrel of dad's cape gun had a 16ga round ball which being that its 16ga (ie 16 balls to the pound) weighs in right at 1oz. That ball deflated the right lung and ended any suffering real quick.


Thus began the dirty work. Being the good son this falls to me. I'd done the job once in '99 when I shot a moose and again in 2009 when dad shot his little one but on a big moose like this the field dressing is a big job. The skin is thick and theres a membrane between it and the internals that has to be cut, you don't want to cut too deep though since you don't want to puncture the guts which will stink and can spoil the meat. I was very careful and managed to not cut anything bad, in all the field dressing took me close to an hour.

Finally the big job of loading the animal started, we had brought ramps with us and tied a strap between the tie down points at the front of the pickup, we then used a come-along to winch the moose up the ramps. The come-along cable was short so we could only go about 3 feet at a time with the moose trying to slide back down the ramp every time we had to reset. If you've ever used a come-along you know how frustrating they are.


After another hour we were loaded and headed back to camp. We paused for ice, its important to get the body cooled as soon as possible to reduce the possibility of spoilage so I put 10# of ice into the body cavity right away. We quickly packed up camp and headed to Waite, Maine to get the moose weighed, tagged and logged, this is also the traditional time for picture taking:


Waite is a small place (population 101) and we were definitely the biggest thing that happened all day. The cape gun was a character in this story in its own right and something nobody in Waite had seen before.
Places like Waite and Grand Lake Stream are always full of characters and we met a bunch of people who claimed to never have seen a moose before. I find that odd since we had seen so many tracks in the woods but we decided that those people must never leave the paved roads. If you want to see animals you need to go where the animals are.

In Waite I bought another 20# of ice to pack the body with for the 2 hour ride north to Caribou to our butcher Scotty of Scotty's Meat Shop. Scotty has cut all our moose for us and does a fantastic job. Since it was early in the week anyway it got to hang and age for a day or two which really improves the flavor and texture of the meat. The last time we shot a moose the meat still came wrapped in paper, these days its vacuum sealed:

I took the picture after we'd already taken about 1/3 of the meat, in all we used all the coolers we had, plus we borrowed one from Scotty, bought another and filled an apple box:


Scotty cut the skull cap for us so we can have the antlers. When I shot the moose in 1999 I cut the skull cap myself, having done it once paying Scotty $50 to do it is a great investment...

There was so much meat my parent's upright freezer was overwhelmed, we had to tape the door shut so meat wouldn't fall out.

Thats after filling the freezer in the fridge upstairs. Angie and I brought a cooler full of meat home the next day which helped the situation. Dad will give Guy and Dave meat too so this animal will feed lots of folks.

Friday, October 7, 2016

Sweet home Chicago

Okay not really home but a fun place for a quick vacation.

Our train ride dropped us off at Union Station in Chi-town, one of the nicest train stations I've ever been in. We hopped a cab to the Intercontinental, don't think we're rich because we stayed there, I travel a lot for work and stay in Holiday Inn hotels. Since Intercontinental is a part of the Holiday Inn chain we get to stay there for free on points. Strangely I don't appear to have taken any pictures of the hotel. The Chicago Intercontinental is a really nice hotel with a really cool pool. If you get the chance to check it out its totally worth it. We've stayed in an Intercontinental before and as far as the room goes the Intercontinental Boston is nicer, the bathroom especially in Boston was stunning.

Anyway the first thing we did was get lunch, the train was 3 hours late remember so instead of arriving just after breakfast we had now missed lunch. Another thing I didn't get a picture of was the amazing Peri-Peri chicken we had for lunch. Angie had never had Peri-Peri before and loved it. Walking back to the hotel we saw a place advertising fried chicken and donuts, gotta check that out right?
We shared a chocolate frosted old-fashioned, it was excellent...

Originally we were going on a Segway tour at 11:30am but now it got bumped to 3pm so we walked through Millennium Park and found "The Bean".
I don't know what the sculpture's actual name is but it looks like a big metal bean. Its cool, you should go see it.


I was a little nervous of the Segway but it turned out to be really easy, lean forward to go forward, lean back to slow down or go backward. Push the handlebar in the direction you want to go, no problem. Our tour took us through Grant park all the way to the stadium the Bears play in. Totally worth it.

After the Segway tour we literally ran back to the hotel to get ready for our dinner cruise. I don't have any pics of the cruise but it was a very nice dinner with dancing and a little cruising around the bay by Navy Pier. Basically the ship cruised back and forth because there was some chop out in the lake and they didn't want people getting sick. I bet in the summer its very nice to sit on deck with a cocktail.

Saturday we were up early for a pizza making class at the original Pizzeria Uno:


The thing I'd never realized about Uno's pizza is that the cheese is on the bottom... Angie bought a couple pizza pans so we can make our own pizza at home. After class it was back to the hotel for a nap, this was a low-sleep trip.

That afternoon we checked out Navy Pier and rode in the Ferris wheel there.
The white ship to the left of the frame is the Odessey 2 which we'd ridden the night before.

Finally we had dinner with friends at Chicago Cut which was spendy but delicious, worth saving up for.
Sunday we flew home, Medway to Albany and then a long drive home. Monday I was up early to fly to LA, what a week it has been...

Wednesday, October 5, 2016

A little trip by rail

Angie and I celebrated our 15th anniversary the other day. For that we took a trip to Chicago by rail.

We picked up the train in Albany and had a sleeper car overnight to Chi-town. For the two of us the sleeper car was just about double what it would have cost to fly but included 2 meals which mitigates the cost some. It took just about 18 hours since the train was 3 hours late but dropped us off right in downtown Chicago and the parking at the train station was way cheaper than an airport.

The smaller sleeper berths are called a "roomette" which is pretty descriptive:

Imagine a 7 foot square 8 feet high and you get the picture. During the day the upper bunk is raised so the room is actually kind of short but not really so bad. There are two seats facing each other with a small table in between. If you look over Angie's right shoulder (left side of the picture) you might spot the sink which folds down from the wall. Immediately below it is the toilet. Obviously you get friendly when using the bathroom. Generally one of us would step into the hall giving the other some privacy. The bathroom is a blessing, we used the public toilets a couple times, they appear to get cleaned during the long stop in Albany and not again until Chicago, in the morning they were pretty ripe...


We brought the wrong bag on this trip, you can see it takes up a good portion of the room. I did eventually get it stuffed into the little cubby for it above the door but it took some effort. Two small bags would have been a much better choice.
The seats were relatively comfortable and at night folded down into a bed, above another bed descends. Don't think you're going to sleep two people in one bed, these are cots with just enough space for one. We found the upper bunk to have a much firmer mattress than the lower and about halfway through the night we switched places. I kind of liked the upper and Angie preferred the lower so it was nice we had two options. Eye masks and earplugs are probably a good idea if you're the sort who has difficulty sleeping.

Two meals were included with our trip, neither was anything to write home about but both were adequate. I had beef short rib for dinner, Angie had pad thai. With a list price for dinner somewhere around $40 I'd have been upset if I'd had to pay for it but it wasn't bad for being included. For breakfast I had french toast, Angie had an omelet, I think I got the better of the two choices. The coffee was surprisingly good and plentiful. There was also juice and water available in our car most all the time and coffee in the morning.

This is the shower, yes a shower in the train. It wasn't bad, small of course, but the water was hot and the soap and towels were pretty nice. I liked that we had the option.

So overall I was pleased, this is something I would do again. I'd bring more snacks and beverages though and some small speakers for my tablet, we watched a couple movies as we traveled but the train is fairly noisy and one of the movies was kind of quiet. The train has wifi which is surprisingly adequate, you're not going to watch YouTube but for the occasional email or article or checking Facebook it was fine.

Friday, September 9, 2016

More lanterns making electricity

Experiment 3 started with me cutting out a plate the same size as the top of a 228E vent. I attached the peltier and heat sink to it and fired the lantern up.

Early results were very good, 1.7v soon after light up. I think the thin steel plate heated up faster, I also got a better coating of heat sink compound on the peltier and on the heat sink.


Unfortunately as the rig got thoroughly heated up voltage dropped to .5, my little heat sink can't shed heat fast enough to keep up with the lantern.


I tried stacking a heat sink on top of the existing heat sink which seemed like it was working at first but in the end just added thermal mass, once the add on heat sink was heat soaked it dropped back to the same .5v I was seeing with just one heat sink.

So I've managed to get the hot side plenty hot, I've got a USB booster that will take anything over .9v and boost it to charge a USB device, the 1.7v I had when I first lit the lantern is plenty, I'll probably need more current but I can get that with a couple peltiers in parallel. What I need now is to keep the cold side temp such that the voltage stays up.

More experiments to come!

Thursday, September 8, 2016

New project

Back in the saddle again...

As if I needed any more projects I've started work on something new. I saw some videos on YouTube of people using peltier devices to charge cell phones. This got me thinking that a Coleman lantern makes a ton of extra heat so why not put that heat to good use.


This is a peltier device, if you put electricity across the two wires it'll make a cold side and a hot side, so it transfers heat from one side to the other. If you work it the other way around, that is apply heat to one side and cool the other it will produce electricity.

Which leads us to:

A Coleman 228E with a peltier strapped to the vent. The outer vent edge shown gets to about 150F. In testing the outside of the heatsink was getting to around 100F. With that temperature difference (delta) the peltier was making around 1/4 volt. Thats proof of concept but not really enough power to do anything...


Experiment two got us more heat, the top of the vent is more like 250F, the ends of the heatsink were now reading more like 120F and you can see in the picture we got around .85v. This is a semi-useful result, I could run several peltiers in series to get a useful voltage but its still disappointingly low. I sprinkled some water on the heatsink and got 1.9v which is a very good result.

This tells me the issue is insufficient temperature delta, the hot side is plenty hot but the cold side isn't cold enough. The heatsink I was using is really small, I've got another much larger one from an old computer case to try next but before I go there I need to make a better system for mounting the peltier and heatsink. Lantern vents are rounded at the top, I really need a flat surface 40mm wide to mount on. I'll work on that next...

Wednesday, September 7, 2016

New Years resolutions down the tube

This year's resolution was to write every day. If you go back to my last couple blog posts you can see I was doing a pretty good job. I wrote a lot of stuff I didn't post too. Then March hit and everything ground to a halt. Its hard to explain why but a really crappy winter with no snow didn't help. Whats surprising is that when I'm busier I actually find time to get more done, when times are slow I get lazy...
In April we had a layoff at work and a couple close coworkers got the axe. That effected me more than I like to admit and made me even lazier.

So anyway its been mostly a summer off, here's something to get us back into the swing:

Angie's 2005 Volkswagen Golf has ugly front fenders, the driver's side especially. It looks like somebody backed into it just forward of the driver's door which caused the lip above the wheel to pooch out. I bought a pair of used fenders from a junkyard that were supposed to be A0 condition. A means good and 0 is supposed to mean zero defects. When I got them I found this:


Of course its the driver's side thats in worse shape.
First I removed the rust:


The bucket is full of citric acid, this is a trick I learned from lanterns and is the same system I used last year on the Dietz wick lantern. It took a couple days before they were completely rust free. Fortunately there was only rust in that corner, it'd have been annoying to build a tub to soak the whole fender.

I welded a patch over the hole which is hidden by the firewall anyway, then I fiberglassed over the whole thing. The fiberglass smooths everything out and covers the weld which is likely to rust otherwise.

Two cans of color match paint came from Paintscratch.com, I like their spray nozzles but one of the two cans was considerably better than the other. Unfortunately I used that can first. I had to paint the welded section a couple times because I didn't do a good enough job getting the patch perfectly smooth first. I should have scrapped the paint down on the whole fender, then primed and painted but I was trying to go quick and as usual ended up wasting a bunch of time and paint.

You can see the primer on the effected corner. I've already put color on the whole fender which is why it looks dull.
As of today I've got color and clear coat on the whole thing. The clear coat is terrible, it orange peeled like crazy, was very hard to get a solid coat down, like the paint was too thick in the can. I need another can of color but I'm going to try my local Fischer Autoparts and see if they can do better...

Wednesday, April 6, 2016

The grand torch finale!


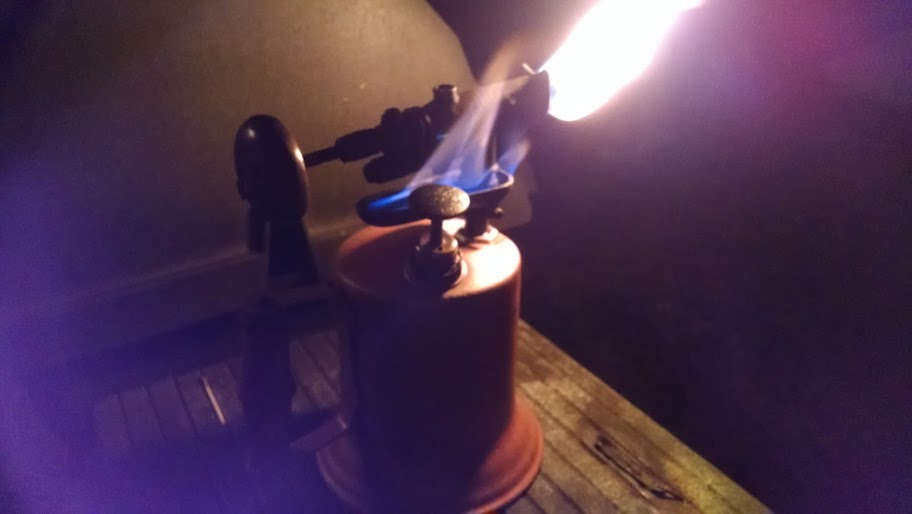
The much anticipated light-up. Torch burns good and holds pressure half an hour or more. Now that I'm able to put full pressure in it really roars! It feels really good to have made a substantial repair and gotten something working. On to the next challenge, and its a doozy.

Monday, April 4, 2016

More torch fun.

Last I told you about the torch I had it working but I was concerned about the seal at the pump. It turns out the seal was not actually the issue, there was a tiny hole in the bung that the pump screws into.

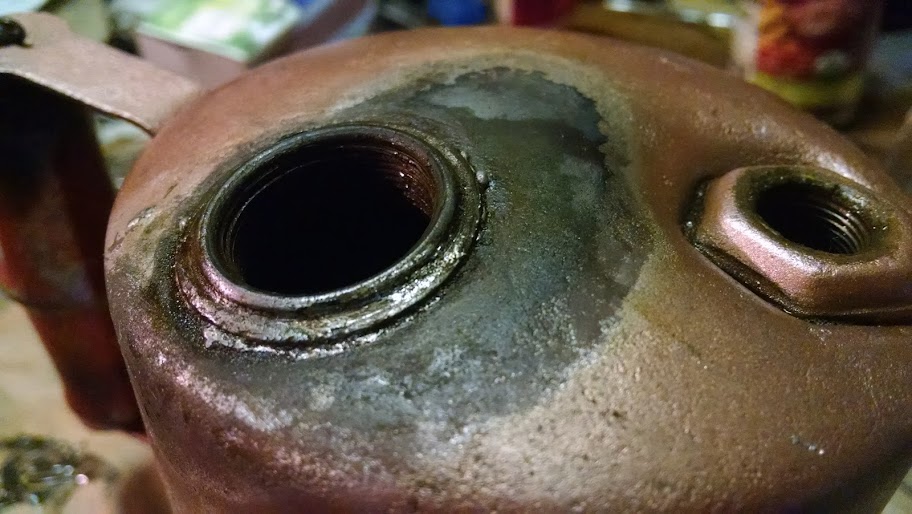
A great deal of time later and I managed to solder the hole closed


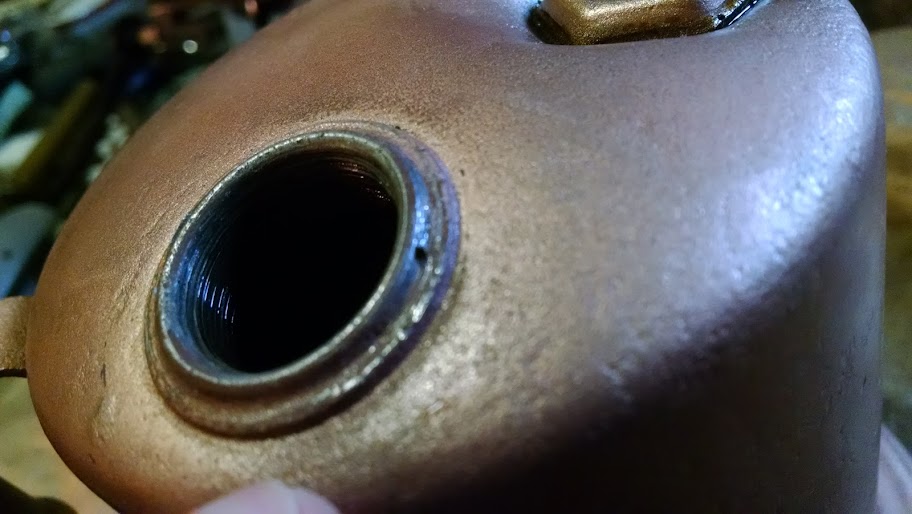
I think the hole is supposed to be there, I think its an explosion preventer, the torch gets hot and the lead in the hole melts allowing pressure to release without the torch exploding. There'd be quite a fireball but it wouldn't explode... I think this because I found at least 3 more little holes around that rim, it seems unlikely that many rust holes developed. Now with that fixed I still had a leak but I already knew about this one.


It was easy to fix too, a dab of lock-tite sealed it up tight. I pumped it up Tuesday and left home on a work trip, Friday when I got home it still held pressure.

The other odd thing I encountered was a tendency for the packing nut to back off. Thats the nut around the valve shaft. Its got a graphite seal inside and when I first got the torch it was stuck. I heated it with a torch and got it loose but it would tend to unthread when I opened the valve. Another very small drop of locktite fixed that too.

Now if only the weather would cooperate I'd give it a test firing...

Friday, March 25, 2016

We won!

Remember this? 


It was an entry into the ID Parts Cold Start contest and it won! We got the award for "Most Creative Video" which is what I was going for. Its certainly not a Spielberg movie but I'm pretty happy with it. Of course watching it now I can see all kinds of things we could do to improve it, the first scene could use some help and Angie needed a little more coaching for her start but we did okay for basically no preparation and maybe 3 hours total of production.

So heres something else I made, this was just over a month ago:


Generally speaking I don't like vlog videos so I've tried to keep this one short and optimistic...

Wednesday, March 23, 2016

It works!

Sorry this blog has been slow in coming, life and all...

Anyway, I finally found time to get the Turner Torch back together. The new paint came out pretty good if not outstanding, as the torch gets banged around it'll look more original. I assembled it and found a little leak around the torch head where it goes into the fount. A drop of blue Locktite cured that. I couldn't get the pump shaft to seal so I dug out the old to replace with an o-ring, in doing so I realized the old seal was leather.


If I'd realized that earlier I would have just treated it with neats-foot oil but since I already had it half dug out I figured I'd just finish the job. The o-ring seals okay but could be better. I think if I sand it down so its got a square edge against the found it'll seal better.

Finally a dose of alcohol into the tray, wait while it heats and crack the valve. Actually for the first attempt I double dosed the tray to make sure everything was plenty hot. This picture is from my second light up and you can see its not really hot enough yet.


After a couple minutes it settled down and burned nicely but suffered from the twin issues of needing to be pumped up often and having a poorly working pump. The pump is improving with use, it gets a lot of exercise trying to keep the torch going. I'll need to work on the cap seal more before going much further...

Sunday, March 6, 2016

Golf brakes

Our '05 Golf has had sticky brakes for far longer than I should have left it so yesterday I finally got off my duff and fixed 'em. I'd planned on calipers, rotors and pads, a sticky caliper will quickly ruin a set of pads which ruins the rotor. Replacing one caliper will generally make the car pull under braking so its best to do them all at once.

IDParts had brand new calipers for only a bit more than re-manufactured so I went with those since it'll allow me to clean up the old ones and keep them as spares.

Everything was going fine until:

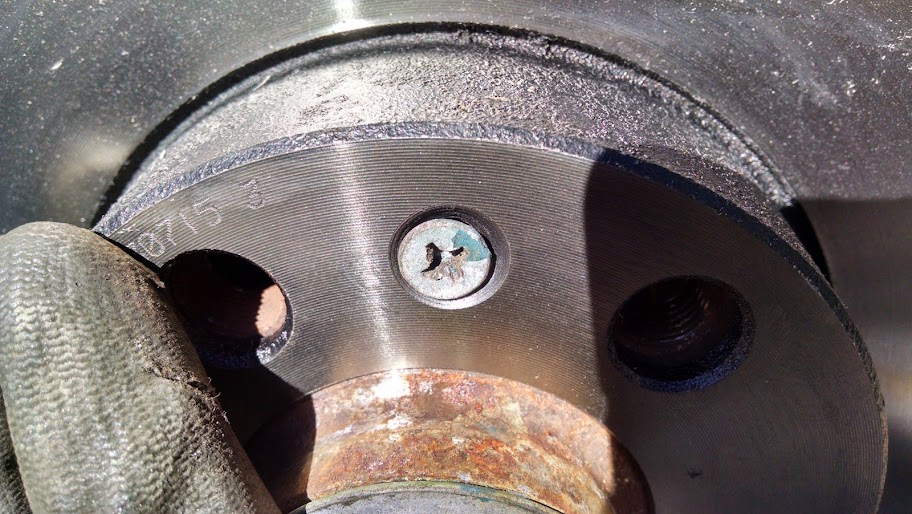
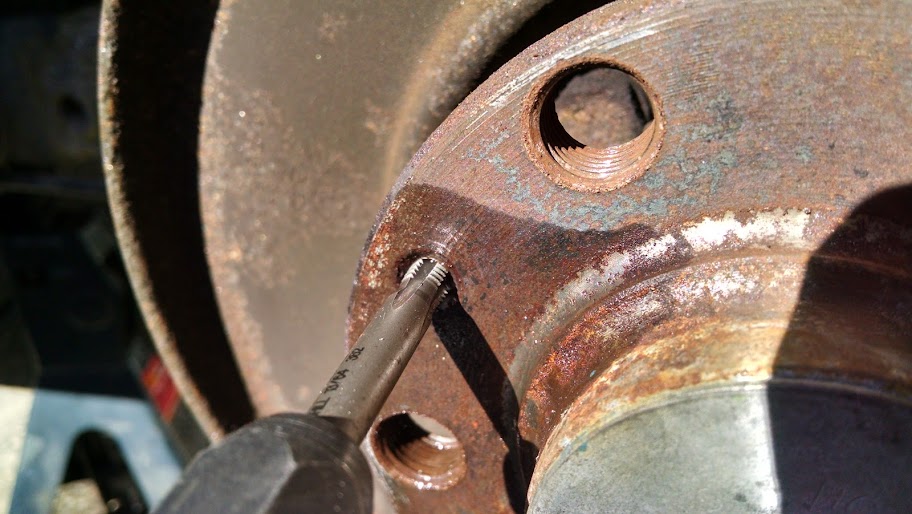
Its difficult to see in the picture but that screw isn't seated all the way. Thats the screw that holds the rotor to the hub. Really its not all that important, the hub and rotor are clamped together by the lug bolts when the wheel is installed, all the screw does is align things when the wheels are off, still it bugged me.


To fix it I used a tap to clean the hole in the hub,


and a die to clean the screw. With them cleaned up the screw seated nicely.


This is actually the heart of the whole problem, this is the caliper mount from the driver's side. Notice the two "bolts" at the top, those are actually caliper slide pins. Notice how the right side is compressed and the left isn't. The pins should slide freely (hence the name "slides") but that right side doesn't. I beat on it with a hammer, cranked it around with a wrench lubed it with Kroil and finally resorted to heat. The heat got it moving and I was finally able to pull the pin, clean out the nasty old grease and add some fresh. Now it moves in and out freely.

 The pin itself

The Golf has floating calipers which means that the two brake pads are actuated by one piston, this is possible because the whole caliper moves to pull on the outside pad. Because of this stuck slide pin the brakes couldn't retract and the inside pad never got released from the rotor. I'd thought this was happening because the parking brake actuator was stuck but you can't really judge with the caliper still on the car...

Anyway with all that work done theres no more squeaking from the dragging pad, performance is much improved and it appears that fuel economy has risen also although that will take some time to really judge.

Now the only mechanical thing wrong with the car is the driver's side power lock actuator seems to be hung up, this is a fairly minor complaint that I'll dig into once it warms up some.

Sunday, February 28, 2016

More diferenter

I've been bad at updating here, I realize I've made a couple things you haven't been notified about.
One of the parts suppliers I use has a yearly cold start contest. If you're not into diesel cars you need to realize that a diesel engine runs only on the heat of compression, if you can't get the engine warm it won't run. When its really cold out that can be an issue. So lots of YouTube space is devoted to cold start videos.
Its been really warm this winter and I was worried were weren't ever going to get any cold to make our cold start video but a sudden cold stap came along. There's price money on the line so on Valentines day we busted out the camera and made a video:


I dunno if having a ton of views and positive comments will make this video win the contest but it sure would make me feel good. :)

I need to find more video making challenges, it can be hard to come up with inspiration for what to make, its a lot easier when theres a challenge. Anyway with one cold start video down I'm already thinking about what next year's

Tuesday, February 16, 2016

Oh Google...

Today Google announced its going to end Picasa starting in May. I've been using Picasa for a couple months now because Google Photos won't give me a clear link to my pictures thats suitable for using in this blog. I wrote about it back in December and the problem still exists for the same reason.

So what Google is going to do is make Google Photos effectively useless to me. If that goes down the way it looks like its going to I'll probably go back to Photobucket. I left them because their website is insanely slow... I should ask around and find if going the paid route with PB is faster than their free system. If thats true it might actually be worth it.

More on the torch

Weird weather here in north central MA, Saturday night it was -19F, today (Tuesday) it got overy 50F.

Anyway to capitalize on the warm weather I figured I'd paint the torch. The plan was to shoot one coat of etching primer to get a good base, then a coat of high build to fill the pits and finally a couple color coats. In the end I shot one coat of etching primer and one of color.

Thats the primer, heres the color coat:


I'm pleased with the color, there are a lot of imperfections in the surface of the torch but I'm going to weather the color coat down substantially anyway so I don't think it'll really matter. I'm weathering it because theres no good way to keep the torch head clean on a user torch. Since its going to get used I want to make it look like a user.
So once the paint is fully dry in a couple days I'll take a piece of wood and work over my new beautiful paint until it looks like its been in use for 50 years. Finally in a couple weeks when the paint is fully cured (and we get another warm day) I'll hit it with some clear coat to lock everything in place and prevent future rust.

Also I got in the mail today a piece of a mop which will replace the piece of wick I had to ruin to get the torch head out of the body. Sent to me gratis which I thought was pretty nice.

Tuesday, February 9, 2016

Something different

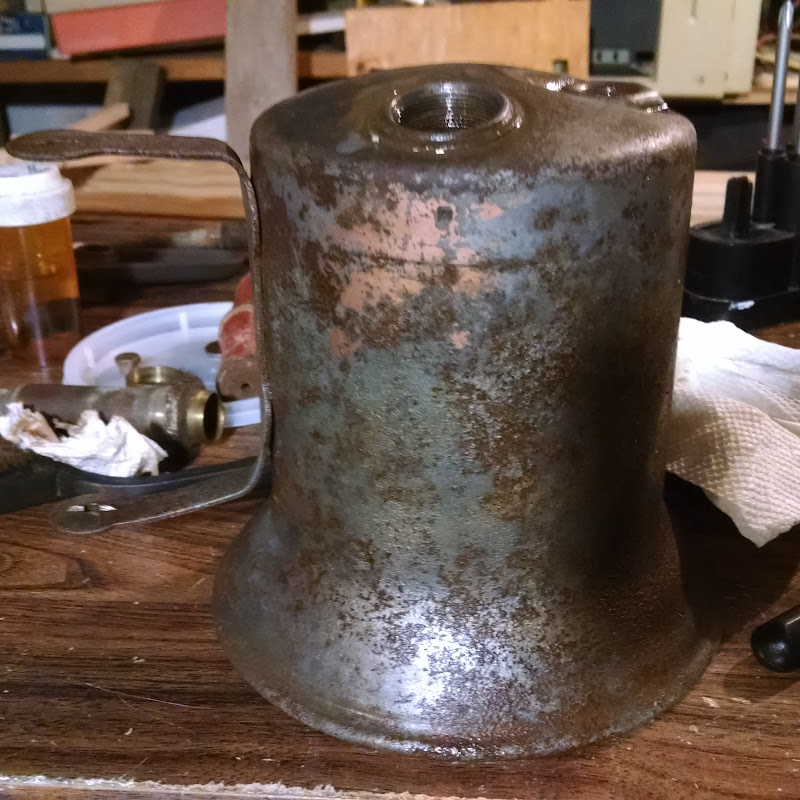
My folks came for a visit right after Christmas. We took a ride around and it turns out the antique shops of Fitzwilliam were having a thing. We hit a couple places and I snagged this:


I didn't pay much, less than $20 certainly though I don't remember the exact price.
The valve was stuck and the pump leather dried. I had some fun messing with the old ladies in the shop when they asked "Do you think it could run again?" I replied "It WILL run again." which they really didn't understand.

Theres no makers mark anywhere on the torch itself but after I soaked the pump handle in citric acid and scrubbed on it with a wire brush a little some markings started to appear.


Its difficult to see in the picture but frankly it was difficult to see in person too. I soaked it some more and scrubbed some more until finally.


I had trouble getting the camera to focus this close in, it says:
The Turner
Brass Works
Trade Mark
Sycamore, Ill
The thing in the middle is a gymnast on his hands with his feet over his head.
After more searching I found "150" on the burner. So I think this is a Turner 150 torch. I think is a fairly late model, the tank is steel which had been painted a copper color, you can see just a trace of the copper remaining


The handle mounting is pretty primitive as is the handle itself. The "screws" that hold the handle are actually fluted nails. The burner is fairly substantial and a design Turner used on many torches.

My plan right now is to de-rust the tank and spray some high build primer on it to fill the pits. Then I'll hit it with copper paint and weather that back to match the condition of the handle which I don't intend to paint. Finally I'll clear coat the whole thing to prevent future rusting.

I've debated back and forth about restoring the whole thing but the pump assembly been chewed pretty badly where somebody used pliers instead of a wrench to remove it. I could never clean that up enough to make it look new so instead I'll clean and get rid of the rust and take it back to "used" condition.

Friday, January 22, 2016

Car fixin

You never really think about your ability to set the fan in the car at different speeds until all of a sudden you can't...

Angie has been driving our 2005 VW Golf and thus it wasn't for some time that I noticed the fan only worked on the high position. She doesn't complain much and since she had a work around she took it. Winter is an especially annoying time to have the fan not work at low speed since a warm car will tend to fog the windshield so I knew this had to be fixed.

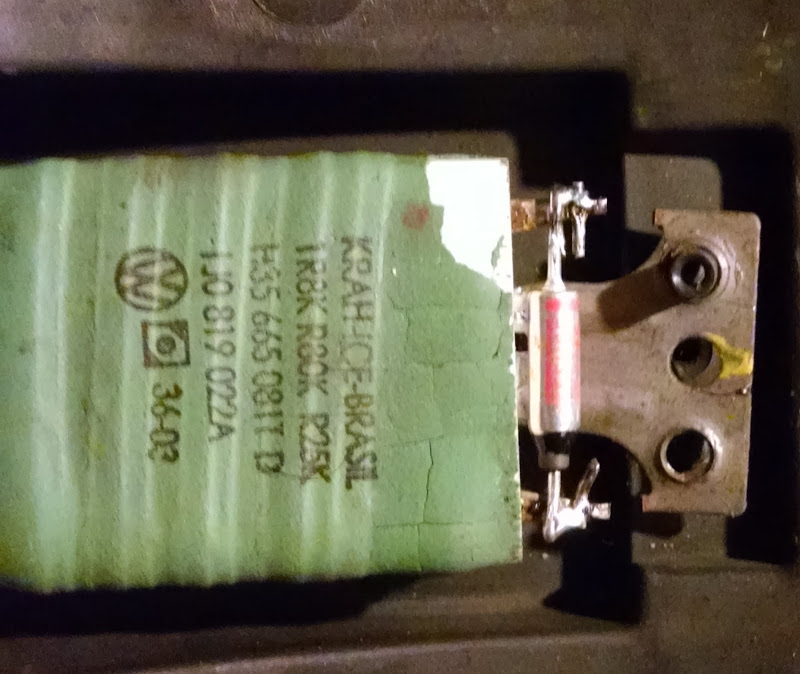
The problem turns out to be a common one caused by a failed thermal switch:

 That's the little blue headed pointy thing in the picture. The big green part is the resistor pack that actually runs the fan at lower speed. The thermal switch is there to keep the resistor pack from burning up if too much power is requested.

So I could just replace the thermal switch but that doesn't address the root cause of the problem which is a sticky fan. The 4th generation Golf and Jetta have a tendency to get some water in the fan which gums up the motor, the gummy motor draws more power and pops the thermal switch. So I popped out the fan, cleaned its bearings (well, bushings actually) good with carb cleaner and dripped a variety of lubricating substances in. I saw a YouTube video where the guy used WD40 but WD is "water displacing" its not really a lubricant. I started with Marvel Mystery oil lubricating formula and moved on to PB Blaster in an effort to find something that would make its way into the bushing. Then I reinstalled the fan and replaced the thermal switch.


I was a little nervous about soldering the new switch in, it is a thermal switch after all but I limited myself to just quick touches with the soldering iron and I'd bought a 5 pack of the switches from Amazon so I knew if my soldering didn't work out I could always resort to crimping on another one.

Fortunately I seem to have done a good enough job, the fan has been working correctly for a couple weeks now.

Of course I could have replaced the whole resistor pack, IDParts has them for $35 but for $1 and a couple minutes with a soldering iron I'm well pleased with this fix. If this happens again I'll probably replace the fan, its difficult to get oil in to the bushings on the old fan, although maybe if I used a needle oiler...

Friday, January 8, 2016

Lamp oil

With the onset of winter I always try to be prepared should we have a big power outage like back in '08. That time we were without power for a day and a half which was quite bearable with minimum supplies but if it'd have lasted much longer we wouldn't have been so well off. These days I keep more supplies around just in case. One of those supplies is kerosene, the other is lamp oil.
I use lamp oil because kerosene by itself smells pretty bad, even in the Aladdin lamps that are designed to burn it. This is especially noticeable in the summer time, when its warm the lamps will off gas a little and can really stink up the room. To fix that issue in the summer I drain the kerosene out and put just a bit of lamp oil in.
Lamp oil is derived somehow from wax, when you put out a lamp burning lamp oil it smells like you're melting crayons. The problem with anything made from wax is that it has a relatively high temperature at which it'll turn solid, its waxing temp if you will. So to get around that I've been mixing some kero with my lamp oil. This also helps to control costs, the lamp oil is SUPER expensive, like $5 a quart. Kerosene at the hardware store is expensive too but at $10/gallon its about half the price of lamp oil. I can get Jet A at a local airport for $4/gallon, Jet A is basically very low sulfur kerosene, it burns well with low odor on its own. I haven't Jet A in an Aladdin lamp yet but I've burned a lot in Colman and Tilley lamps and friends assure me its good in wick lamps too. Using Jet A my cost comes way down and I think I can reduce the percentage of lamp oil since the Jet A doesn't smell too bad anyway.


Anyway on a recent evening I picked up a new bottle of lamp oil, its the big one on the right in the picture. The little bottle in the middle is full of a 50:50 mixture of lamp oil and kerosene, the kero came from the bottle on the left which you can now see is marked "Jet". I refilled the kero bottle with Jet A because its easier to pour out of than a bigger jug. The big bottle has about 30 percent kero and 70 percent lamp oil.


I took this picture this morning, the temps were hovering just about freezing although the interior of the garage hadn't really warmed up yet. You can see the large bottle with the 30:70 mix has turned solid, its real hard, like ice. The smaller bottle is still liquid, no sign of gelling or waxing at all.

So the extra percentage of kero in the smaller bottle is clearly doing its job.

Here's the result:


Burning well, basically no scent. There was a little smell when I first lit the lamp but once it warmed up all the way the smell was gone. I've had it burning for about four hours now and its steady as a rock.