Monday, August 17, 2015

Wickie time!

 So in the interminable delay between posts I've kept working on the wickie. It took maybe 4 days in the citric acid before all the rust came off the main part of the lantern although the smaller assemblies were done in a day or two. I think I was right in my estimation that this sat somewhere that it got dripped on, the horizontal (or nearly horizontal) surfaces on it were the worst. In the end I could just scrub the rust off with a steel brush.

Since the rust was pretty gross I bought some "Rustoleum Rusty Metal Primer" which is supposed to give a really good adhesion and rust prevention. I found that it was dammed hard to get a good coating of the stuff on the vertical surfaces without it running. I sanded off runs 3 or 4 times. Worse the runs would take forever to dry although sunlight really seemed to help in that regard. I did finally get it on good after spraying a couple super thin coats that I then had to blend carefully together. I finished it with a coat of filler primer to fill in any sanding scratches I might have not seen.


For paint I went with Krylon Hunter Green which is the same color I used for my Coleman 237. I feel like it matches the older Coleman green nicely. Its also very nice paint to work with, it comes out in a much thinner spray than Rustoleum.


Sadly after getting the lantern covered I ran out of Krylon and was completely unable to find any locally. It appears that Rustoleum has absolutely cornered the market for spray bombs. Other than a couple cheap no-name paints and some specialized tractor paints thats all I could find anywhere. Fortunately Amazon saves the day. They had the right stuff which should arrive at the end of the week.

On a side note I'm DONE with Photobucket. Their app is slow, and the webpage is pitifully/painfully slow. Today I wanted to crop the images above and even after hitting reload 4 times the image editor just wouldn't open my image. In the time it took for Photobucket to not work I uploaded 9 images to Google Images, cropped those two and figured out how to post them. Its not perfect but it'll do...

Thursday, August 6, 2015

A what now?

I'd said for a long time that I had no real interest in wick lanterns. Well at camp we've got an old hot blast lantern that came with the place and last fall I spent a bunch of time playing with it. While it doesn't throw much light it doesn't use a whole bunch of fuel and doesn't make any noise. We used it for a nightlight for which it worked out perfect.

A hot blast lantern uses the hot exhaust gases to feed back into the burner where any left over fuel in the hot gasses gets burned. This process costs a little brightness but reduces fuel use. The alternative is a cold blast lantern which uses the heat of the hot combustion gasses to draw cold air into the lantern. The cold air being drawn in has more oxygen in it and is more dense since its colder which allows for a brighter flame although it'll cost some more fuel. Both hot blast and cold blast lanterns fall into the "tubular lantern" category. This confused me at first because I'd seen things like Aladdin lamps which have round wicks in a tube shape. So don't be confused by tubular lanterns which carry the air into the burner in tubes and round wick lanterns which have a round (or tube shaped) wick.

Anyway since I'd had some experience playing with the hot blast at camp got me interested in cold blast lanterns. Before I'd started looking for them I was seeing wick lanterns all over the place, now of course I'm hardly seeing any and the ones I am seeing are really expensive. So I was really happy to see this at a yardsale:


Its a Dietz D-Lite No. 2 made from 1919 to 1947, its got a great big 7/8" wick rated for around 7 candle power (cp). The D-Lite is a short globe lantern which is easier to clean than the tall globe models but it costs some light. The tall globes would get closer to 12cp. For comparison a Coleman 200A is more like 300cp. It had no price tag, I offered $3 and he accepted.

As you can see my lantern is all rusty, it looks like it was sitting under a hole in the barn roof for years and years. Originally the lantern was galvanized and the underside is perfect looking but every inch of the rest of the lantern is covered in rust.


The rust is worst at the top, it gets better toward the bottom of the air tubes and bad again at the flared part on top of the fuel tank. Also the top is dented and the whole top end of the lantern is twisted and leaning slightly.

I put some kero into the tank, trimmed the wick a little and it lit right up. Thats the great thing about these lanterns, theres only a moving parts, wick lifter, the globe lifter and the ring on top so theres really not much that can fail.

So what to do, what to do? I could leave it rusty, after all it works. I could clean the rust off, oil the metal and keep it that way hoping I always keep enough oil on it to prevent rust, or I could clean the rust off and paint it. While this one wasn't originally painted they were sometimes and many other models were and since I paid $3 for the lantern I'm not particularly worried about originality.

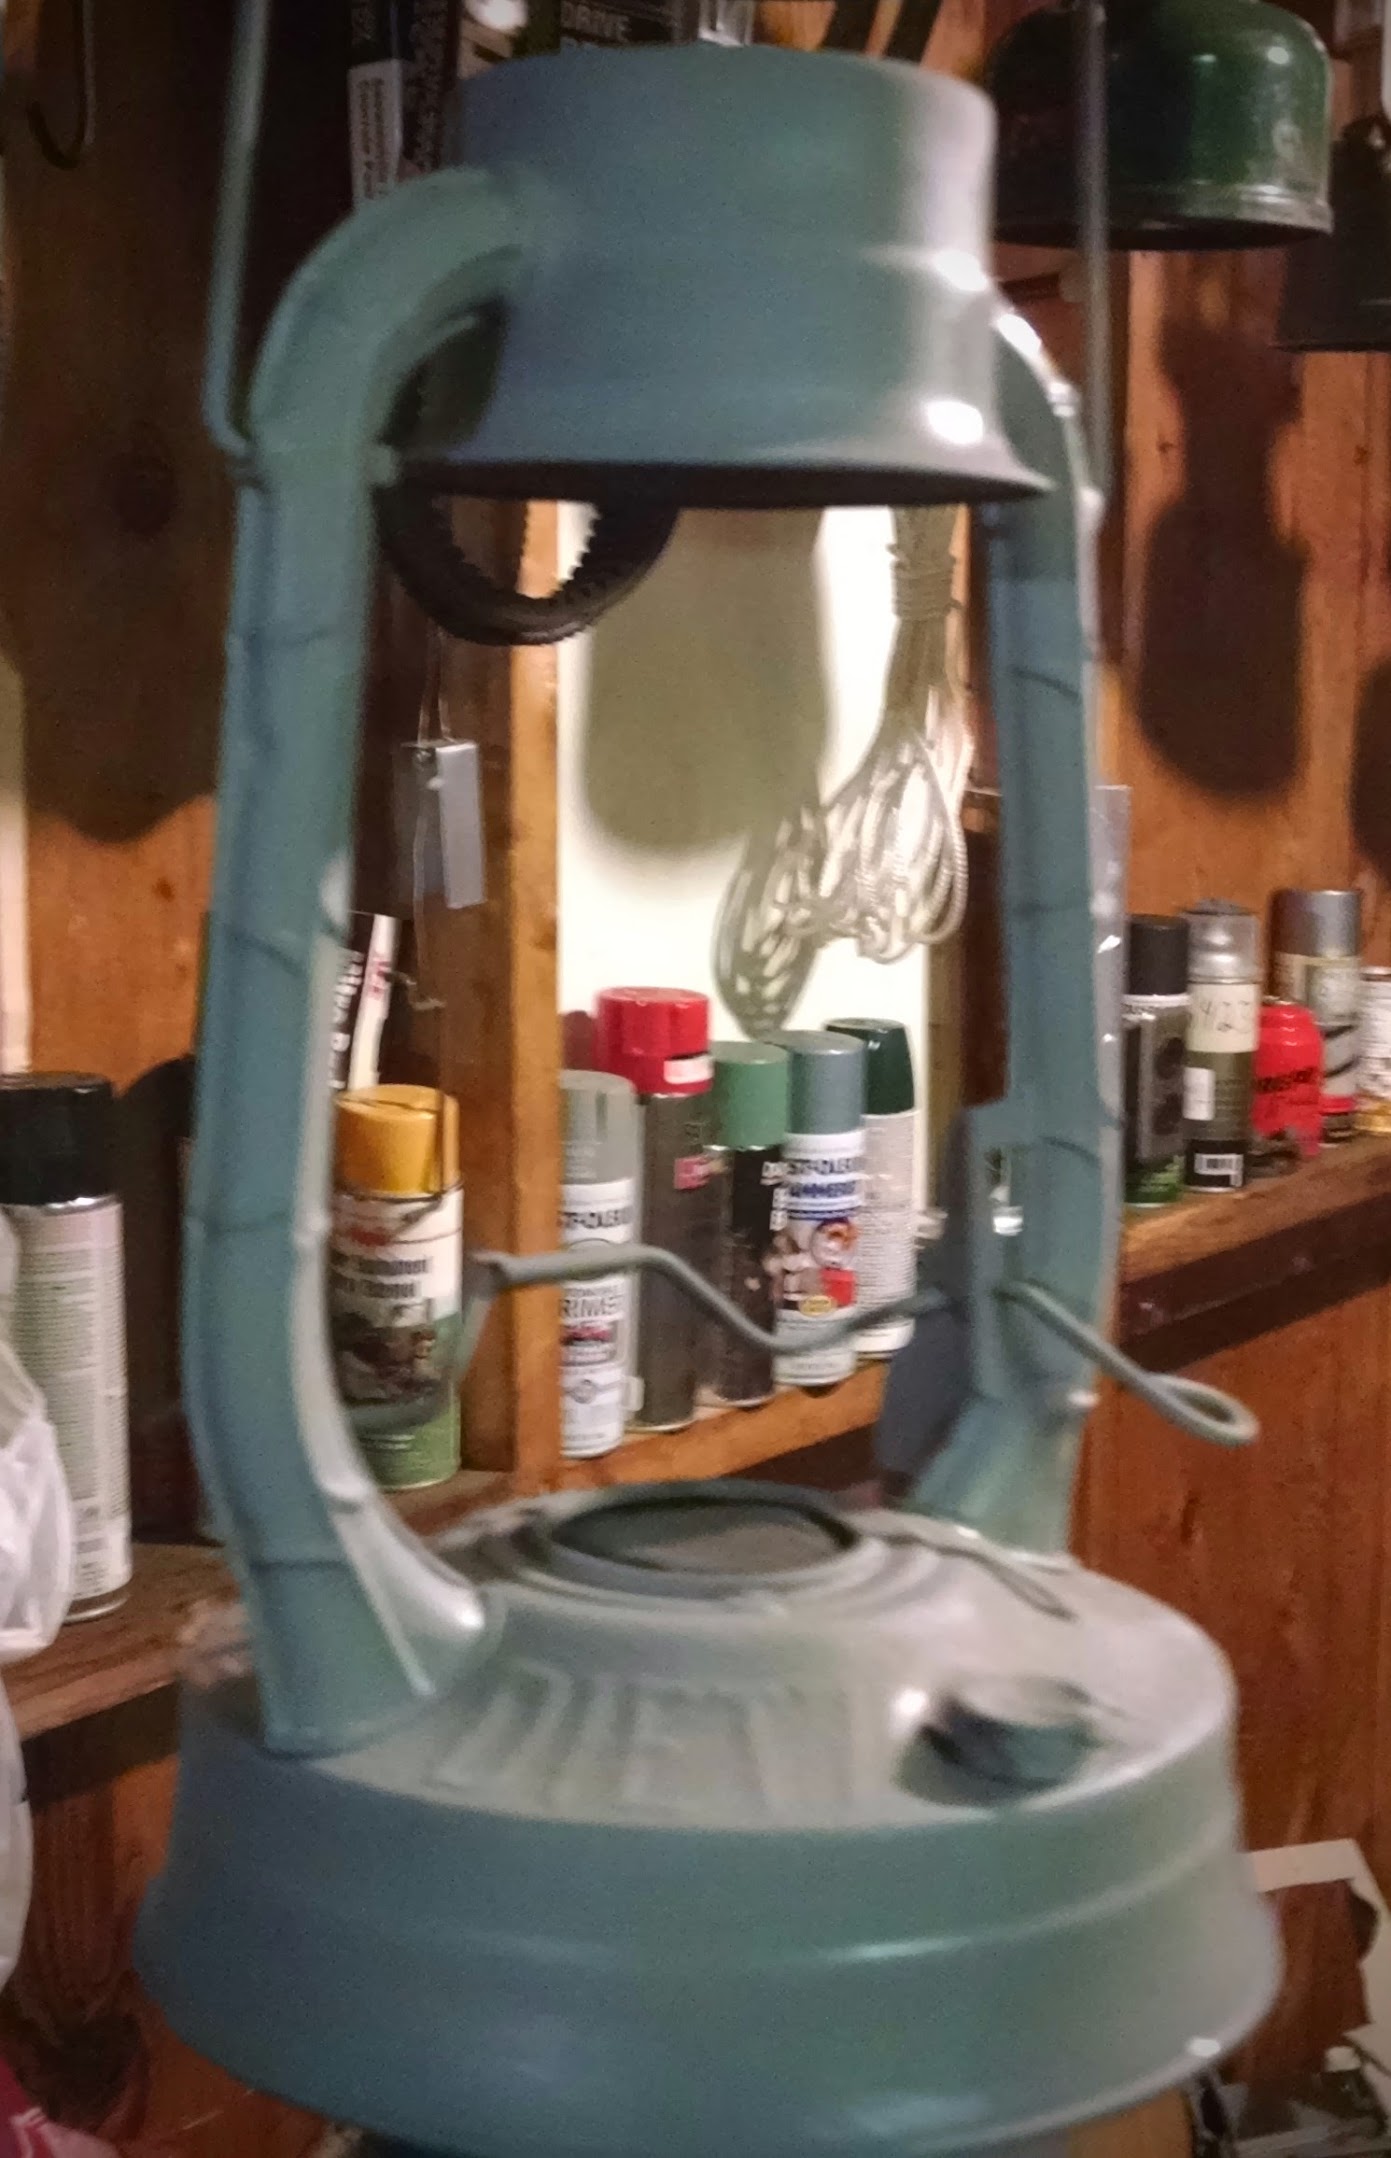
In the end I decided to clean and repaint. How to clean off the rust? I'm going the easy way:


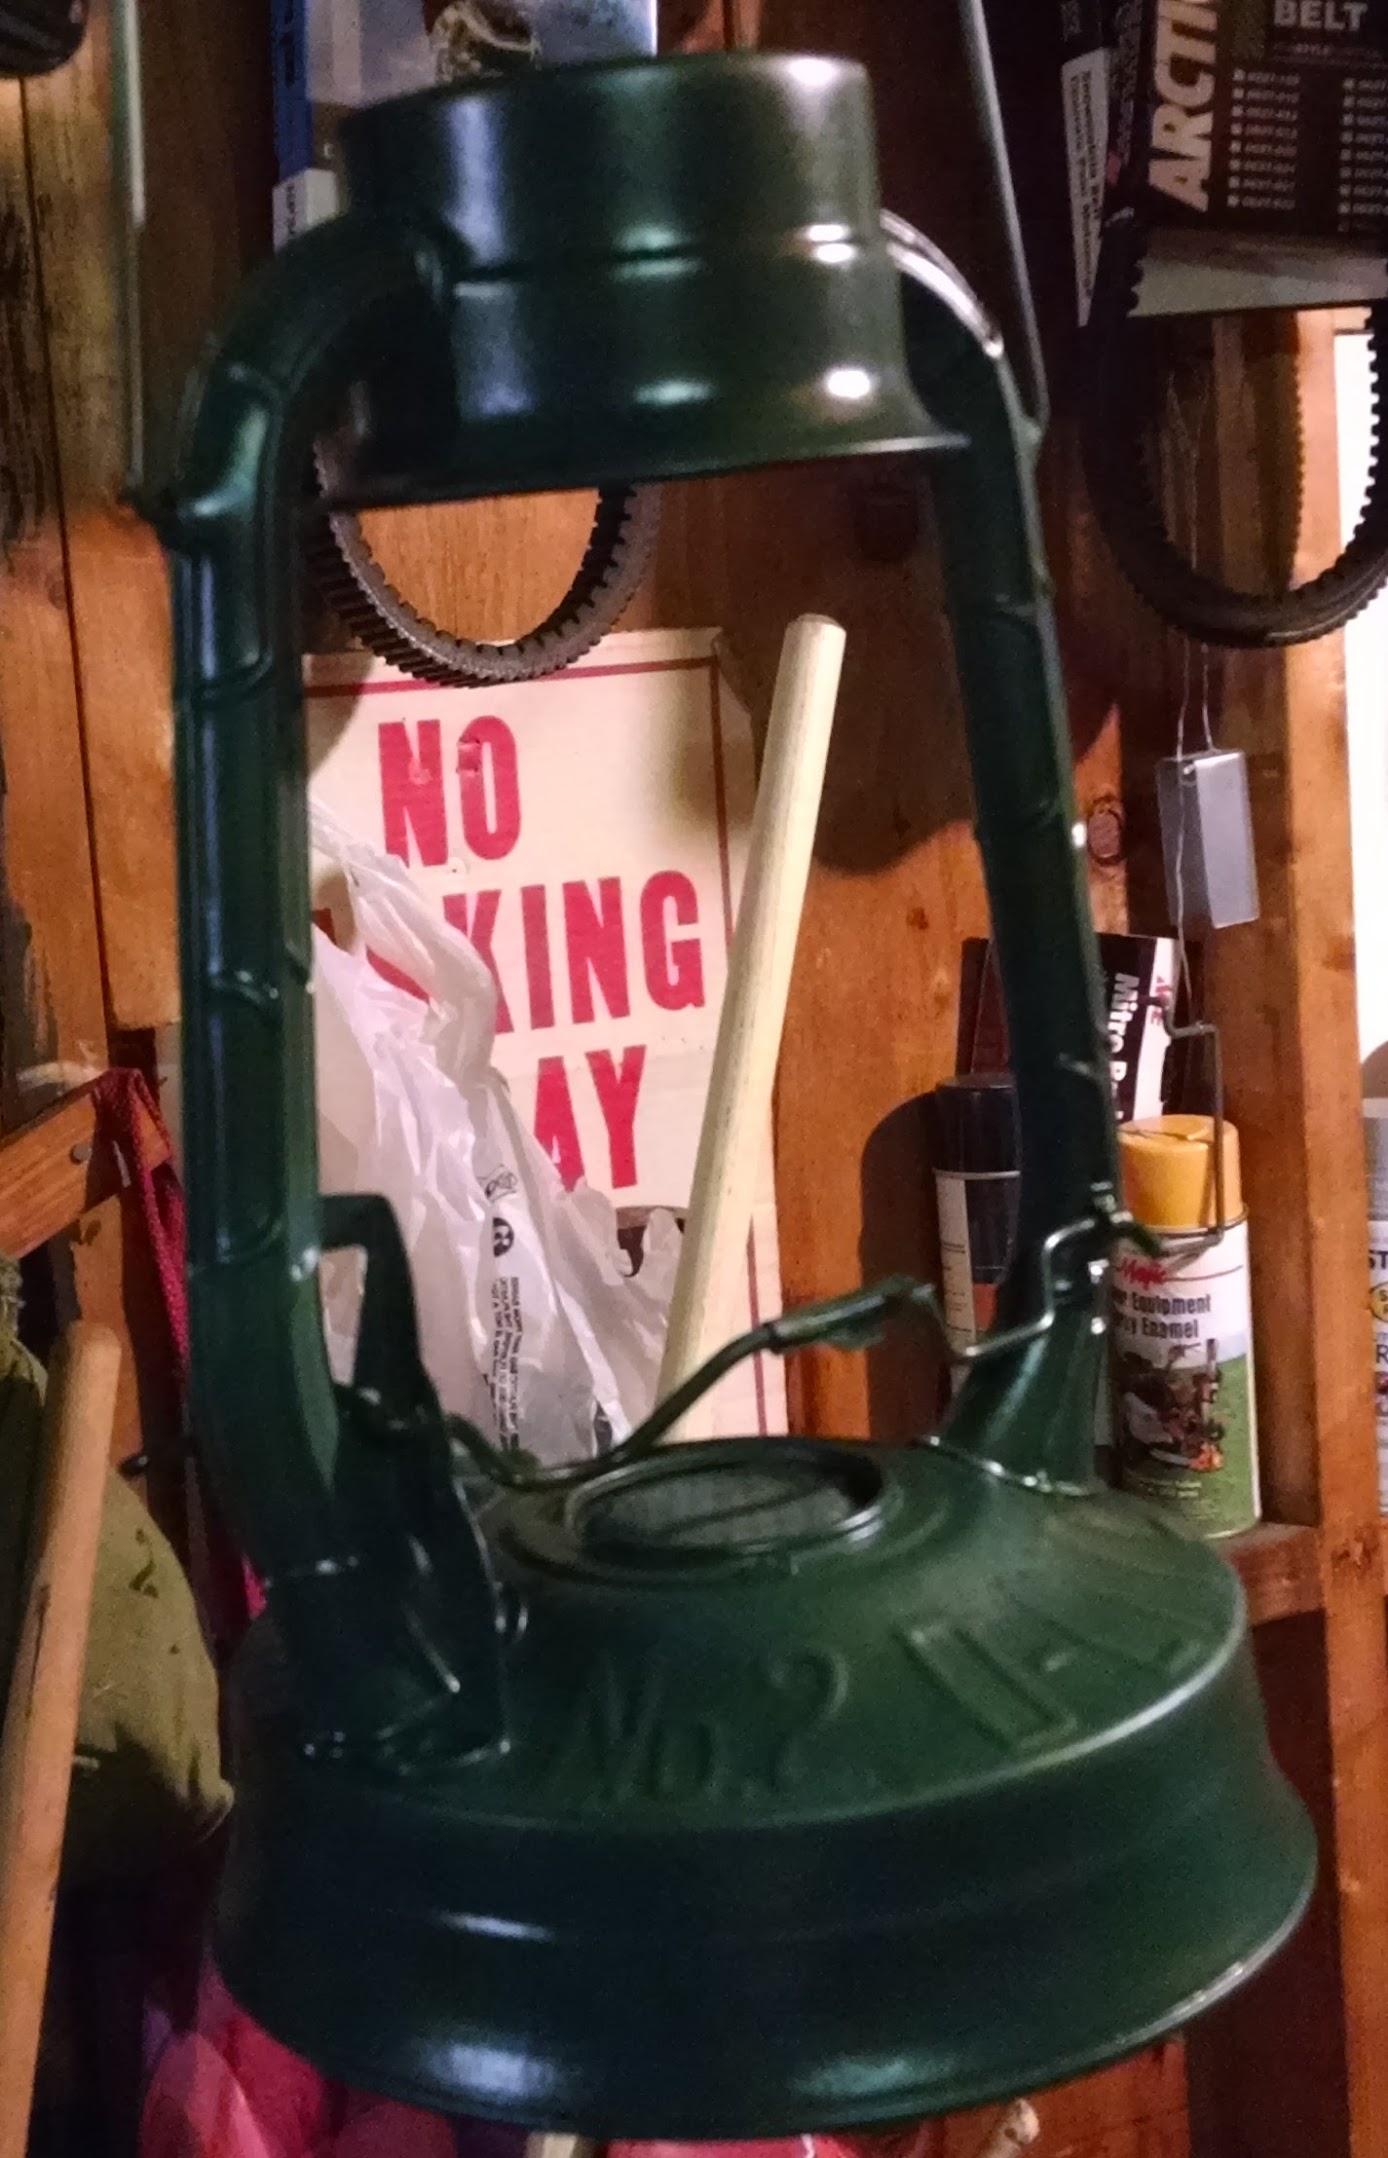
The bucket is full of citric acid, the plastic wrapped brick on top holds the lantern down, I plugged the fuel tank, it was perfectly clean so I didn't want to worry about having citric acid in it. It took 4 days of soaking to get all the rust off but it finally came clean. As of yesterday I got the lantern out of the acid bath, rinsed off, dried and primed. The burner cover and top end pieces I've already painted Coleman green (Krylon Hunter Green). I went a little overboard with the primer on the main lantern body so I'll have to go back and sand off some runs before I can paint. It takes a couple days for the thick primer to harden enough to really do that well.

So green is the color except for the wires that hold the globe in place, I'm going to paint those grey. I'm not going to paint the bail at all, any paint on that would just wear off anyway...

Tuesday, August 4, 2015

621a o-ring fix

One of the big thing lantern people look for is the elusive "birthday lantern" which is one which was made in the same year as you were. I've got 4 of them now, a 200A, 335, 321a and most recently a 621a.
The 621a is interesting because its an Easi-light lantern which uses a schrader valve for the shut off. It also uses an o-ring for the seal around the control valve. While we were at the Coleman convention in Ohio that o-ring failed which resulted in fuel dripping out of the control valve. On a 550 candle power lantern with a great big old mantle that scared me so I poured the fuel out of it and set it aside for the rest of the trip.

Last week I received a set of new o-rings from OldColemanParts.com. Installation was surprisingly easy considering I hadn't been able to find much information on it.

With the top end of the lantern (vent, bail, glass, burner frame, collar) removed:


The nut in the picture comes off which allows the control detent to come off and the shaft to come out:


Which reveals the failed o-ring. Looking at it on the shaft I thought that it didn't look too bad. When I tried to pry it off it broke which proved to me it needed replacing...

Here with the new o-ring:


Reinstallation was super easy, I did have to bend the control detent slightly to get the knob to engage correctly but once it was all back together it lit right up with no leak.


The lantern is SUPER bright, it puts a 237 to shame. I've got a Peerless 24A mantle on mine now, I think it would be brighter with a 111 but I hate to remove a working mantle...

Monday, August 3, 2015

BLARG! An eBay seller to avoid.

You might remember a couple weeks ago when I complained about the NRV pip in one of my Tilley lanterns failing. I think I'd mentioned then that it was the second one which had done it to me, well now I can report a third.


This one was in fact the rubber pip that shuts the lantern off. See how its all swollen with fuel. When new it would just barely protrude from the cup, now it wont allow fuel flow so the lantern won't light. When I tried to pull the pip out of the cup it tore apart, the rubber was just saturated with kerosene. The irritating thing is that the eBay seller I got the pips from denies theres anything wrong with them and now won't even reply to my messages.

Since the seller refuses to make things right I have no problem calling him/her out, so for the record don't buy a Tilley service kit from hootflipflopandfly on eBay, the pips will swell up in the presence of kerosene which is the proper Tilley fuel. The pips are poorly shaped and don't fit particularly well in the  cups anyway. They were made with a cheap cutter and show significant hour glassing which leads me to believe they were homemade even though the seller claims they are "Genuine Tilley". Instead go to Harbor Freight and buy a punch set, then order a sheet of proper Buna-N rubber from McMaster Carr, you'll have enough material to make a lifetime of Tilley pips. I've had my sheet of rubber since 2013 and have used only a small corner of it.